


A tiled shower fails in the same few places every time: at the corners, around the niche, and along the joint where the wall meets the tray. Get the waterproofing and the sequence right and the tiles are the easy part. This guide covers tiling a standard shower enclosure or wet area in a UK home, with the focus on the walls, a recessed niche, and the order you work in. If you are tiling a full open wet room floor with a drain, that is a bigger job with its own rules, so treat this as the wall and niche side of the work.
Why the wet zone has to be tanked
Tiles and grout are not a waterproof layer. Cement grout is water resistant, not impervious, and over months of daily showering water will work through the grout lines and into whatever sits behind the tiles. If that background is ordinary plasterboard, it softens, the adhesive lets go, and you get loose tiles, black mould in the corners, and sometimes damp showing through on the other side of the wall.
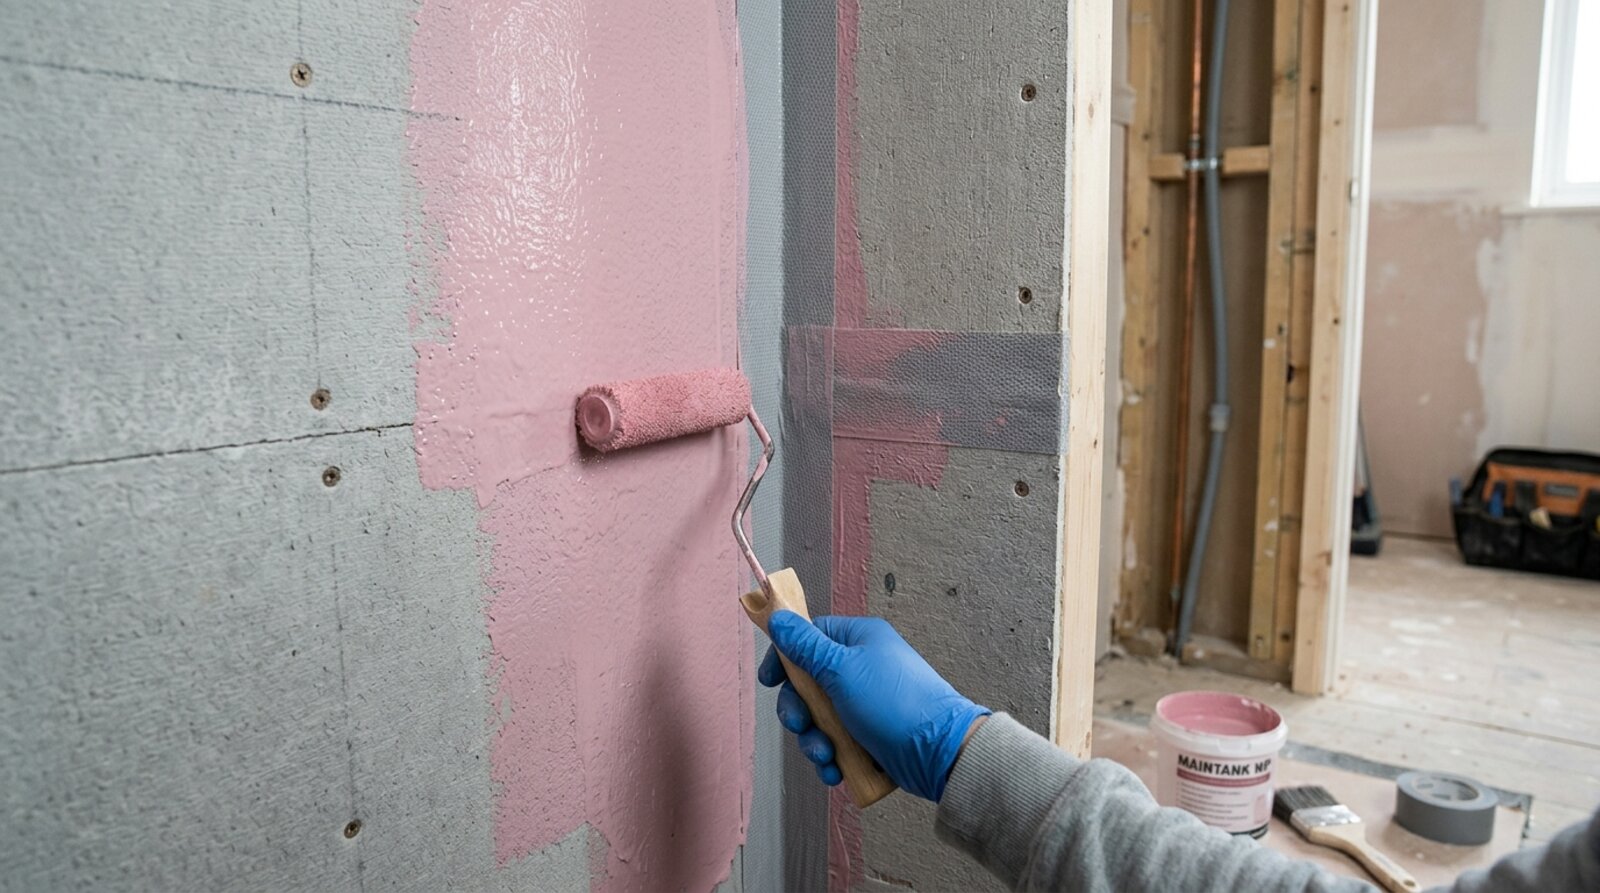
The British Standard for tiling in adverse conditions, BS 5385-4, treats a domestic power shower or wet area as a frequently wetted situation, and it says the basic structure behind the tiles should itself be watertight and tanked, with water-resistant materials used throughout. Good practice now is to waterproof all substrates in a domestic wet area with a proprietary tanking membrane system before tiling, not just commercial installations. In plain terms: the waterproofing is the membrane you apply behind the tiles, and the tiles are the wearing and decorative surface on top of it.
A typical tanking kit contains a primer, waterproofing tape (often a fleece-backed band) for the joints and internal corners, and a liquid membrane you apply in two coats. The order matters. Prime the board so the membrane bonds properly, bed the tape into a first pass of membrane along every internal corner and board joint, then apply two full coats of membrane across the whole wet zone, letting the first go off before the second. Two coats is not optional; it is how you get a continuous film with no thin spots or pinholes.
Getting the background right
The most common DIY mistake is tiling straight onto plasterboard in the splash zone. Standard plasterboard is not a suitable wet-area background on its own. In the shower enclosure, fit a tile backer board over or in place of the plasterboard. Foam-core boards such as those made by Marmox or Wedi have a waterproof XPS core and give you a stable, dimensionally consistent surface that does not move with humidity. Cement-based backer boards work too.
Even with a waterproof-cored board, the boards themselves are not the waterproof layer until the joints and corners are sealed. The board cores resist water, but the screw fixings and the gaps between boards are weak points, so you still tape the joints and tank over the lot. BS 5385 guidance steers you away from tiling directly onto timber-based sheets like plywood in frequently wetted areas because they move as their moisture content changes; if you have a timber background you need an intermediate layer such as a backer board or a reinforced tanking membrane over it.
Fix backer boards with the washers and screws the manufacturer specifies, keep them flat and in plane, and stagger the joints. Once the board is up, fixed and flat, you can prime and tank as described above.
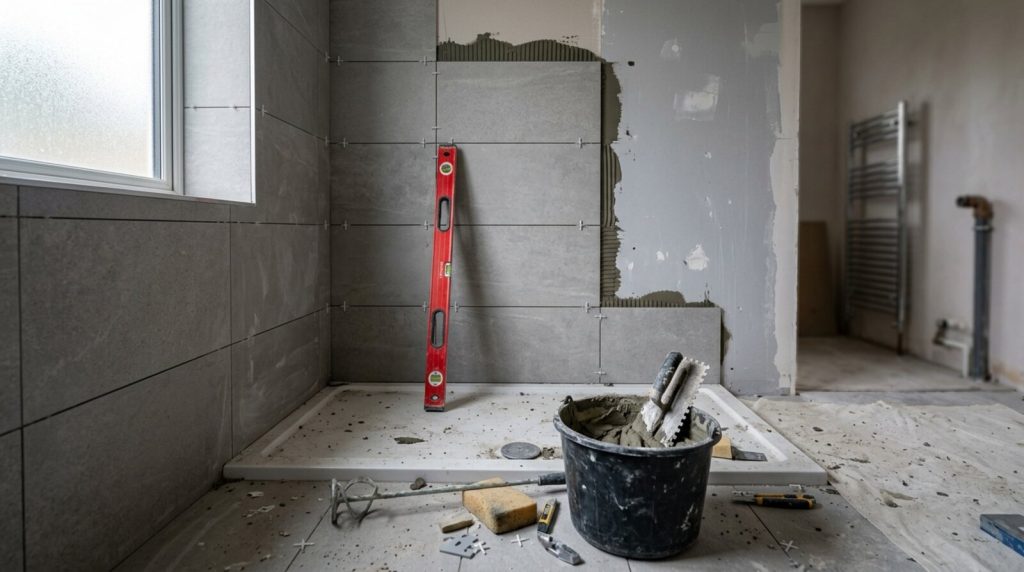
Setting out so the cuts are balanced
Setting out is the bit people skip, and it is what separates a tidy job from an obvious DIY one. Do not start tiling from a corner and hope it works out. Find the centre line of the main wall and dry-lay or measure your tile gauge across it so you can see where the cuts land at each end. You want roughly equal cuts at both ends rather than a full tile at one side and a sliver at the other.
Plan vertically as well. Avoid a thin sliver of tile at the top or at floor level, and try to keep a full or near-full tile at the most visible height, usually just above the tray. Mark a true horizontal line with a spirit level or laser as your starting datum, because shower trays and floors are rarely dead level, and screw a temporary batten to the wall to support the first row so nothing slips while the adhesive sets. Decide where the niche sits during setting out, not afterwards, so its edges line up with grout lines instead of cutting awkwardly through the middle of tiles.
Building and waterproofing a recessed niche
A recessed niche is a shelf for shampoo and soap set into the wall, and it is a classic leak point because it has more internal corners than the flat wall around it. You either cut an opening between the studs and line it, or build a box from backer board and fix it into the opening. Line the back, top, bottom and both sides with backer board so every internal face is a tileable, water-resisting surface.
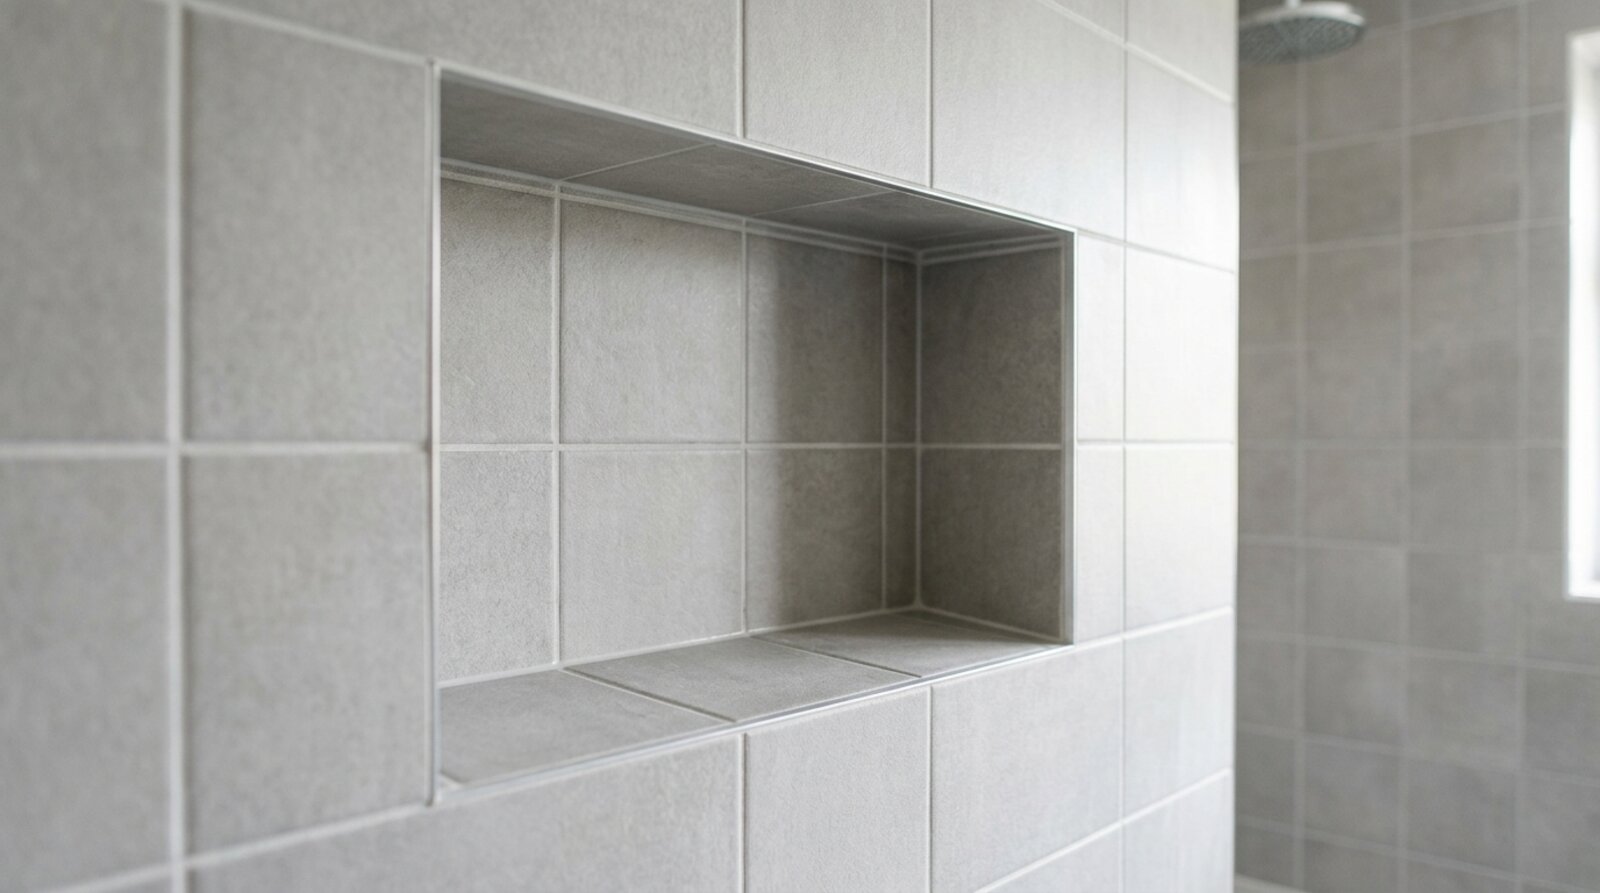
Give the base of the niche a slight fall towards the front, just a few millimetres, so water drains out onto the shower wall and runs away instead of sitting on the shelf. A dead-level or back-falling shelf holds water, which eventually finds the grout lines and the corners.
Tank the niche with the same membrane system as the walls, and do not skimp on the corners. Bed waterproofing tape into every internal angle of the niche, the four around the back panel and the joints where the niche meets the surrounding wall, then run your two coats of membrane over the whole inside of the niche and onto the wall around the opening so it ties into the wall tanking as one continuous layer. When you tile, work the niche in a sensible order: back panel first, then bottom and top, then the two sides so their cut edges face into the opening and hide the joints. A pro will often add tile trim or mitre the front edges for a clean finish.
Adhesive, grout and sealing the junctions
Use a cement-based tile adhesive rated for wet areas and, ideally, flexible. Look for products classified under BS EN 12004 as C2, which is an improved cementitious adhesive; a flexible C2 adhesive from an established trade range handles the slight movement and the constant wetting far better than a cheap general-purpose mix. Solidly bed each tile so there are no voids behind it, because trapped voids hold water and create weak points; BS 5385 makes the same point about eliminating voids. Notch the adhesive, comb it in one direction, and back-butter larger tiles to get full coverage.
For grout, choose a flexible, water-resistant cementitious grout intended for showers and power showers; many include an antimicrobial additive to slow mould. For the most water-exposed installations some tilers specify an epoxy grout, which is fully waterproof and very hard wearing, though it is harder to work with. Remember grout is the wearing surface, not the waterproofing; the tanking behind it is what keeps water out.
The single most important detail at the end is the junction between the bottom row of tiles and the shower tray or floor. Do not grout this joint. Seal it with a flexible, mould-resistant silicone sealant instead. The tray and the wall move independently, and rigid grout in that gap will crack and let water straight through to the structure. The same applies to internal vertical corners where two tiled walls meet: silicone, not grout, so the joint can flex. Tool the silicone to a clean concave bead and let it cure fully before using the shower.
Where falls and drains matter, and when to call a pro
If you are building a wet-room-style shower with no tray, where the floor is tiled and water runs to a drain, the floor needs a built-in fall to that drain, typically formed with a pre-fabricated former or a screed laid to a gradient, and the whole floor has to be tanked and tied into the wall membrane. That is a different and less forgiving job than a standard enclosure with a tray, and the consequences of getting the fall or the floor tanking wrong are expensive, because the leak ends up under the floor.
Tiling flat walls is well within reach for a confident DIYer. The waterproofing, the niche corners, the falls on a wet-room floor and the membrane-to-tray detailing are where a professional earns their fee, because those are the parts that leak quietly for months before you notice. If your shower is on a suspended timber floor, on a wall shared with a bedroom, or you are forming an open wet room, it is worth getting a tiler in. For tiling advice and quotes in the local area, see Bromley Tilers. For the technical detail behind these requirements, BS 5385-4 is published by the British Standards Institution and you can read the scope of the series on the BSI website.
Frequently asked questions
Do I really need to tank a shower if the tiles and grout are waterproof?
Yes. Grout is water resistant but not impervious, and water gets through the grout lines over time. BS 5385-4 and current good practice say the background behind the tiles in a frequently wetted area should be made watertight with a tanking membrane. The tiles are the surface; the membrane is the waterproofing.
Can I tile straight onto plasterboard in a shower?
Standard plasterboard is not a suitable wet-area background on its own. Fit a tile backer board over or in place of it in the shower enclosure, then tape the joints and corners and apply two coats of tanking membrane before tiling.
Why shouldn’t I grout the gap between the tiles and the shower tray?
The wall and the tray move independently. Rigid grout in that joint cracks and lets water through to the structure behind. Seal that junction, and the internal vertical corners, with a flexible mould-resistant silicone instead, tooled to a clean bead.
How do I stop water pooling in a shower niche?
Build the base of the niche with a slight fall towards the front, a few millimetres is enough, so water drains out onto the wall rather than sitting on the shelf. Tank the inside fully, taping every internal corner before the two membrane coats.
What adhesive and grout should I use in a shower?
Use a cement-based adhesive rated for wet areas, ideally a flexible C2 type classified under BS EN 12004, and bed tiles solidly with no voids. For grout, use a flexible water-resistant cementitious grout made for showers, or an epoxy grout where you want a fully waterproof joint.
Is tiling a shower a DIY job?
Tiling flat walls is achievable for a careful DIYer. The waterproofing, niche corners, and any wet-room floor falls are where mistakes leak quietly and cost the most, so those are worth handing to a professional, especially on a suspended floor or a shared wall.
Related guides
- How to Tile a Bathroom Wall: A UK Step-by-Step Guide
- How Much Does Tiling Cost in the UK? A Realistic Price Guide
- How to Remove Old Wall Tiles Without Damaging the Wall
- Porcelain vs Ceramic Tiles: Which Is Right for Your Bathroom or Kitchen?
- How to Tank and Waterproof a Wet Room Before Tiling: A Bromley Homeowner’s Guide
- Do You Need to Seal Natural Stone Tiles Before Grouting? A Tiler Explains
- How to Tile a Bathroom Floor (Including Around the Toilet)
- Construction Trade News: June 2026
- Bathroom Tiling Guide: How to Plan, Prep and Finish a Lasting Job
- Tile Backer Board vs Plasterboard for Bathrooms
- Best Tiles for Small Bathrooms (and How to Make a Space Look Bigger)
- Wall and Floor Tiles for a Wet Room: What Actually Works
- Tiling vs Wall Panels for a Bathroom: Which Is Better?
- Do You Tile the Floor or Walls First in a Bathroom?
- Tiling and Bathroom Trade News: Mid-June 2026
- Kitchen Tiling: Splashbacks, Walls and Floors Explained