


Kitchen tiling covers three very different jobs in one room: the splashback behind a worktop or hob, the full walls if you want them tiled, and the floor underfoot. Each one asks for a different tile, a different adhesive and grout, and in some cases a different set of safety rules. Getting them mixed up is how people end up with a polished floor that turns to ice when wet, or grout behind the hob that stains brown within a year. This guide covers where tiles go in a kitchen, what to choose for each surface, and the British standards and regulations worth knowing before you start.
Where kitchen tiles go
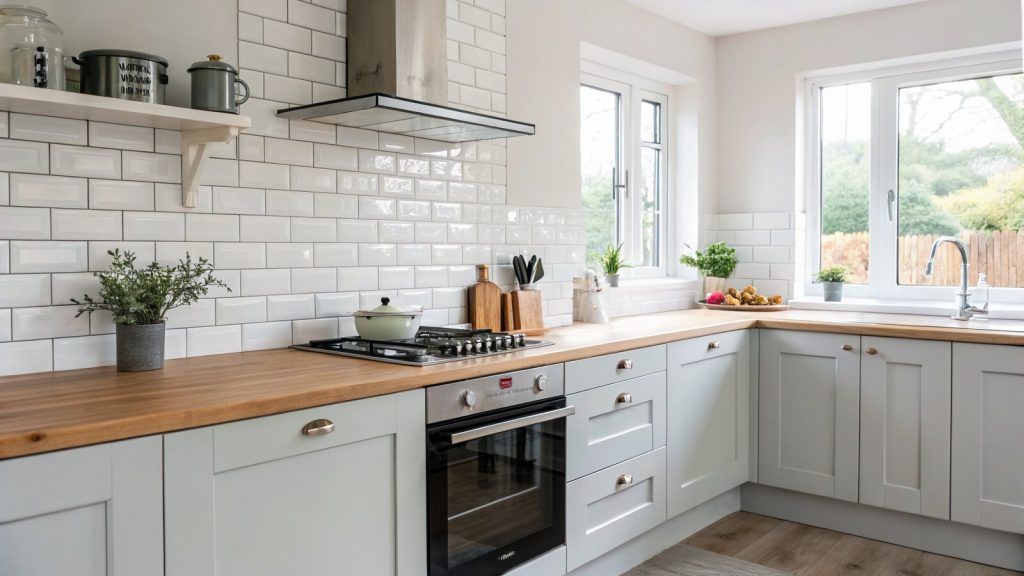
Most UK kitchens use tiles in two or three places. The splashback is the most common: a band of tile that protects the wall behind the worktop and hob from water, grease and cooking splatter. It usually runs from the worktop to the underside of the wall units, often around 450mm to 600mm, and goes higher behind a hob. A full tiled wall takes tile from worktop to ceiling, or covers a whole wall on an open run with no units, which suits feature walls, range cookers and kitchen-diners. The floor is the third surface and the one with the strictest performance demands: it takes foot traffic, dropped pans, spilled water and oil, and the weight of appliances, so the tile, the substrate and the slip resistance all matter more here than anywhere else.
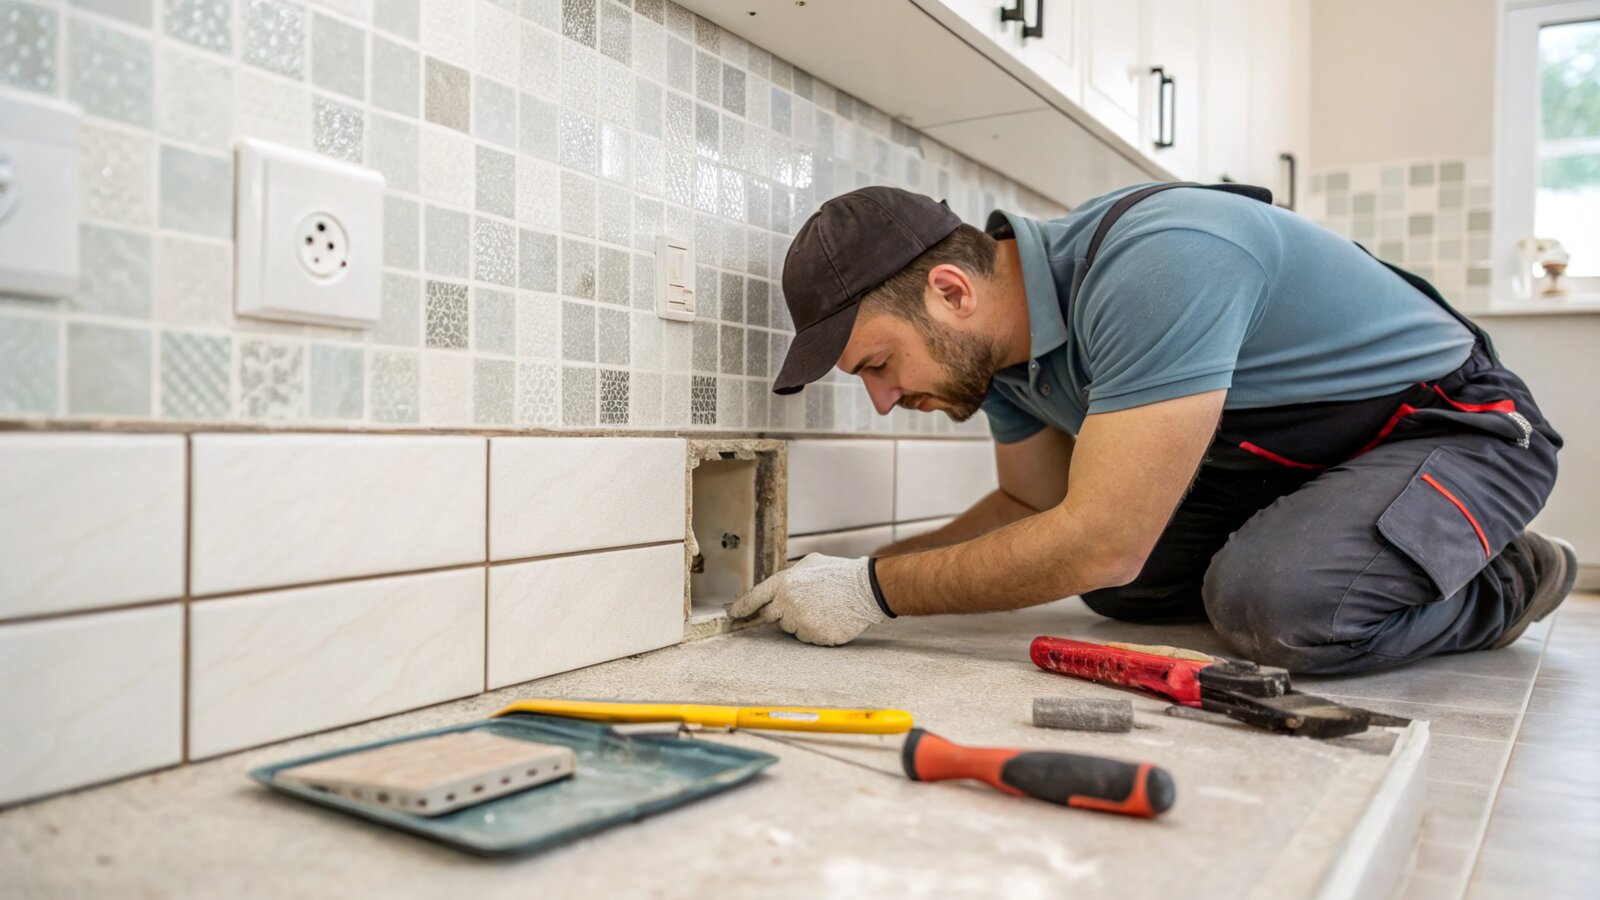
Two code-of-practice documents govern proper installation. Internal wall tiling falls under BS 5385-1, and internal floor tiling under BS 5385-3. They set out the recognised UK standard for backgrounds, adhesives, movement joints and tolerances, and any competent tiler will work to them.
Choosing tiles for splashbacks, walls and floors
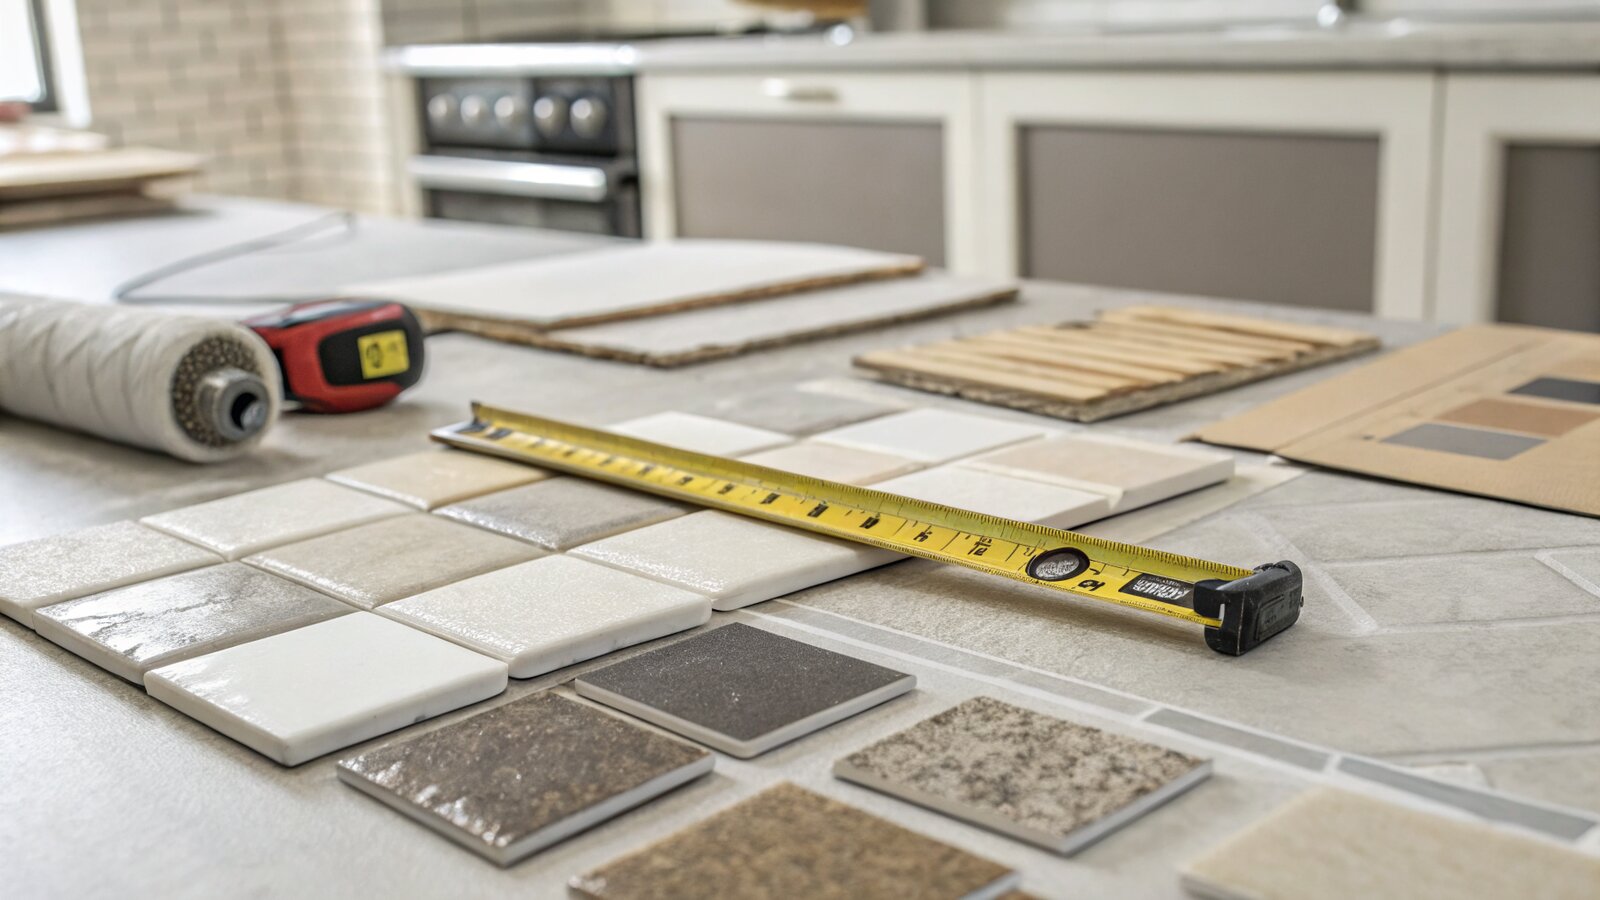
The big choice is porcelain versus ceramic, and the honest answer is that it depends on the surface. The difference is defined by water absorption under BS EN 14411: porcelain is fired hotter and denser, absorbing 0.5% water or less (group BIa), while standard ceramic absorbs more, typically above 3%. Porcelain is harder, less porous and more durable; ceramic is lighter, easier to cut and usually cheaper.
Splashbacks and walls
For a splashback or wall, ceramic is perfectly fine. The tiles are not being walked on, and a glazed ceramic face wipes clean of grease and water without trouble. Lighter ceramic tiles are also kinder to a plasterboard or skimmed wall background, which has a weight limit for tiling. Porcelain still works on walls if you want a particular finish or a large-format look, just check the wall can carry the load and use the right adhesive.
Finish is a personal call. Gloss tiles bounce light around and suit smaller or darker kitchens, but they show smears and water spots more readily. Matt and satin finishes hide everyday marks better. Textured or “structured” tiles look good but trap grease in the dips behind a hob, so keep heavily textured tiles away from the cooking zone.
Floors
For the floor, porcelain is the sensible default. Its low absorption and high abrasion resistance (often a PEI rating of 5) handle the wear a kitchen throws at it. The detail that catches people out is slip resistance. In the UK this is measured two ways: the German R rating (a ramp test, R9 to R13) and the Pendulum Test Value, or PTV. A PTV of 36 or above is classed as low slip potential; 25 to 35 is moderate; below 25 is high. For a domestic kitchen floor, aim for around R10, or a textured or matt porcelain rated for low slip potential. Avoid polished porcelain on the floor: it looks superb dry and becomes treacherous the moment a glass of water tips over near the sink.
Splashback height behind hobs and worktops
Behind a worktop, splashback height is about looks and practicality, so matching the underside of the wall units is the usual approach. Behind a hob, it becomes a safety question, and two things drive the answer.
First, the manufacturer’s instructions for the hob always win. They specify the minimum clearance to combustible surfaces and the gap to any side or rear wall, and those figures override general guidance. Tile and the right adhesive are non-combustible, which is one reason a tiled splashback is a common choice directly behind a hob where a plain painted wall or a timber panel would not be suitable.
Second, anything fitted above the hob, such as an extractor or cooker hood, sets the top of the tiled area, because you generally tile up to the underside of it. Manufacturers set a minimum mounting height for the hood above the hob, and the appliance manual is the figure that counts. Run your splashback tiles to a clean line at the underside of the hood or wall unit rather than stopping at an awkward half tile.
Tiling around sockets, switches and worktops
Kitchens are full of sockets, switches and isolators, and tiling around them neatly is what separates a tidy job from a rushed one. Set out so that cut tiles fall in less visible places and so socket plates sit centrally on tiles or on clean joints rather than clipping a sliver off one corner.
There are real electrical rules to respect. Under Part P of the Building Regulations (Approved Document P), electrical work must be safe, and the widely followed industry guidance is that sockets and switches should not sit directly above or behind a hob. NHBC guidance accepts a minimum of 100mm from an accessory to the hob or cooker edge, but the IET’s preferred figure is at least 300mm horizontally, which keeps switches and plugs away from heat and splashes. You can read the official position on the Planning Portal’s Part P page.
To tile around a socket: turn off the power, pull the faceplate forward, tile up to and slightly behind the back box so the plate covers the tile edge when refitted, then screw it back on over the finished tiles. Cut openings with a drill and tile file, an angle grinder, or a wet saw for porcelain. Where tiles meet the worktop, leave a small gap and finish it with flexible silicone rather than grout, because the two surfaces move at different rates and rigid grout will crack.
Adhesives and grout suited to kitchens
Kitchens combine heat, grease, steam and the occasional flood, so the bonding materials matter. Adhesives are classed under BS EN 12004: C1 is standard, C2 is improved-performance. For porcelain, large-format tiles, or anything on a wall that flexes a little, a C2 (often a flexible, S1-rated) adhesive holds better and copes with small movements. On a solid, well-prepared wall, ceramic splashback tiles can go up on a good ready-mixed adhesive; on floors and porcelain, use a powdered C2 and mix it properly.
Grout is where kitchens punish the wrong choice. Standard cement grout is porous, so it absorbs grease and cooking stains and discolours, especially in a light colour behind the hob. A flexible cement grout sealed afterwards is acceptable for most splashbacks. For the hardest-working zones, an epoxy grout is non-porous and resists water, grease and chemicals, which is why it shrugs off grease and red wine. It is fiddlier to apply and costs more, but behind a hob or on a busy floor it pays off. Whatever you use, finish tile-to-worktop and internal corner junctions with silicone, not grout.
The herringbone and metro tile trend
Two patterns dominate UK kitchen splashbacks right now. The metro tile, a rectangular brick-shaped tile usually around 100mm by 200mm or 75mm by 150mm, gives that clean Underground-station look. Laid in a standard half-bond brick pattern it is forgiving and quick; laid vertically or in a stacked grid it feels more contemporary. Coloured grout against white metro tiles is a popular way to add definition without changing the tile.
The herringbone layout, where rectangular tiles interlock at 45 or 90 degrees, has moved from floors onto splashbacks. It looks impressive but uses more tiles (allow extra for the angled cuts), takes longer to set out, and demands accurate cutting at the edges. If you are tackling it yourself, dry-lay a section first and start from a true centre line so the pattern stays symmetrical.
DIY versus hiring a tiler
A straightforward splashback in standard square or metro tiles on a sound, flat wall is a realistic DIY job for a confident home improver: you need a notched trowel, spacers, a tile cutter, a grout float and patience with the setting out, and because the area is small and at eye level, mistakes are easy to spot and redo. Floors, full walls, herringbone patterns, large-format porcelain and anything involving lots of socket cuts are a different proposition, dealing with substrate movement, levelling, slip safety, movement joints and back-buttering to avoid hollow tiles that crack. These are the jobs where a professional tiler working to BS 5385 earns their fee, and where a botched attempt costs more to put right than doing it properly would have. If you would rather hand it to someone who tiles kitchens every week, Bromley Tilers covers kitchen splashbacks, walls and floors across Bromley and South East London.
Frequently asked questions
Should kitchen floor tiles be porcelain or ceramic?
Porcelain is the better choice for a kitchen floor. It is denser, absorbs almost no water (0.5% or less under BS EN 14411) and resists abrasion better than ceramic, so it copes with foot traffic, dropped pans and spills. Choose a textured or matt finish with a suitable slip rating, around R10 or a Pendulum Test Value of 36 or more, and avoid polished porcelain on floors.
How high should a splashback be behind a hob?
There is no single legal height. The hob manufacturer’s instructions set the minimum clearance to nearby surfaces and must be followed. In practice the tiled splashback runs from the worktop up to the underside of the extractor or wall unit above the hob, finished to a clean line rather than an awkward cut tile.
How far should a socket be from a hob?
Sockets and switches should never sit directly above or behind a hob. NHBC guidance accepts a minimum of 100mm from the hob or cooker edge, while the IET’s preferred figure is at least 300mm horizontally. All electrical work must comply with Part P of the Building Regulations.
What grout is best for a kitchen?
For splashbacks and walls, a flexible cement grout that you seal afterwards is usually fine. For floors and the area directly behind a hob, an epoxy grout is the strongest option because it is non-porous and resists grease, water and staining. Always seal tile-to-worktop joints and internal corners with flexible silicone rather than grout.
Can I tile over plasterboard in a kitchen?
Yes, plasterboard is an acceptable background for ceramic wall tiling provided it is dry, firmly fixed and within the weight limit for the tile and adhesive. Heavy or large-format porcelain can exceed what plasterboard will carry, so check the tile weight per square metre against the board and adhesive limits, and use a flexible C2 adhesive for porcelain.
Is herringbone harder to tile than metro?
Yes. A standard half-bond metro layout is forgiving and quick to set out. Herringbone interlocks tiles at an angle, needs an accurate centre line, generates more edge cutting and uses more tiles overall, so it takes longer and is easier to get visibly wrong. It is a good candidate for a professional unless you are an experienced DIY tiler.
Related guides
- How to Tile a Bathroom Wall: A UK Step-by-Step Guide
- How Much Does Tiling Cost in the UK? A Realistic Price Guide
- How to Remove Old Wall Tiles Without Damaging the Wall
- Porcelain vs Ceramic Tiles: Which Is Right for Your Bathroom or Kitchen?
- How to Tank and Waterproof a Wet Room Before Tiling: A Bromley Homeowner’s Guide
- Do You Need to Seal Natural Stone Tiles Before Grouting? A Tiler Explains
- How to Tile a Bathroom Floor (Including Around the Toilet)
- How to Tile a Shower: Walls, Niche and Waterproofing
- Construction Trade News: June 2026
- Bathroom Tiling Guide: How to Plan, Prep and Finish a Lasting Job
- Tile Backer Board vs Plasterboard for Bathrooms
- Best Tiles for Small Bathrooms (and How to Make a Space Look Bigger)
- Wall and Floor Tiles for a Wet Room: What Actually Works
- Tiling vs Wall Panels for a Bathroom: Which Is Better?
- Do You Tile the Floor or Walls First in a Bathroom?
- Tiling and Bathroom Trade News: Mid-June 2026
- How to Tile a Kitchen Splashback: Step-by-Step Bromley Guide
- How to Tile Around Kitchen Sockets, Switches and Worktops
- Kitchen Splashback Tile Ideas: 12 Looks That Work
- Tiling and Bathroom Trade News: Late June 2026
- How to Lay Metro Tiles in a Herringbone Pattern
- Tiled vs Glass Splashback (and Acrylic): Which Is Best?
- How High Should a Kitchen Splashback Be Tiled? UK Heights Guide
- Tiling and Bathroom Trade News: Early July 2026
- Types of Tiles: The Complete UK Buyer’s Guide
- Porcelain vs Natural Stone Tiles: Which Should You Choose?
- Natural Stone Tiles Explained: Marble, Travertine, Slate and Limestone
- Tiling and Bathroom Trade News: Mid-July 2026
- Mosaic Tiles: Where to Use Them and How They’re Fixed
- Tile Slip Ratings Explained: R Ratings and PTV for UK Floors