


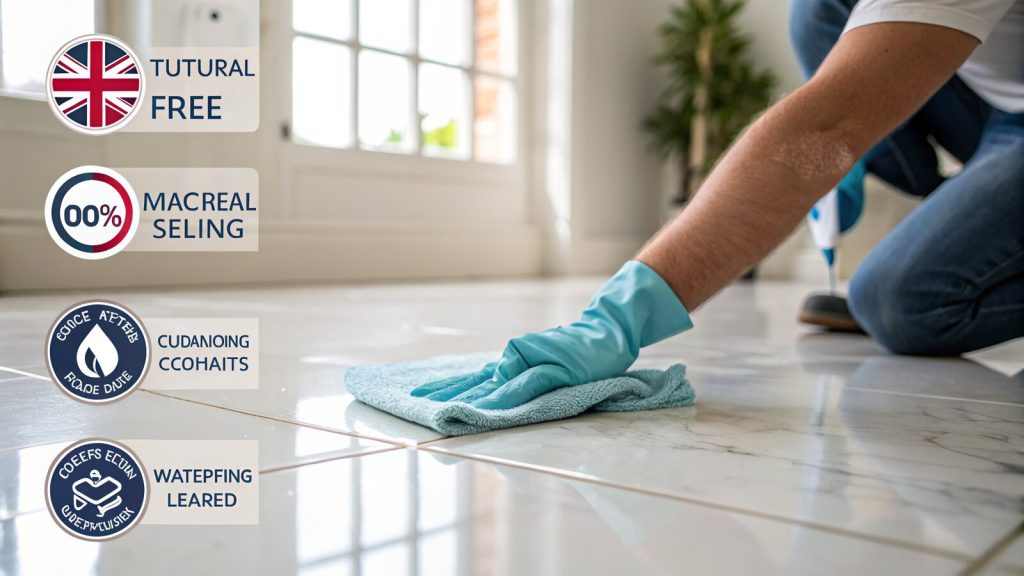
If you are about to grout a marble, travertine or slate floor and you are worried about grey haze ruining the surface, you are asking the right question at exactly the right moment. The short answer is yes: most natural stone should get a coat of impregnating sealer before you grout, not just after. We tile bathrooms, kitchens and wet rooms across Bromley and south east London, and the staining we get called out to fix almost always comes from someone grouting bare, unsealed stone.
This guide explains the why, the exact sequence we use on site, the stones that genuinely suffer without it, and the timing details that the product pages skip over. Get the order right and grouting becomes a clean, low stress job. Get it wrong and you can drive grout pigment into the pores of the stone where no amount of scrubbing will lift it.
Why seal natural stone before grouting at all
Natural stone is porous. Even polished marble and honed travertine have a network of tiny pores and pits that drink in liquid. Grout is, at its core, a coloured cement or cement-and-polymer slurry. When you spread it across the tile face and work it into the joints, that pigmented water sits on the surface and starts soaking in. On a pale stone with a darker grout, the result is a permanent grey or beige shadow that follows the grain.
An impregnating sealer fills those pores below the surface and creates a water and oil repellent barrier. It does two jobs at once when you apply it before grouting:
- It blocks staining. Grout pigment can no longer migrate into the stone, so the tile face stays the colour you bought.
- It acts as a grout release. Excess grout and the haze it leaves behind wipe off the sealed face far more easily, instead of keying into raw, thirsty stone.
This is not a fringe opinion. LTP, one of the main UK sealer manufacturers, advises that you apply a coat of impregnating sealer before grouting to assist with the removal of residual grout and help prevent staining, then build up the full protection afterwards. That before-and-after approach is the professional standard, and it is the one we follow.
Which stones genuinely need it (and which can wait)
Not every stone is equally at risk, but the porous ones are the ones most people are tiling with in a bathroom or kitchen. Here is how we judge it on site.
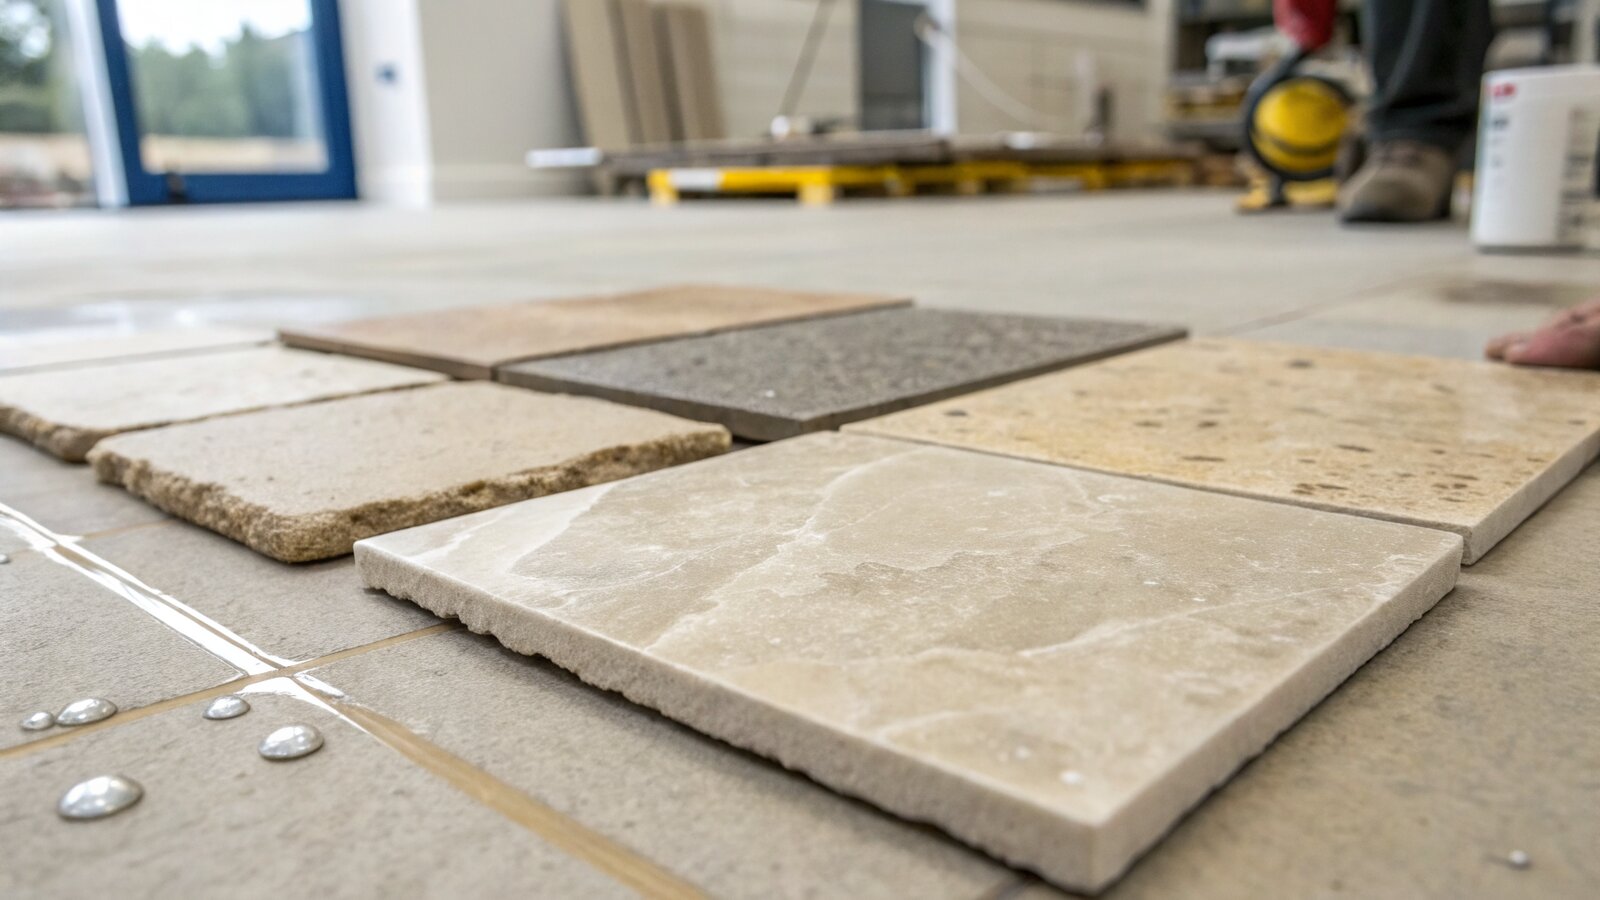
Seal these before grouting without question
- Tumbled travertine. The most vulnerable of all. The tumbling process opens up the natural holes and gives a soft, chalky, light surface that grabs grout pigment instantly. We have seen grey-hazed tumbled travertine that simply cannot be brought back. Always seal first.
- Honed and light marble. A honed (matt) finish is more open than a polished one, and pale Carrara or Calacatta marble shows the faintest grout shadow. Seal it.
- Limestone. Soft, absorbent and usually light coloured. High staining risk.
- Slate, sandstone and unfilled travertine. Textured, riven surfaces trap grout in every dimple. Sealing first makes the difference between a quick wipe and an hour of picking grout out of the cleft.
You can sometimes get away without it
Dense, polished granite and some highly polished marbles are much less absorbent, and if you are using a grout colour that closely matches the tile, the risk drops. Even so, we still seal, because a single hazy tile costs more to replace than a tin of sealer costs to apply. The only real exception is a glazed porcelain or ceramic tile, which is not natural stone and is non-porous, so it needs no pre-grout sealing at all. If you are unsure what you have, do the water test below before you decide.
How to tell if your stone is porous: the water test
Before you commit to anything, drip a small amount of clean water onto an offcut or a spare tile and wait a few minutes. If the water darkens the stone or soaks in, it is porous and must be sealed before grouting. If it beads and sits on the surface, the stone is dense and the risk is lower, though a sealer still does no harm. Do this on an offcut, never on a fixed tile, in case the water itself marks it.
The correct sequence: a tiler’s step by step
Here is the order we use. Read it through fully before you start, because the timing windows matter.
1. Let the adhesive cure first
The tiles must be firmly set before you seal or grout. With most cement-based tile adhesives that means leaving it overnight, or as long as the adhesive bag states. Sealing or grouting onto green, uncured adhesive can trap moisture and cause problems later.
2. Clean the stone properly
The face has to be completely clean and dry: no dust, no adhesive smears, no fingerprints. Sealer locks in whatever is on the surface, so a smear of dried adhesive becomes a permanent mark. A dedicated stone-safe cleaner is worth using here. Avoid anything acidic on marble, travertine or limestone, because acid etches calcium-based stone.
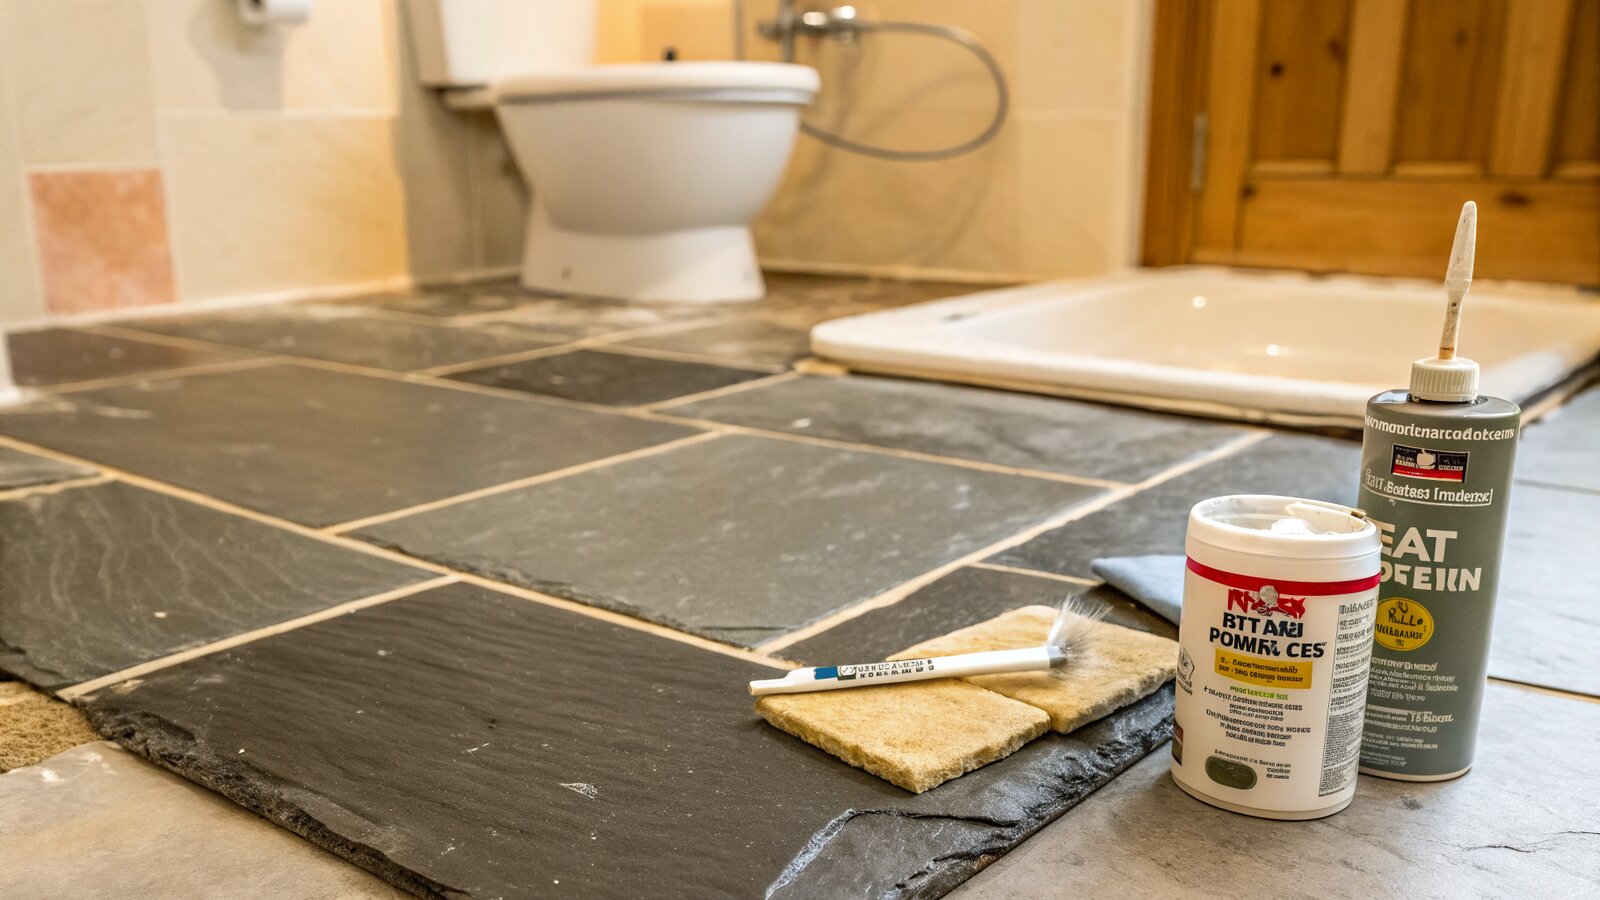
3. Apply the first coat of impregnating sealer
Use an impregnating (penetrating) sealer made for natural stone, not a topical surface coating. A matt-finish impregnator such as LTP Mattstone is the type we reach for on slate, marble, sandstone and travertine because it soaks in and leaves no plastic-looking film. Apply it evenly across the whole tile face with a clean cloth, foam applicator or brush, working in manageable areas so nothing dries before you reach it. On very porous, thirsty stone like tumbled travertine, lay it on generously.
4. Buff off the excess before it dries
This is the step most people miss. An impregnator has to soak into the pores, not dry on top. Let it absorb, then buff all the excess off the surface with a clean, dry cloth before it dries. LTP is blunt about this for Mattstone: do not let the product dry on the surface, and buff off anything that has not been absorbed. If you leave pooled sealer to dry on the face it can leave a patchy, streaky residue that is a nuisance to remove. Soak, then buff. That is the rhythm, and the exact dwell time will be on the tin in front of you.
5. Apply a second coat on porous stone
Absorbent stones rarely seal fully on one coat. LTP recommends two to three coats of Mattstone on stone floors, allowing at least two hours between coats, and says very absorbent floors may need further coats applied generously. Two or three well buffed coats give you a far more reliable barrier than one rushed one. Always follow the specific tin in front of you, because dwell and recoat times vary by brand.
6. Grout once the seal has set
Now you grout, with the stone protected. Follow the instructions on your sealer for when to grout: with the pre-grout coat done, the tile face is protected and excess grout wipes off it far more easily. Work the grout in, then clean the face promptly with a damp (not soaking) sponge, rinsing often. Because the stone is sealed, the haze comes off easily.
7. Seal again after the grout has cured
Once the grout has fully cured, usually around three days, apply a final coat of sealer over both the stone and the grout lines. This re-seals any areas where the first coat was worn away during grouting and protects the porous grout itself. Keep the surface dry while everything cures. LTP, for example, says Mattstone dries in roughly two hours but takes a further three days to become fully resistant, so keep the floor dry over that period.
Common mistakes we get called out to fix
- Grouting bare tumbled travertine. The classic. By the time the homeowner notices the grey haze, the pigment is already in the pores. Prevention is the only real cure.
- Using a topical sealer as a grout release. A film-forming surface sealer can stop the next coat and the grout bonding properly. Use a penetrating impregnator for the pre-grout coat.
- Letting sealer dry on the face. Skipping the buff-off leaves streaks. Always remove the excess before it dries.
- Acidic cleaners on calcium stone. Marble, travertine and limestone etch on contact with acid, leaving dull marks no sealer can hide.
- Grouting before the adhesive has set. Tiles shift, joints crack, and moisture gets trapped.
If your floor is large, expensive, or a wet room where waterproofing matters as much as appearance, it is often cheaper in the long run to have it sealed and grouted properly the first time. You can see the kinds of stone and wet room work we handle on our Bromley Tilers homepage.
A note on standards and doing it by the book
Tiling in the UK is covered by the British Standard BS 5385 series, which sets out good practice for the design and installation of ceramic, natural stone and mosaic tiling. The parts split by location: BS 5385 Part 1 covers wall tiling in normal internal conditions, while floor work falls under BS 5385 Part 3 (internal and external ceramic, mosaic and natural stone floor tiling) and BS 5385 Part 5 (terrazzo, natural stone and agglomerated stone tile and slab flooring). The standards also set out minimum grout joint widths depending on tile size, which is worth knowing before you buy your grout, because a stone floor needs a wider minimum joint than many people leave. For wider guidance on materials, methods and finding a qualified installer, The Tile Association is the recognised UK trade body; you can read their guidance in The Tile Association tiling guide and across the rest of their website.
Frequently asked questions
Can I just seal natural stone after grouting instead of before?
You can, but you are taking a real risk on porous stone. Sealing only after grouting means the grout has already had direct contact with bare, thirsty stone, and any pigment that soaked in during grouting is now locked under your sealer permanently. On dense polished granite with a matching grout you may get away with it. On tumbled travertine, limestone or honed marble, seal before and after.
How long should sealer dry before I grout?
It depends on the product, so follow the tin. As a guide, the pre-grout coat needs to soak in and be buffed clean, and many impregnators are then ready to grout over once the surface is dry to the touch, while some ask for a longer cure first. Times also vary with how porous your stone is and how warm the room is, so always go by the drying and recoat times printed on the product you are using.
What sealer should I use on travertine or marble?
Use an impregnating (penetrating) sealer made specifically for natural stone, not a glossy topical coating that sits on top. A matt-finish impregnator keeps the natural look of honed and tumbled stone. UK products such as LTP Mattstone are made for stone including sandstone, slate, marble and terracotta. If you want an enhanced, slightly darker, wet look, there are colour-enhancing impregnators too, but test on an offcut first.
Will sealing change the colour of my stone?
A standard matt impregnating sealer should not noticeably change the colour; it soaks in and repels water and oil without leaving a film. Colour-enhancing or wet-look sealers are a different product and will deepen the tone on purpose. If colour matters to you, always trial your chosen sealer on a spare tile before committing to the whole floor.
How much does it cost to seal a natural stone floor in the UK?
Sealer itself is relatively inexpensive for a domestic-sized room, though the price varies by brand, finish and how many coats your stone drinks up. Coverage drops sharply on very porous stone, so a tumbled travertine floor uses far more than a dense polished one. If you are paying a tiler to seal and grout, the cost depends on area, stone type and access. Treat any figure you see online as a rough guide and get a quote for your specific job.
Do I need to seal porcelain or ceramic tiles before grouting?
No. Glazed porcelain and ceramic tiles are non-porous, so the tile face will not absorb grout pigment and needs no pre-grout sealer. The exception is some unglazed or textured porcelains and the grout lines themselves, which can benefit from a grout sealer afterwards. The pre-grout sealing advice in this article is specifically for natural stone.
The bottom line
For porous natural stone, sealing before grouting is not optional fussiness; it is the step that keeps your floor looking like the one you chose. Apply a penetrating impregnator, let it soak in, buff off the excess before it dries, build up two or three coats on thirsty stone like tumbled travertine, then grout and seal again once it has cured. If you would rather not gamble with an expensive marble or travertine floor, a local tiler who works with stone every week will get the sequence and the timing right first time.
Related guides
- How to Tile a Bathroom Wall: A UK Step-by-Step Guide
- How Much Does Tiling Cost in the UK? A Realistic Price Guide
- How to Remove Old Wall Tiles Without Damaging the Wall
- Porcelain vs Ceramic Tiles: Which Is Right for Your Bathroom or Kitchen?
- How to Tank and Waterproof a Wet Room Before Tiling: A Bromley Homeowner’s Guide
- How to Tile a Bathroom Floor (Including Around the Toilet)
- How to Tile a Shower: Walls, Niche and Waterproofing
- Construction Trade News: June 2026
- Bathroom Tiling Guide: How to Plan, Prep and Finish a Lasting Job
- Tile Backer Board vs Plasterboard for Bathrooms
- Best Tiles for Small Bathrooms (and How to Make a Space Look Bigger)
- Wall and Floor Tiles for a Wet Room: What Actually Works
- Tiling vs Wall Panels for a Bathroom: Which Is Better?
- Do You Tile the Floor or Walls First in a Bathroom?
- Tiling and Bathroom Trade News: Mid-June 2026
- Kitchen Tiling: Splashbacks, Walls and Floors Explained
- How to Tile a Kitchen Splashback: Step-by-Step Bromley Guide
- How to Tile Around Kitchen Sockets, Switches and Worktops
- Kitchen Splashback Tile Ideas: 12 Looks That Work
- Tiling and Bathroom Trade News: Late June 2026
- How to Lay Metro Tiles in a Herringbone Pattern
- Tiled vs Glass Splashback (and Acrylic): Which Is Best?
- How High Should a Kitchen Splashback Be Tiled? UK Heights Guide
- Tiling and Bathroom Trade News: Early July 2026
- Types of Tiles: The Complete UK Buyer’s Guide
- Porcelain vs Natural Stone Tiles: Which Should You Choose?
- Natural Stone Tiles Explained: Marble, Travertine, Slate and Limestone
- Tiling and Bathroom Trade News: Mid-July 2026
- Mosaic Tiles: Where to Use Them and How They’re Fixed
- Tile Slip Ratings Explained: R Ratings and PTV for UK Floors