


Tiling around kitchen sockets is the part of a splashback job that separates a tidy result from a messy one. The sockets, switches and the fused spur outlets above your worktop sit right at eye level, so any gap, lifted edge or crooked cut shows immediately. A clean finish is mostly about careful measuring, the right cut, and one small adjustment to how the socket box sits once the tiles add depth to the wall. This guide covers the full sequence for a kitchen splashback in Bromley and across SE London: isolating the power, marking and cutting accurately, getting the faceplate to sit flush over the tile, and finishing neatly where the tiles meet the worktop and the underside of your wall units.
One point to be clear on from the start. A tiler can tile around an existing socket, but moving, adding or refitting the electrics is a separate trade. Read the safety section before you touch anything live.
Safety first: isolate the power and know what an electrician must do
Before any tiling, switch off the circuit at the consumer unit and confirm the socket is dead, ideally with a socket tester or a voltage tester. Switching the socket off at the wall switch is not enough on its own; turn off the relevant circuit at the consumer unit and check the socket reads dead before you remove the faceplate.
You can safely remove a faceplate to tile behind it and refit the same faceplate afterwards. What you must not do as a DIYer is alter the wiring, move a socket to a new position, or fit a deeper box and rewire it. Electrical work in dwellings falls under Approved Document P (Part P) of the Building Regulations in England. Installing a new circuit is notifiable work and should be carried out by a registered electrician or notified to building control. Since the 2013 amendment, kitchens are no longer treated as a special location, so adding a socket to an existing circuit or a like-for-like replacement is generally not notifiable, though it still has to meet the wiring regulations (BS 7671). For the official position, see the Approved Document P guidance on GOV.UK and the Planning Portal page on home electrics.
A registered electrician working under a competent person scheme such as NICEIC or NAPIT can self-certify notifiable work, which saves you a separate building control application. If your tiling plan involves repositioning a socket or fitting an extender to refit one, line up the electrician before you start tiling, not after.
Measure and mark the cut-outs around socket and switch boxes
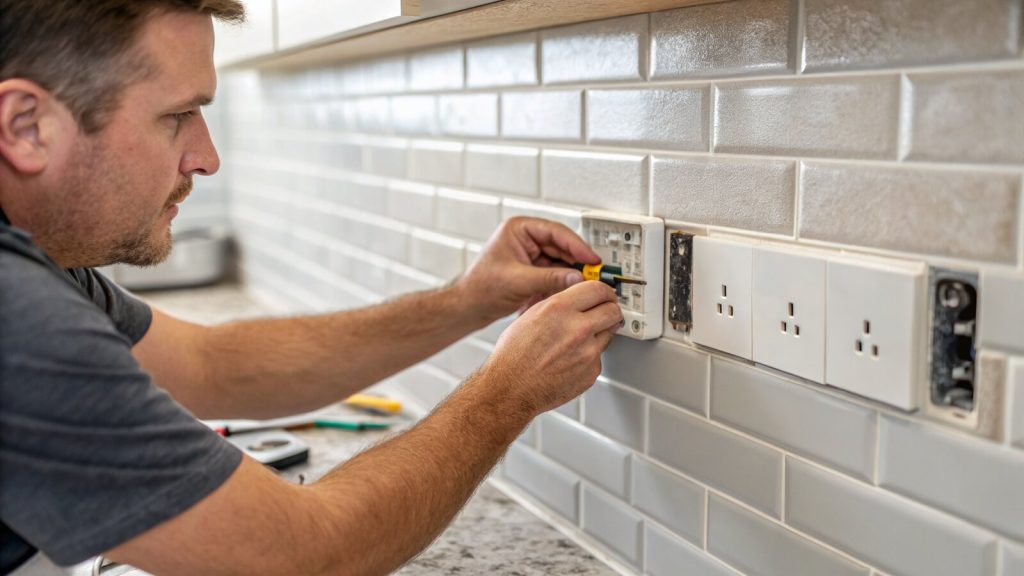
With the power off and the faceplate removed, you will see the back box recessed into the wall. Your aim is to tile up to the edges of that box so the faceplate, once refitted, covers the cut tile edges and hides them.
Work out your tile layout first. Dry-lay or chalk-line the wall so you know where the grout joints fall, then see how the socket sits within that grid. Where you can, plan the layout so the socket falls roughly central on a tile or across a clean joint, rather than catching a tiny sliver of tile that will be fragile and hard to cut.
- Hold the tile in its final position and mark the box edges onto the face of the tile with a pencil or fine marker.
- Allow a 2mm to 3mm clearance around the box so the tile is not fighting the metal lugs, and so the faceplate has room to seat.
- Account for the spacers in your grout joints when you measure, so the cut lands where you expect once the tile is bedded.
- For a socket that sits across two or four tiles, mark each tile separately rather than guessing the whole opening at once.
Double-check the marks against the box before cutting. A faceplate typically overhangs the box by a few millimetres on each side, so a cut that is slightly generous is far better than one that is tight and leaves bare tile visible past the plate.
Cut the tiles: wet cutter, manual cutter or hole cutter
Most socket cut-outs are an L-shape, a notch, or a square opening where the box sits within a single tile. The tool depends on the cut and the tile.
Manual tile cutter: a scribe-and-snap cutter is quick and dust-free for straight cuts, so it handles the straight side of an L-cut well. It cannot turn a corner, so you finish the second line another way.
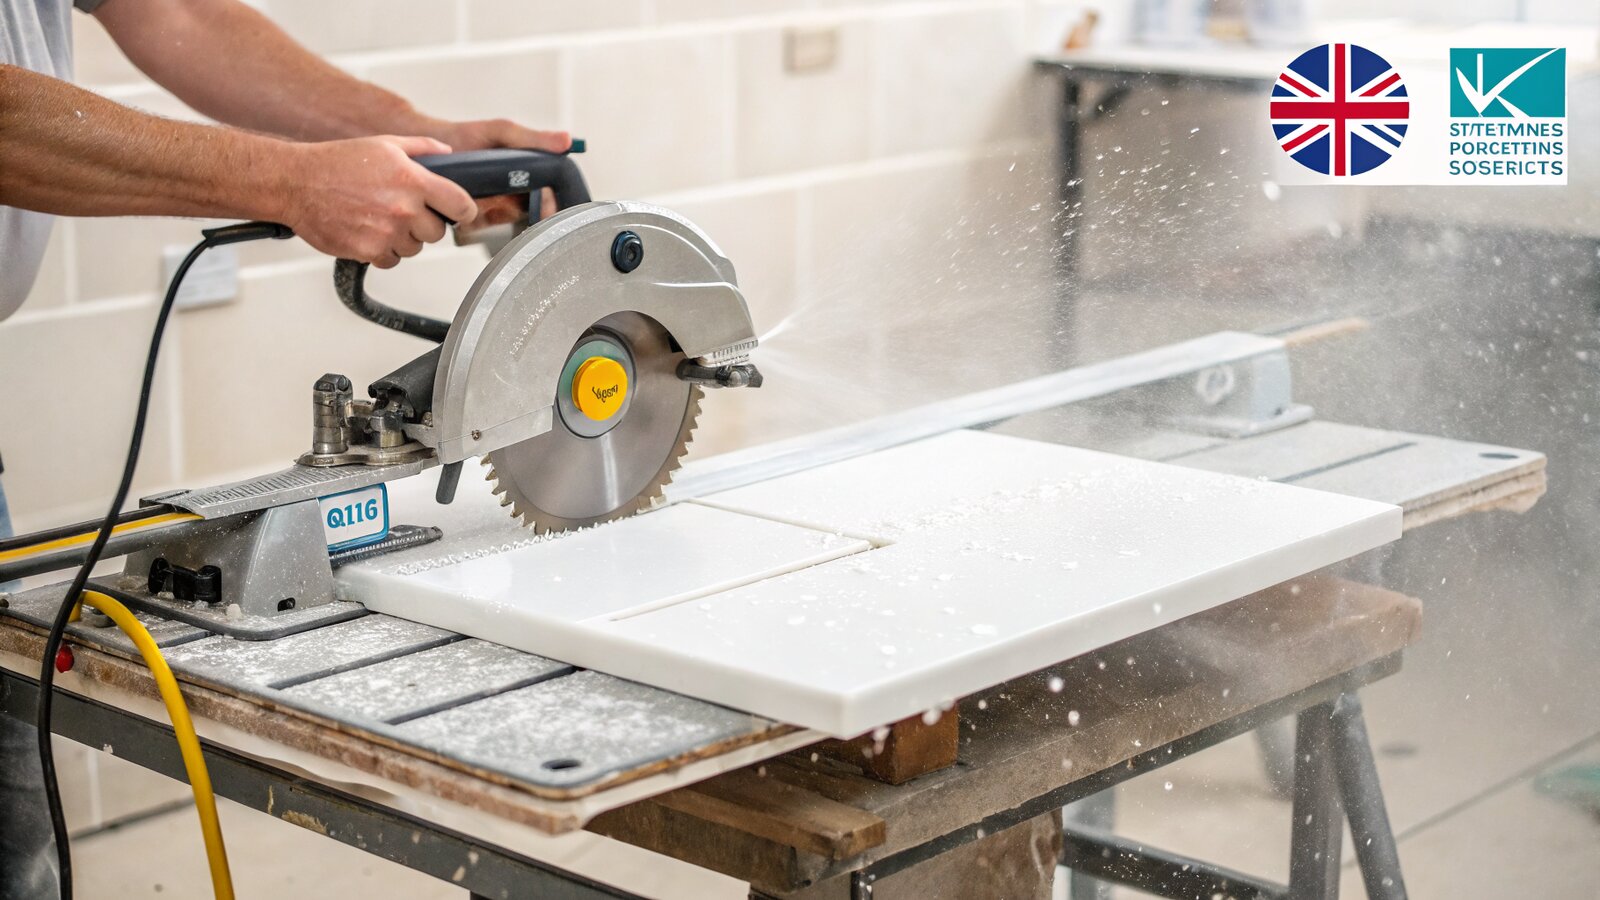
Wet cutter or tile saw: a wet saw with a diamond blade cuts harder porcelain cleanly and lets you run two straight cuts into a corner to free an L-shaped piece. The water keeps the blade cool and holds the dust down, which matters in a kitchen.
Diamond hole cutter: where a round opening is needed, or to start a clean internal corner, a diamond hole cutter (core bit) on a drill works well. Keep it wet to stop it overheating, start at a low speed so it does not skate across the glaze, and let the bit do the work rather than forcing it.
Tile nippers: handy for nibbling away small amounts and tidying a curved or awkward edge that the saw could not reach.
For an internal corner on an L-cut, a common method is to drill the corner point with a small diamond bit, then run the two straight cuts up to it. That gives a crisp corner without overcutting past the line, which would show beyond the faceplate. Cut slightly proud of your pencil line and test-fit before you commit; you can always take a touch more off, but you cannot put tile back.
Make the faceplate sit flush: socket box spacers
Here is the detail most DIY jobs miss. Tile and adhesive add roughly 8mm to 12mm of depth to the wall. Once you tile up to a socket, the faceplate screws no longer reach properly and the plate can sit recessed or rock on the tile. The fix is a socket box spacer, also sold as a back box extender, which sits between the existing box and the faceplate to make up the lost depth.
Spacers come in common depths to suit the build-up of tile and adhesive, in single (1-gang) and double (2-gang) sizes. You choose a depth that matches your finished tile thickness so the faceplate ends up flush against the tile face, neither buried below it nor standing proud on long screws. Fitting an extender and refitting the wiring is electrical work, so if you are not competent and qualified, this is the point to bring in your electrician. They will set the depth correctly, refit the faceplate so it seats cleanly over your cut tile edges, and confirm everything is safe.
A faceplate that sits flat and square over the tile, covering every cut edge, is the mark of a job done right. If the plate is rocking or you can see cut tile around it, the spacer depth or the cut needs adjusting before you grout.
Tile up to the worktop and the under-cabinet line
A kitchen splashback is bounded below by the worktop and above by the underside of the wall units, so both edges need to read as deliberate lines.
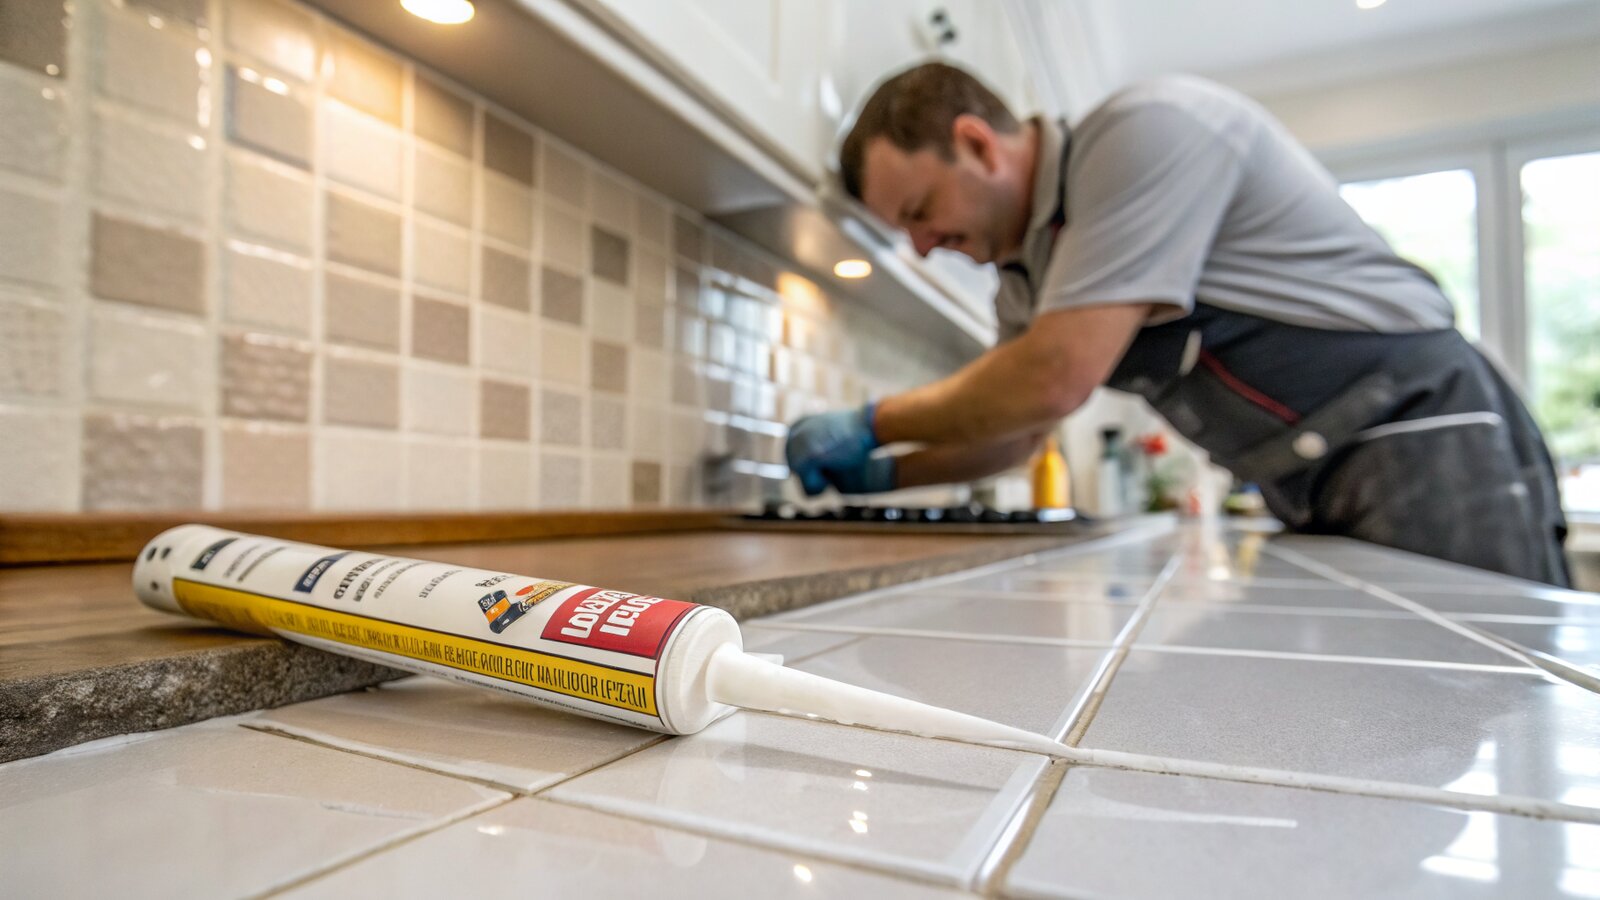
At the worktop, do not bed tiles tight onto the surface and grout the joint. The worktop and the wall move very slightly and at different rates, and a grouted joint there will crack. Instead, leave a small, consistent gap (the thickness of a tile spacer is a good guide) and fill it later with a flexible silicone sealant rather than grout. Run your bottom row of tiles so the cut edge is hidden behind this silicone bead and, ideally, tucked just behind the upstand if you have one.
At the top, tile up to the underside of the wall units so the cut row disappears under the cabinets. Plan your layout so the bottom (worktop) row carries any cut, keeping a full tile at the top edge where the eye lands. Where the splashback ends at an open edge, such as the side of a run, a tile trim or a neatly bullnosed edge finishes it cleanly.
The silicone bead: once grout has cured, run a thin, even bead of kitchen-grade silicone along the worktop junction and tool it with a wetted finger or a sealant tool for a clean concave line. Mask both sides with tape first if you want a sharp edge. This bead is the part of the job most people see every day, so it is worth taking your time over.
When to call a professional tiler
Plenty of homeowners tile a small splashback themselves. The job gets harder, and the case for a professional gets stronger, when there are several sockets and switches in a run, large-format porcelain that is unforgiving to cut, a patterned or natural-stone tile where any error shows, or where the wall is out of square. A professional tiler will set out the whole wall first so cuts fall in sensible places, cut cleanly around every socket, and leave faceplates sitting flush with a tidy silicone line at the worktop.
If you are in Bromley or anywhere across SE London and want the splashback done properly the first time, you can find local help and more guides on our tiling homepage. For anything involving moving or refitting the electrics, pair the tiler with a registered electrician so the notifiable side is covered.
Frequently asked questions
Do I need an electrician to tile around a kitchen socket?
Not for the tiling itself. You can switch off the circuit, remove the faceplate, tile around the box and refit the same faceplate. You do need a registered electrician if the work involves moving the socket, fitting a back box extender and rewiring it, or installing a new circuit, as a new circuit is notifiable under Part P in England.
What is a socket box spacer and do I need one?
A socket box spacer, or back box extender, is a frame that fits between the existing box and the faceplate to make up the depth that tile and adhesive add to the wall. You need one whenever the tile build-up would otherwise leave the faceplate recessed or unable to screw down flush. They come in different depths and in 1-gang and 2-gang sizes to match your tile thickness.
Should the socket faceplate sit on top of the tile or flush with it?
The faceplate should sit flush against the tile face, covering the cut tile edges underneath it. With the correct spacer depth, the plate seats flat on the tile with no rocking and no visible cut edges around it. A plate left standing proud on long screws or sunk below the tile means the spacer depth needs adjusting.
How much gap should I leave around a socket box when tiling?
Aim for around 2mm to 3mm of clearance between the cut tile and the back box. That gives room for the box lugs and lets the faceplate seat properly, while staying small enough that the faceplate still covers the cut edges. Measure against the actual box and remember the faceplate overhangs it by a few millimetres on each side.
Can I grout the gap between the tiles and the worktop?
No. The worktop and wall move slightly and at different rates, so grout in that joint cracks. Leave a small, even gap and fill it with a flexible kitchen-grade silicone sealant instead, tooled to a clean concave bead. Keep your bottom row of cut tiles hidden behind that bead.
What is the best tool for cutting tiles around a socket?
For straight cuts, a manual scribe-and-snap cutter is fast and dust-free. For L-shaped openings and harder porcelain, a wet saw with a diamond blade lets you run two clean cuts into a corner. A diamond hole cutter handles round openings or a crisp internal corner, and tile nippers tidy small awkward edges.
Related guides
- How to Tile a Bathroom Wall: A UK Step-by-Step Guide
- How Much Does Tiling Cost in the UK? A Realistic Price Guide
- How to Remove Old Wall Tiles Without Damaging the Wall
- Porcelain vs Ceramic Tiles: Which Is Right for Your Bathroom or Kitchen?
- How to Tank and Waterproof a Wet Room Before Tiling: A Bromley Homeowner’s Guide
- Do You Need to Seal Natural Stone Tiles Before Grouting? A Tiler Explains
- How to Tile a Bathroom Floor (Including Around the Toilet)
- How to Tile a Shower: Walls, Niche and Waterproofing
- Construction Trade News: June 2026
- Bathroom Tiling Guide: How to Plan, Prep and Finish a Lasting Job
- Tile Backer Board vs Plasterboard for Bathrooms
- Best Tiles for Small Bathrooms (and How to Make a Space Look Bigger)
- Wall and Floor Tiles for a Wet Room: What Actually Works
- Tiling vs Wall Panels for a Bathroom: Which Is Better?
- Do You Tile the Floor or Walls First in a Bathroom?
- Tiling and Bathroom Trade News: Mid-June 2026
- Kitchen Tiling: Splashbacks, Walls and Floors Explained
- How to Tile a Kitchen Splashback: Step-by-Step Bromley Guide
- Kitchen Splashback Tile Ideas: 12 Looks That Work
- Tiling and Bathroom Trade News: Late June 2026
- How to Lay Metro Tiles in a Herringbone Pattern
- Tiled vs Glass Splashback (and Acrylic): Which Is Best?
- How High Should a Kitchen Splashback Be Tiled? UK Heights Guide
- Tiling and Bathroom Trade News: Early July 2026
- Types of Tiles: The Complete UK Buyer’s Guide
- Porcelain vs Natural Stone Tiles: Which Should You Choose?
- Natural Stone Tiles Explained: Marble, Travertine, Slate and Limestone
- Tiling and Bathroom Trade News: Mid-July 2026
- Mosaic Tiles: Where to Use Them and How They’re Fixed
- Tile Slip Ratings Explained: R Ratings and PTV for UK Floors
- Matt vs Gloss Tiles: Which Finish Is Right for Your Room?
- Cost to Tile a Bathroom in the UK: 2026 Price Breakdown
- Polystyrene Ceiling Tiles: Are They Any Good?
- Cost to Tile a Kitchen in 2026: Floor and Splashback Prices
- Tiling and Bathroom Trade News: Mid-July 2026
- Tiling Cost Per Square Metre 2026: Labour and All-In Prices