


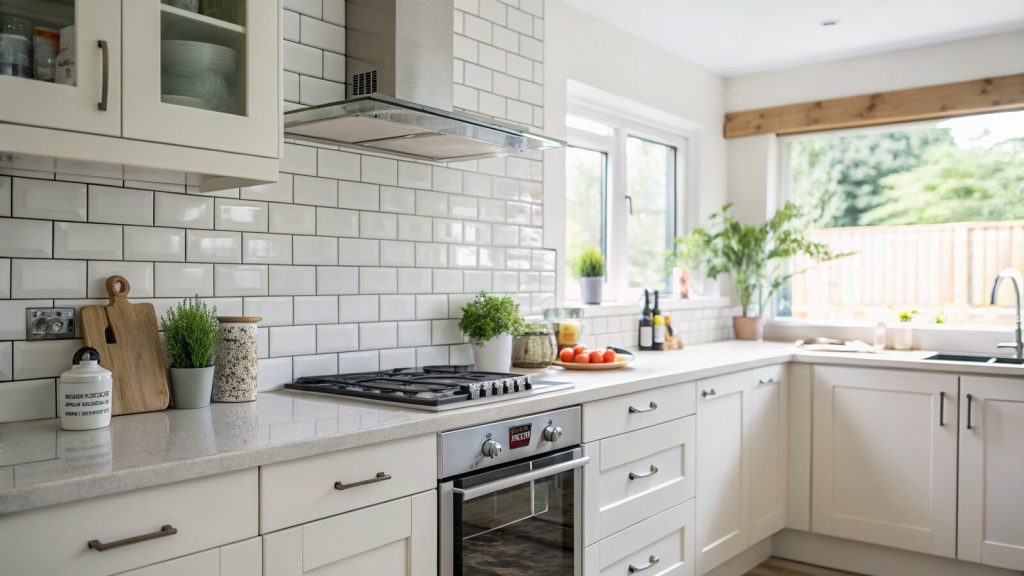
Learning how to tile a kitchen splashback is one of the few tiling jobs that a careful DIYer in Bromley or anywhere across SE London can realistically finish in a weekend. The area is small, it sits at a comfortable working height, and a fresh run of tiles behind the hob and worktop changes the look of a tired kitchen for not much money. This guide walks through the whole job in order: the tools you need, how to set out so the tiles line up, which adhesive to use, the right way to cut around sockets, and how to grout and seal the worktop join so it lasts.
It is honest about the fiddly parts too. Cutting tightly around a double socket and getting the silicone bead clean along the worktop are the two places most first attempts go wrong, so those get extra detail. Near the end you will find a clear note on when a tiled splashback is worth handing to a professional.
What you will need before you start
Gather everything first so you are not hunting for a sponge while adhesive goes off on the wall. A typical splashback run behind a worktop needs the following.
- Tiles, plus around 10 to 15 percent extra for cuts and breakages
- Tile adhesive: a ready-mixed paste tub is fine for small ceramic or glass mosaic splashbacks; use a flexible powdered adhesive if you are tiling onto plasterboard or fitting porcelain
- Grout in your chosen colour, and a tube of neutral-cure silicone sealant for the worktop join
- Notched trowel (a 6mm notch suits most splashback tiles), tile spacers, and a grout float
- Spirit level, tape measure and pencil for setting out
- Tile cutter for straight cuts; tile nippers or an electric wet cutter for curves and socket cut-outs
- Sponge, two buckets (one for mixing, one for clean water), and a soft cloth for the final polish
- A socket tester or voltage indicator, and the right screwdriver for your faceplates
Check what surface you are tiling onto. Painted, sound plaster is fine once you have keyed it. New plaster should be left to dry for at least four weeks and then sealed with a primer before tiling, otherwise the adhesive can fail. Plasterboard should be primed too. The British Standard for wall and floor tiling, BS 5385, sets out backgrounds, adhesives and movement joints; The Tile Association publishes technical guidance behind these steps, and you can read more on the Tile Association website if you want the detail.
Step 1: Prepare the wall and the worktop
Clear the worktop and lay a dust sheet or thick cardboard across it to protect the surface and catch drips. Turn off and isolate any sockets in the work area at the consumer unit, then test with a socket tester to confirm they are dead before you loosen any faceplates. Wipe the wall down with sugar soap to remove grease, which is everywhere behind a hob, and let it dry. Fill any dents, sand glossy paint to give the adhesive something to grip, and make sure the wall is flat. Tiles will telegraph every bump underneath them.
Step 2: Set out so the tiles line up
This is the step that separates a neat splashback from a wonky one, and it costs nothing but ten minutes. Do not assume your worktop is level; many are not. Find the centre point of the run, usually above the hob or sink, and mark a true vertical line there with a spirit level. Then dry-lay a row of tiles along the worktop, including spacers, to see where the cuts fall at each end.
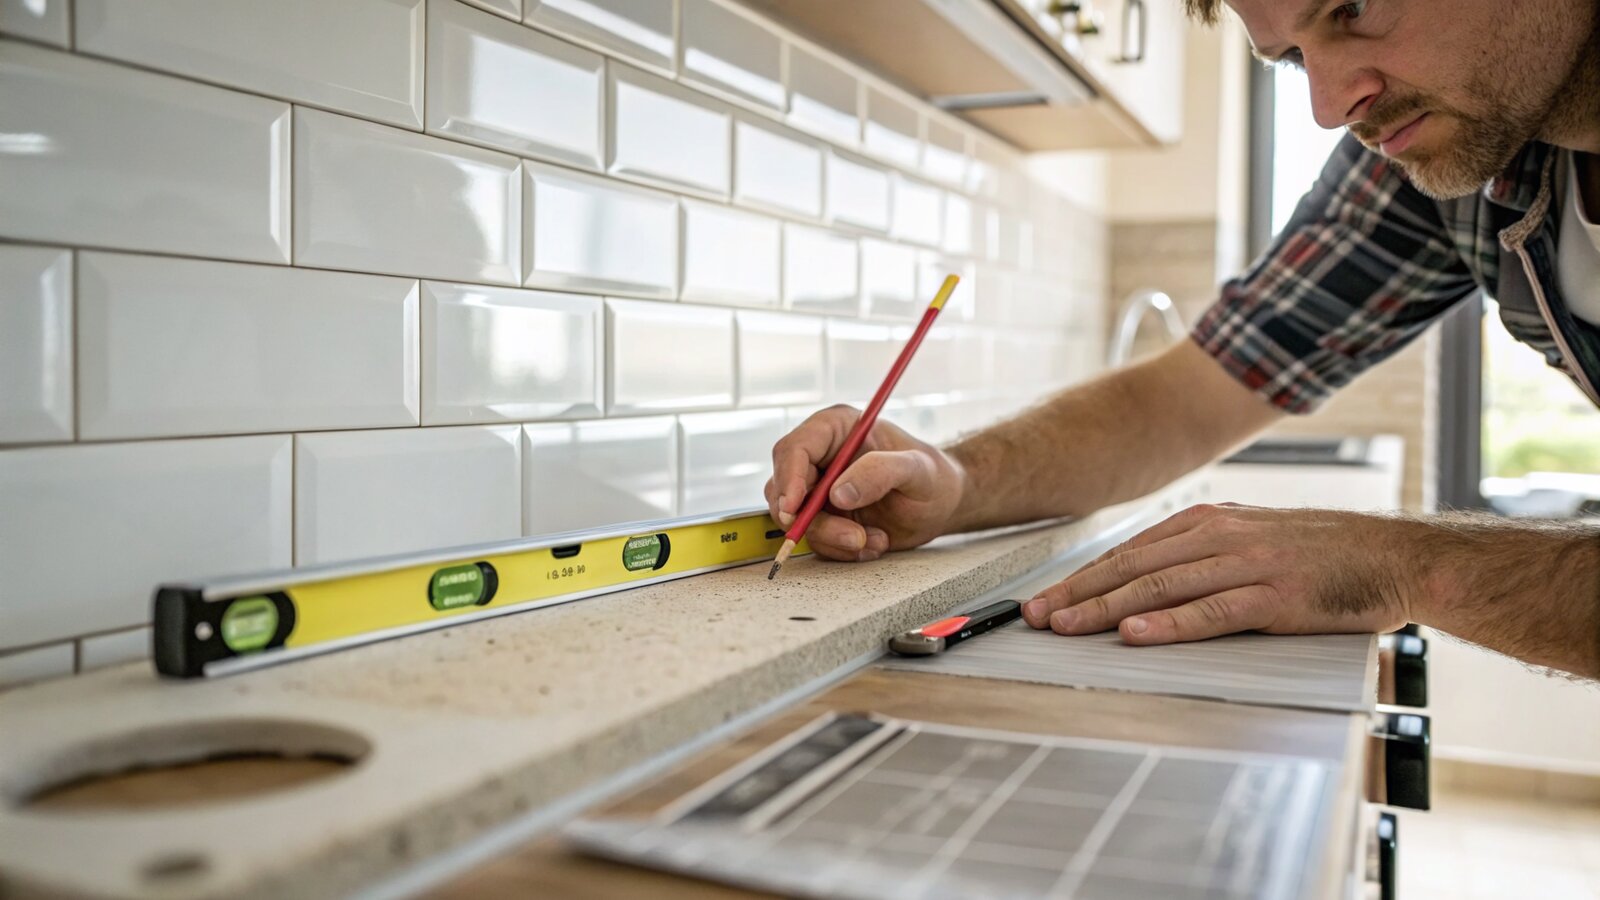
The aim is to avoid a thin sliver of tile at one end or against a wall return, which looks awkward and is hard to cut. Shift your starting line left or right until the end cuts are roughly even and at least half a tile wide. If the worktop is not level, work to a level horizontal pencil line rather than the worktop itself, and cut the bottom row of tiles to follow the worktop afterwards. Plan to start tiling from the bottom and build upward so each row supports the one above.
Step 3: Apply adhesive and lay the tiles
Spread adhesive onto the wall with the flat edge of the trowel, then comb through it with the notched edge held at about 45 degrees to leave even ridges. Cover only the area you can tile before the adhesive starts to skin over, usually about half a square metre at a time. Press each tile firmly into the bed with a slight twist, push spacers into the joints, and check across several tiles with the spirit level as you go. If a tile sits proud, lift it and scrape a little adhesive off rather than forcing the others to match.
Mosaic sheets go up the same way: line up the sheet edges so the joints stay consistent, and adjust the small tiles at the seams by hand before the adhesive grabs. Keep a damp sponge handy and wipe any adhesive out of the joint faces straight away, because dried adhesive in a joint stops the grout sitting flush.
Step 4: Cut around sockets safely
Behind a worktop you will almost always meet a double socket, and this is where care pays off. With the circuit isolated and tested dead, unscrew the faceplate and let it hang forward on its cables so you can tile right up to and slightly behind the metal back box. Measure the cut-out you need, transfer it to the tile, and remove the waste with nippers or a wet cutter, leaving a small clearance around the box rather than a tight fit. A tile clamped hard against a back box can crack later as the building moves.
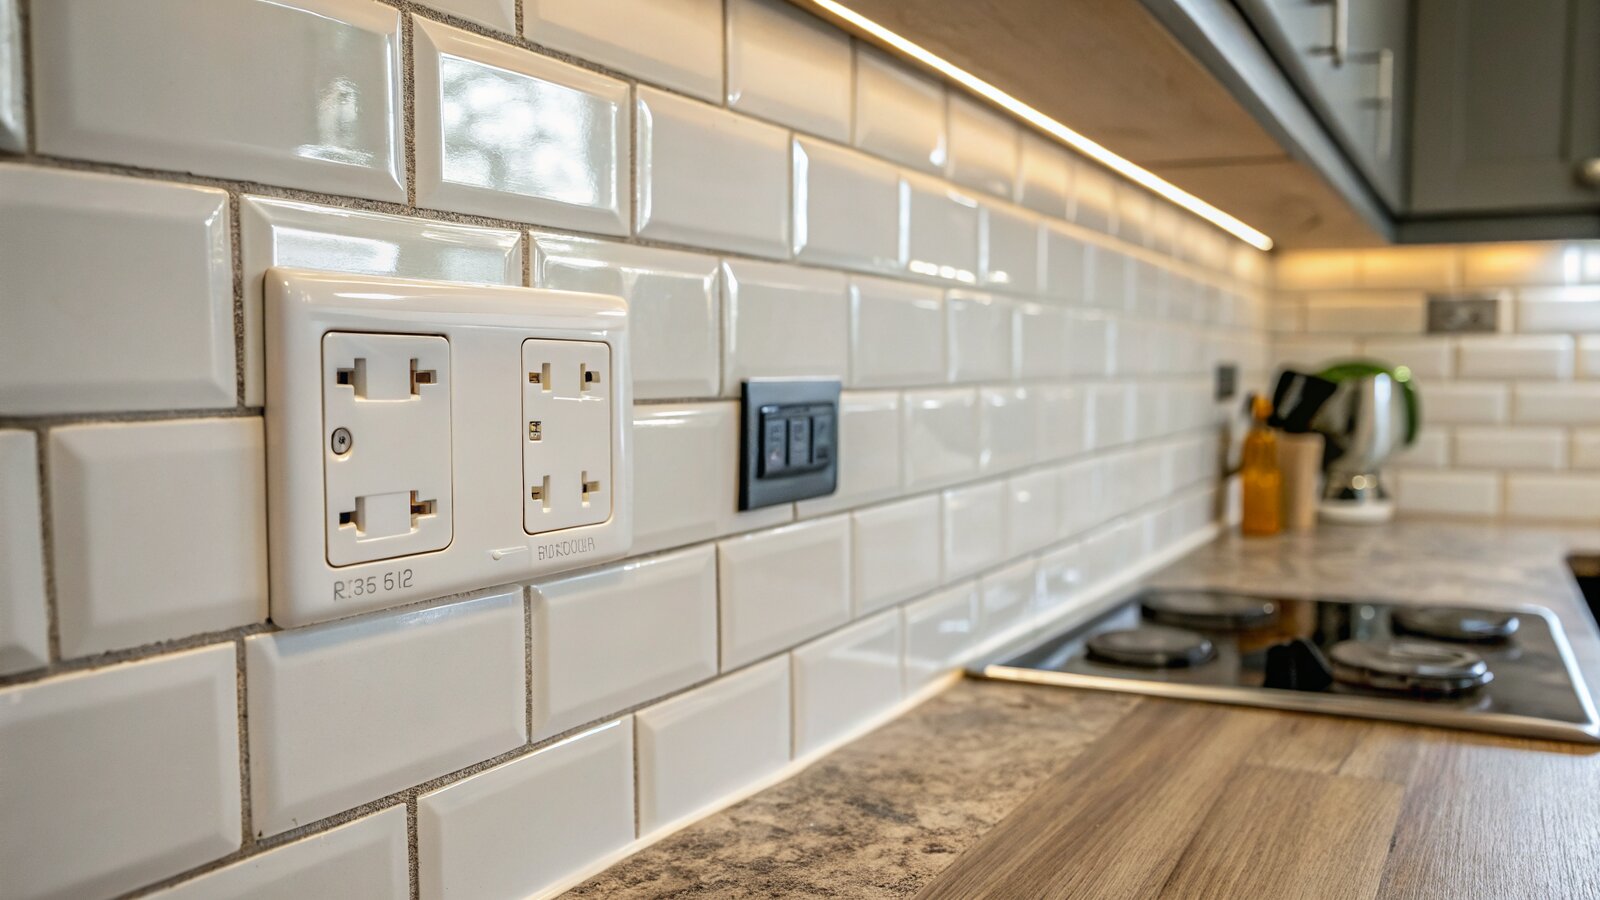
When the tiling is done, the faceplate screws back on over the tile edges and hides the cut. If the tiles add depth, your electrician may need slightly longer screws or socket-box spacers so the faceplate sits flush and safe. Reconnecting or moving sockets is electrical work. New circuits and work in certain locations can be notifiable under the Building Regulations, and Approved Document P covers who may carry it out and when it must be certified. The Planning Portal guidance on Part P explains the rules; if you are doing anything more than refitting an existing faceplate, use a registered electrician.
Step 5: Grout the joints
Leave the adhesive to cure fully, normally around 24 hours, before grouting. Mix the grout to a smooth, firm paste, or open your ready-mixed tub, and work it into the joints with the float held at roughly 45 degrees so it packs the gaps rather than skating over them. Cover a manageable area, then wait about ten minutes for the grout to firm up.
Wipe the faces clean with a damp, not soaking, sponge, rinsing often and changing the water as it clouds. Drag the sponge diagonally across the tiles so you do not pull grout back out of the joints. Once the surface dries it leaves a light haze; buff that off with a dry cloth an hour or so later. Do not grout the bottom join where the tiles meet the worktop. That join needs to flex, so it gets silicone, not grout.
Step 6: Seal the worktop join
The line where the splashback meets the worktop, and any internal corner, is a movement joint. Grout there will crack and let water behind the tiles, so fill it with a neutral-cure silicone instead. Run masking tape along the tile edge and the worktop edge to give a crisp line, gun a steady bead into the gap, then smooth it once with a wetted finger or a silicone tool. Pull the tape away before the silicone skins over, and leave it to cure before getting it wet. A clean silicone bead here is what keeps water out of the worktop and the cabinet below, so it is worth taking your time.
When to call a professional tiler
Plenty of Bromley homeowners tile a simple ceramic or mosaic splashback themselves and get a good result. There are jobs where a professional is the better call. Large-format porcelain, natural stone such as marble, and metro tiles laid in a precise brick or herringbone pattern all punish small setting-out errors, and stone often needs sealing and specific adhesives. Walls that are out of square, runs with several windows, returns or under-cabinet lighting, and anything involving moving sockets or a hob splashback that must meet heat and safety requirements are all easier and safer in experienced hands.
A professional also brings a wet cutter for clean curved cuts and the judgement to set out an awkward room so the cuts land in the right places. If you would rather have it done once and done properly, you can talk to a local tiler through Bromley Tilers for a splashback or a full kitchen. For a straightforward splashback you are confident about, the steps above will get you there.
Frequently asked questions
Can I tile a splashback over existing tiles?
You can, if the existing tiles are firmly stuck, clean and flat. Key the surface by sanding the glaze and use a flexible adhesive and primer suited to tiling over tiles. If any tiles are loose or drummy when tapped, it is better to strip them back to a sound wall first, because new tiles are only as secure as what is under them.
How long should I leave adhesive before grouting?
Follow the adhesive instructions, but around 24 hours is normal for the adhesive to cure before you grout. Ready-mixed pastes on a thin splashback can take longer in a cold or poorly ventilated kitchen. Grouting too soon can pull tiles out of line, so it is worth waiting.
What adhesive is best for a kitchen splashback?
For small ceramic or glass tiles on sound plaster, a ready-mixed tub adhesive is convenient and strong enough. For porcelain, larger tiles, or tiling onto plasterboard or over existing tiles, use a flexible powdered adhesive, which copes better with the small amount of movement a wall sees. Check the maximum tile weight the background can carry.
Do I need to seal a kitchen splashback?
Ceramic and porcelain tiles do not need sealing, but the grout and the silicone join do the waterproofing, so make sure both are sound. Natural stone tiles such as marble or slate should be sealed with a stone sealer before and after grouting to stop staining from cooking splashes.
Is tiling around a socket safe to do myself?
Cutting the tiles to fit and refitting an existing faceplate over them is within reach of a careful DIYer, provided you isolate and test the circuit first. Anything that involves moving a socket, adding a new one, or new wiring is electrical work that can fall under Approved Document P, and that should be done by a registered electrician.
How many tiles should I buy?
Measure the area in square metres and add about 10 to 15 percent for cuts, breakages and future repairs. Patterns like herringbone or diagonal layouts waste more in cuts, so lean towards the higher figure. Keep a few spare tiles after the job in case one ever needs replacing, since tile batches and colours change over time.
Related guides
- How to Tile a Bathroom Wall: A UK Step-by-Step Guide
- How Much Does Tiling Cost in the UK? A Realistic Price Guide
- How to Remove Old Wall Tiles Without Damaging the Wall
- Porcelain vs Ceramic Tiles: Which Is Right for Your Bathroom or Kitchen?
- How to Tank and Waterproof a Wet Room Before Tiling: A Bromley Homeowner’s Guide
- Do You Need to Seal Natural Stone Tiles Before Grouting? A Tiler Explains
- How to Tile a Bathroom Floor (Including Around the Toilet)
- How to Tile a Shower: Walls, Niche and Waterproofing
- Construction Trade News: June 2026
- Bathroom Tiling Guide: How to Plan, Prep and Finish a Lasting Job
- Tile Backer Board vs Plasterboard for Bathrooms
- Best Tiles for Small Bathrooms (and How to Make a Space Look Bigger)
- Wall and Floor Tiles for a Wet Room: What Actually Works
- Tiling vs Wall Panels for a Bathroom: Which Is Better?
- Do You Tile the Floor or Walls First in a Bathroom?
- Tiling and Bathroom Trade News: Mid-June 2026
- Kitchen Tiling: Splashbacks, Walls and Floors Explained
- How to Tile Around Kitchen Sockets, Switches and Worktops
- Kitchen Splashback Tile Ideas: 12 Looks That Work
- Tiling and Bathroom Trade News: Late June 2026
- How to Lay Metro Tiles in a Herringbone Pattern
- Tiled vs Glass Splashback (and Acrylic): Which Is Best?
- How High Should a Kitchen Splashback Be Tiled? UK Heights Guide
- Tiling and Bathroom Trade News: Early July 2026
- Types of Tiles: The Complete UK Buyer’s Guide
- Porcelain vs Natural Stone Tiles: Which Should You Choose?
- Natural Stone Tiles Explained: Marble, Travertine, Slate and Limestone
- Tiling and Bathroom Trade News: Mid-July 2026
- Mosaic Tiles: Where to Use Them and How They’re Fixed
- Tile Slip Ratings Explained: R Ratings and PTV for UK Floors
- Matt vs Gloss Tiles: Which Finish Is Right for Your Room?
- Cost to Tile a Bathroom in the UK: 2026 Price Breakdown
- Polystyrene Ceiling Tiles: Are They Any Good?
- Cost to Tile a Kitchen in 2026: Floor and Splashback Prices
- Tiling and Bathroom Trade News: Mid-July 2026
- Tiling Cost Per Square Metre 2026: Labour and All-In Prices