


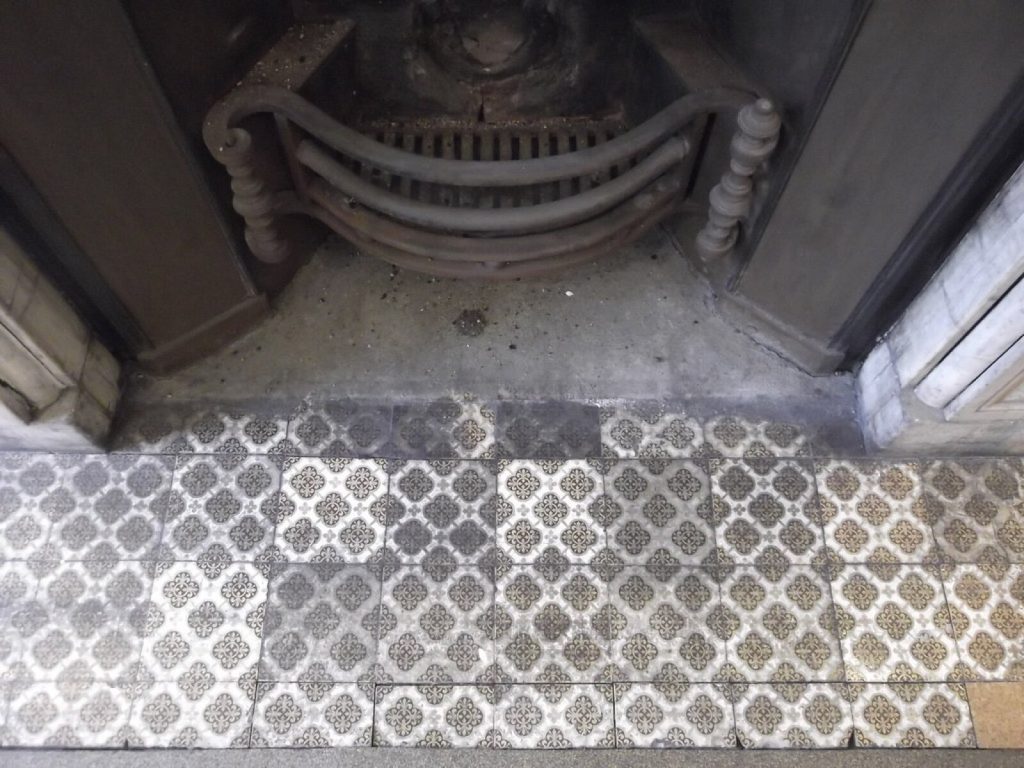
Tiling the fireplace is two different jobs that often get treated as one. The decorative part, the slips and tiles around the opening, is ordinary tiling done with heat in mind. The hearth under the fire is a fire-safety component with minimum sizes set by Building Regulations, and a thin layer of pretty tiles on a timber floor does not meet them. This page covers both: which tiles cope with heat, which adhesive and grout to use, the hearth dimensions in Approved Document J, and the order we tile a surround in on period homes across Bromley and South East London.
Surround, hearth or firebox: know which part you are tiling
A fireplace has three zones, and each takes a different approach.
- The surround is the wall face around the opening, including the slips either side and the panel above. It gets warm but not hot, and most wall tiling methods work here with the right adhesive.
- The hearth is the floor slab in front of and under the fire. It takes the most heat, falling embers and the weight of a stove. Its thickness and size are regulated.
- The firebox is the inside of the opening where the fuel burns. Do not tile it. It should be lined with firebricks or fireplace lining components, which Approved Document J names as the suitable protection for a recess.
If the fireplace is decorative only, with no working fire or stove, you are free to tile it like any feature wall. The regulations below apply once you burn anything in it.
Hearth sizes and Building Regulations
The rules for solid fuel fires and stoves up to 50kW are in Approved Document J, the government’s guidance on combustion appliances. The figures below come from its hearth section (paragraphs 2.22 to 2.28 and Diagrams 24 to 26).
Constructional hearth
- Thickness: at least 125mm of solid non-combustible material such as concrete or masonry. The thickness of any non-combustible floor finish or decorative surface counts towards that 125mm, so your tiles and adhesive bed are part of it.
- In a fireplace recess: the hearth projects at least 500mm in front of the jambs and at least 150mm beyond each side of the opening.
- Free-standing stove: a hearth at least 840mm by 840mm.
- Timber underneath: no combustible material below the hearth unless there is at least a 50mm air gap under it, or the combustible material is at least 250mm below the top of the hearth.
The clear zone around the appliance
The hearth surface around the fire must be free of combustible material: at least 225mm in front of a closed stove, and at least 300mm for an open fire or a stove that can be used with its door open. It should extend at least 150mm to each side. Approved Document J asks for the edge of that zone to be clearly marked so nobody lays carpet or a wooden floor up to the fire, and suggests a change in level as a way to do it. A raised superimposed hearth of tiles or a stone slab does exactly that.
These clearances can be reduced to the manufacturer’s figures only for appliances whose surfaces stay at or below 85°C in normal use. A lighter hearth of non-combustible board or tiles at least 12mm thick is allowed only under an appliance that has been tested to show it cannot heat the hearth surface above 100°C, and that does not stand in a recess. Check the stove’s installation manual before assuming either applies.
Installing a stove is notifiable
Fitting a new or replacement stove is building work. It needs either a building control application or an installer registered with a competent person scheme such as HETAS, who self-certifies it. Approved Document J also requires a carbon monoxide alarm in the same room when a new or replacement fixed solid fuel appliance goes in. Tiling a hearth before the installer has checked the base can mean lifting it again, so get the hearth signed off first.
In Bromley, check the fuel as well as the fireplace: Bromley Council says its smoke control area covers the entire borough apart from parts of Darwin and Chelsfield and Pratts Bottom wards. There, wood can only be burnt on an exempt appliance.
Which tiles work on a fireplace
Heat and knocks from fire tools are the two tests. These materials pass both:
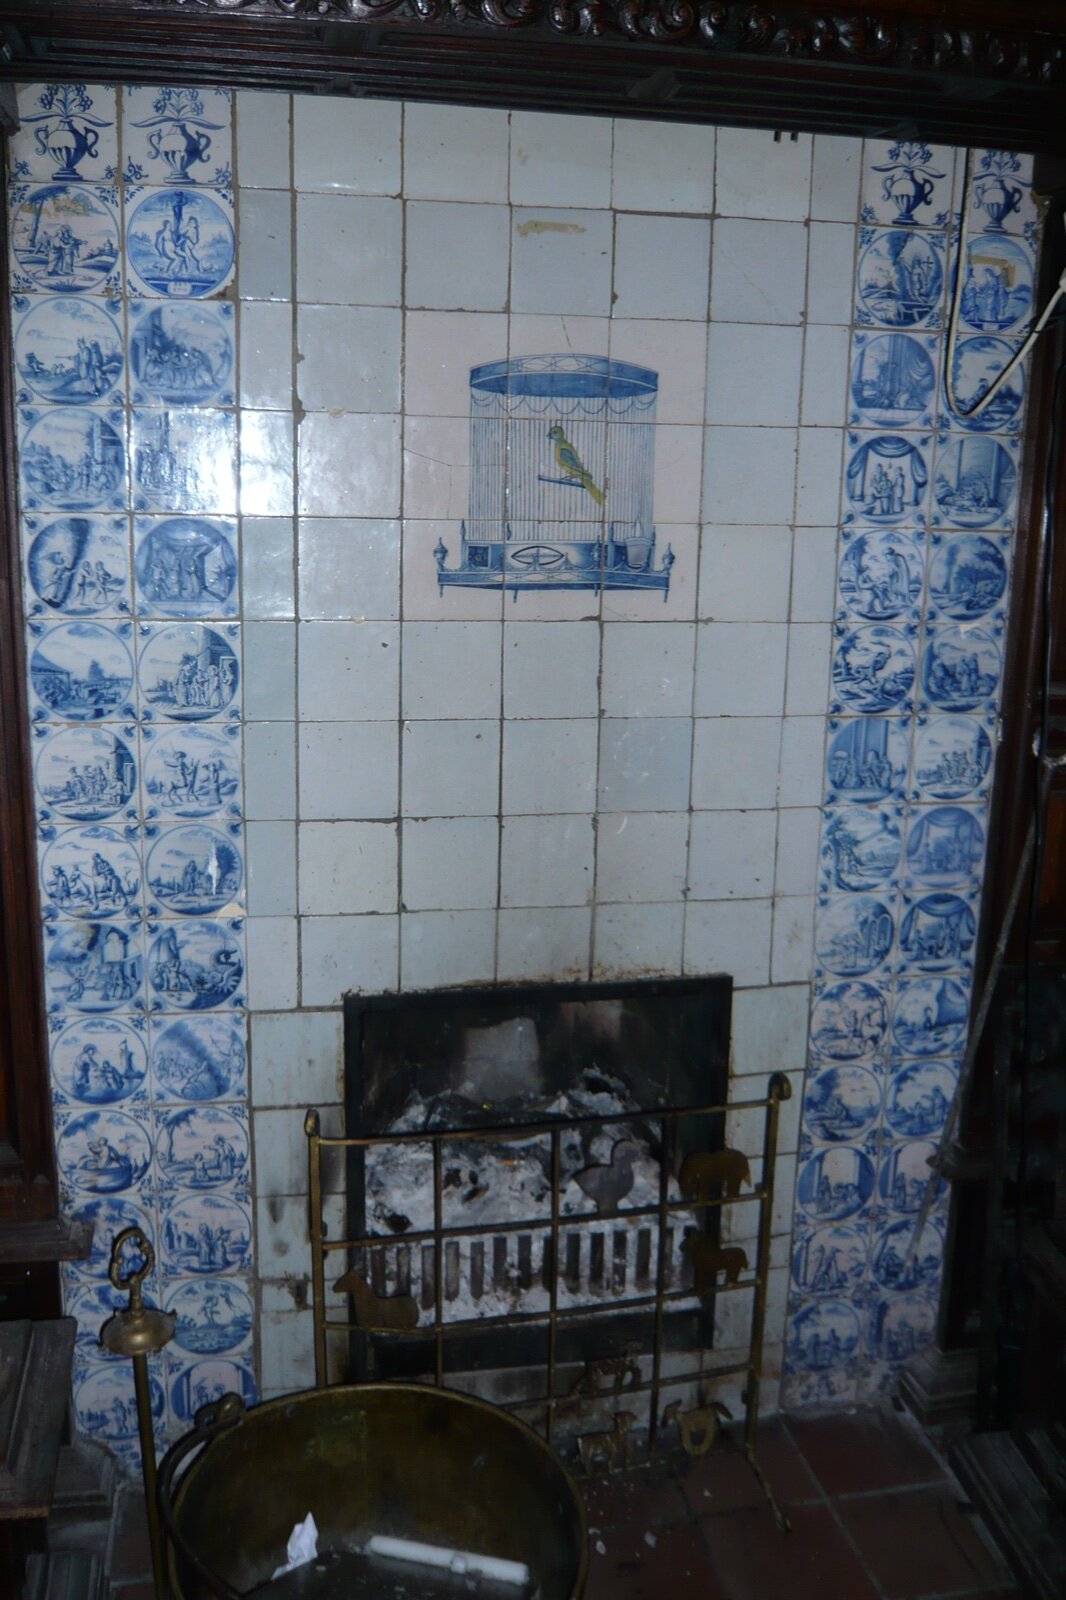
- Porcelain is dense, takes heat well and is the easiest choice for a hearth. Matt or textured finishes hide ash better than polished.
- Glazed ceramic and encaustic-style patterned tiles suit the surround and the slips beside a Victorian cast iron insert, which is the original look in many Bromley and Beckenham terraces.
- Slate and granite make a hard-wearing hearth. Slate should be sealed so soot and ash wash off.
- Brick slips give a rustic surround and cope with the heat of a chimney breast.
Be careful with limestone, marble and travertine on a hearth in front of a stove door: they are softer, can mark from falling embers and need sealing. Avoid glass mosaic, vinyl, and peel-and-stick tiles anywhere near the opening. Cheap wall tiles with a soft body can craze or crack from repeated heating and cooling.
Adhesive, grout and movement
A fireplace heats and cools every time you use it, and the adhesive has to move with that.
- Adhesive: use a cement-based, flexible adhesive (class C2, with an S1 deformability rating, under BS EN 12004). Read the data sheet and confirm the maker rates it for heated surfaces or fireplaces. Ready-mixed tub adhesives are the wrong choice here.
- Solid bed: back-butter each tile and aim for full coverage with no hollows. Air pockets under a hearth tile become cracks after a few heating cycles.
- Grout: a cementitious flexible grout. Dark grey or charcoal hides soot far better than white.
- Movement joint: leave a gap where the hearth meets the wall and where tiles meet a cast iron insert, and fill it with a heat-resistant sealant rather than grout. Metal and tile expand at different rates.
If the fire has been lit recently, let the chimney breast cool fully. Tiling onto warm masonry makes adhesive skin over before the tile is bedded.
How to tile a fireplace surround, step by step
- Check the substrate. Tile onto sound masonry, render or cement board. Remove loose plaster, and do not use plasterboard directly beside a working fire. Scrape and degrease old painted surfaces.
- Prime. Porous brick and render need a primer so they do not pull water out of the adhesive too fast.
- Set out from the centre of the opening. Mark a centre line and dry-lay the tiles so the cuts either side are equal. Symmetry matters more on a fireplace than almost anywhere else in a room.
- Support the first row. Screw a timber batten level across the wall to carry the tiles above the opening, and fill the bottom row last once the adhesive has set.
- Tile the slips and panel. Use spacers and check level every row. Cut tiles with a wet saw for clean edges around a cast iron insert.
- Tile the hearth last. Lay onto the cured constructional hearth, falling very slightly away from the fire so ash and water do not pool against it.
- Grout and seal. Grout after the adhesive’s stated setting time, then seal natural stone or slate.
- Wait before lighting. Leave the adhesive and grout to cure fully to the manufacturer’s time before the first fire, then run the first few fires small.
When to call a tiler (and a HETAS installer)
A decorative surround is a fair DIY job if you are confident with setting out. Get help if the hearth needs rebuilding to 125mm, if old tiles are lifting because the base underneath is failing, or if you are matching original Victorian encaustic tiles and need replacements cut in. Stove installation belongs to a registered installer. We tile the surround and hearth once the installer has confirmed the base.
Frequently asked questions
Can you tile directly around a fireplace?
Yes, on sound masonry, render or cement board, with a flexible cement-based adhesive rated for heat. Do not tile inside the firebox itself; that should be lined with firebricks or fireplace lining components.
How thick does a fireplace hearth need to be?
Approved Document J says a constructional hearth for a solid fuel fire or stove should be at least 125mm of solid non-combustible material, including any tiles or decorative surface on top.
How far should a hearth come out from a fireplace?
For a fire in a recess, at least 500mm in front of the jambs and 150mm beyond each side. For a free-standing stove, the hearth should be at least 840mm by 840mm.
What tiles are heat resistant for a fireplace?
Porcelain, glazed ceramic, slate, granite and brick slips all cope well. Avoid glass mosaic, vinyl and stick-on tiles near the opening, and seal softer natural stone.
What grout colour is best for a fireplace?
Dark grey or charcoal. Soot and ash stain pale grout quickly, and a darker flexible cementitious grout stays looking clean for longer.
Do I need Building Regulations approval to tile a fireplace?
Tiling a decorative surround does not need approval. Installing a new stove does, through building control or a HETAS-registered installer, and the hearth must meet Approved Document J.
For fireplace, hearth and period tiling across Bromley and South East London, see our work on the Bromley Tilers homepage.
Related guides
- How to Tile a Bathroom Wall: A UK Step-by-Step Guide
- How Much Does Tiling Cost in the UK? A Realistic Price Guide
- How to Remove Old Wall Tiles Without Damaging the Wall
- Porcelain vs Ceramic Tiles: Which Is Right for Your Bathroom or Kitchen?
- How to Tank and Waterproof a Wet Room Before Tiling: A Bromley Homeowner’s Guide
- Do You Need to Seal Natural Stone Tiles Before Grouting? A Tiler Explains
- How to Tile a Bathroom Floor (Including Around the Toilet)
- How to Tile a Shower: Walls, Niche and Waterproofing
- Construction Trade News: June 2026
- Bathroom Tiling Guide: How to Plan, Prep and Finish a Lasting Job
- Tile Backer Board vs Plasterboard for Bathrooms
- Best Tiles for Small Bathrooms (and How to Make a Space Look Bigger)
- Wall and Floor Tiles for a Wet Room: What Actually Works
- Tiling vs Wall Panels for a Bathroom: Which Is Better?
- Do You Tile the Floor or Walls First in a Bathroom?
- Tiling and Bathroom Trade News: Mid-June 2026
- Kitchen Tiling: Splashbacks, Walls and Floors Explained
- How to Tile a Kitchen Splashback: Step-by-Step Bromley Guide
- How to Tile Around Kitchen Sockets, Switches and Worktops
- Kitchen Splashback Tile Ideas: 12 Looks That Work
- Tiling and Bathroom Trade News: Late June 2026
- How to Lay Metro Tiles in a Herringbone Pattern
- Tiled vs Glass Splashback (and Acrylic): Which Is Best?
- How High Should a Kitchen Splashback Be Tiled? UK Heights Guide
- Tiling and Bathroom Trade News: Early July 2026
- Types of Tiles: The Complete UK Buyer’s Guide
- Porcelain vs Natural Stone Tiles: Which Should You Choose?
- Natural Stone Tiles Explained: Marble, Travertine, Slate and Limestone
- Tiling and Bathroom Trade News: Mid-July 2026
- Mosaic Tiles: Where to Use Them and How They’re Fixed
- Tile Slip Ratings Explained: R Ratings and PTV for UK Floors
- Matt vs Gloss Tiles: Which Finish Is Right for Your Room?
- Cost to Tile a Bathroom in the UK: 2026 Price Breakdown
- Polystyrene Ceiling Tiles: Are They Any Good?
- Cost to Tile a Kitchen in 2026: Floor and Splashback Prices
- Tiling and Bathroom Trade News: Mid-July 2026
- Tiling Cost Per Square Metre 2026: Labour and All-In Prices
- Tiler Day Rate UK: What Tilers Charge Per Day in 2026
- Cost to Regrout a Bathroom in 2026: UK Prices Explained
- Floor Tile Prices UK 2026: What You Will Pay Per Square Metre
- Is It Cheaper to Tile or Use Wall Panels? A UK Cost Comparison
- How to Tile: A Complete Beginner’s Guide (UK)
- How to Cut Tiles: Manual Cutter, Wet Saw and Nippers
- How to Cut Holes in Tiles for Pipes and Taps
- How to Grout Tiles (and Get Clean, Even Lines)
- Cork Flooring: Pros, Cons and Where It Works in UK Homes
- Tiling and Bathroom Trade News: Late July 2026
- How to Mix and Apply Tile Adhesive Correctly
- How to Set Out Tiles for a Perfect Layout
- How to Seal Grout and Tiles in a Bathroom (UK Guide)
- Can You Tile Over Tiles? When It Works and When It Doesn’t
- Tiling Tools List: What You Need for a Professional Finish
- How Much Tile Adhesive Do I Need? Coverage Per Square Metre
- Tiling Trade News: Topps App, Costs Up 6% (Aug 2026)
- Tile Problems: 9 Common Faults and How to Fix Each
- How to Fix Loose Tiles Without Removing Them
- Cracked Grout Repair: Why It Happens and How to Fix It
- Tiling Trade News: TTA Silica Warning, 2% Retentions
- How to Replace a Broken Tile Without Redoing the Wall
- Water Leaking Through Shower Tiles: 6 Causes and Fixes
- Remove Mouldy Silicone Sealant: A 24-Hour Reseal Job
- How to Clean Grout: What Works, and What Etches Stone
- Why Are My Floor Tiles Lifting? The 40m² Bay Rule
- Tiling Trade News: 3,841 Construction Firms Failed
- How to Lay Porcelain Paving: 1:80 Fall, 150mm Below DPC
- Tile Patterns: Why Big Tiles Need a One-Third Offset
- Grout Colour Ideas: How to Get the Shade You Chose
- Can You Paint Tiles? Yes on Walls, No in the Shower
- Decoupling Membrane for Tiles: When You Actually Need One
- Can You Tile Over a Wooden Floor? What Changed in 2024
- Tiling Cost 2026: £25 to £95 per m² Labour, UK Rates
- Tile Ideas: 7 Looks and the One Rule Each Needs
- Metro Tiles: Sizes, Bevels and the 1/3 Offset Rule
- Tile Feature Wall: The Weight Limit That Decides Yours
- Tiling Over Underfloor Heating: 14 Days Before Heat On
- How to Tile a Hallway Floor: Set Out From the Door
- Wood Effect Tiles and Marble Effect: 5 Specs to Check
- Tile Levelling Systems: The 3mm Rule That Decides It
- Tiling Trade News: Repair Work Up 1.7%, Headlam Fails
- Floor Levelling Compound: How Deep and How Long to Dry
- How to Find a Good Tiler: 9 Checks Before You Book
- Tiling Quote: The 10 Lines a Proper One Must Show
- Tile Trim: Sizes, Profiles and the One-Size-Up Rule
- Tile Spacers: 2mm or 3mm, and When to Pull Them Out
- Tiling Trade News: Shaws Sinks Reprice on 1 November
- Porcelain vs Stone Paving: Grip, Sealing and Upkeep
- Tiling a Large Floor: Movement Joints Every 10 Metres