


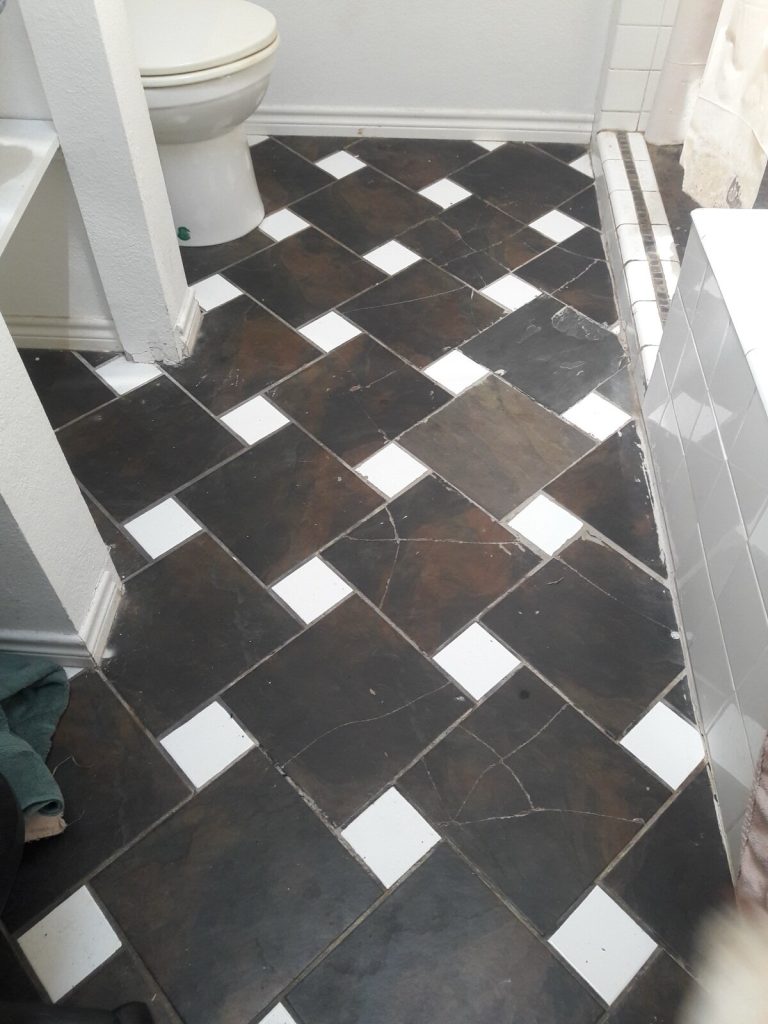
Why are my floor tiles lifting? In almost every case the answer is the same: the floor moved, and the movement had nowhere to go. Tiles are rigid. Everything underneath them is not. Concrete shrinks as it dries, screeds and timber swell and shrink with moisture, and anything with heating in it expands a little every time it warms up. Squeeze that movement between four walls with no gap to absorb it and the energy has to come out somewhere. It comes out as a ridge of tiles arching off the floor, a row springing loose along one wall, or grout turning to powder.
That matters because the repair depends entirely on which cause you are dealing with. Re-bedding the tiles that popped will not help if the reason they popped is still there. Below are the six causes we see on Bromley floors, in rough order of how often they turn out to be the real one, and how to tell them apart.
What “lifting” actually means
Three different faults get described as lifting, and they point in different directions.
- Tenting or arching. A line of tiles rises off the floor into a ridge, sometimes with a bang. This is compression. The floor grew, had nowhere to expand, and the tiles took the path of least resistance: upwards.
- Debonding. Individual tiles come away cleanly from the bed, often with adhesive still stuck to the substrate rather than to the tile. This is an adhesion problem, not a compression one.
- Drummy or hollow tiles. The tile is still down but sounds hollow when tapped. There are voids under it. It has not lifted yet, but it is the most likely candidate to go next.
Tap across the floor with a screwdriver handle before you do anything else. The change in note between solid and hollow is obvious once you have heard it, and mapping the hollow areas tells you more than the tiles that already failed.
Cause one: no movement joints, or not enough of them
This is the big one, and it is the cause of most tenting. The Tile Association’s guidance in Tile It Right is specific: movement joints are needed around the perimeter of a floor and wherever tiling meets walls, columns, kerbs and steps, and on large floor areas the tiling should be divided into bays not exceeding 40 square metres. The recommended minimum joint width is 6mm.
The perimeter joint is the one that gets missed most often, because it is invisible when the job is finished. It should be a genuine gap, filled with sealant or a proprietary profile and covered by the skirting, not a bead of grout run tight up to the wall. Grout is rigid. A grouted perimeter is the same as no perimeter joint at all.
There is one useful exception in the same guidance: floors less than 2 metres between walls do not normally need movement joints, except where there is under tile heating. So a small cloakroom or a narrow en suite is unlikely to tent for this reason. An open plan kitchen diner running 9 metres from the back door to the hall very much is.
The tell is the pattern. Compression failures usually appear as a ridge somewhere across the middle of the run, or as tiles lifting along the longest uninterrupted stretch. If the tiles that failed are in a line and the rest of the floor is solid, movement is your answer.
Cause two: the substrate was still wet when it was tiled
A drying screed or slab is still shrinking. Tile it too early and the tiles get carried along with that shrinkage until the bond gives up, usually within the first year.
The Tile Association’s technical guidance is that any screed containing Portland cement to BS EN 197-1:2011 must be allowed to cure for at least 7 days, by preventing the surface from drying too quickly, for example by covering with a polythene sheet, and then allowed to dry out for a further 2 weeks. New concrete gets a longer wait: at least six weeks old and thoroughly dry before floor tiles go down.
That wait is exactly what gets shortened on a job already running late. If your floor was tiled within days of the screed going in, and the failures are spread across the room rather than in a line, drying shrinkage is the likely explanation.
Cause three: underfloor heating that was never commissioned properly
Underfloor heating adds a movement cycle that the floor would not otherwise have, and it is the reason the 2 metre exception above stops applying. It also has a specific sequence that is easy to get wrong.
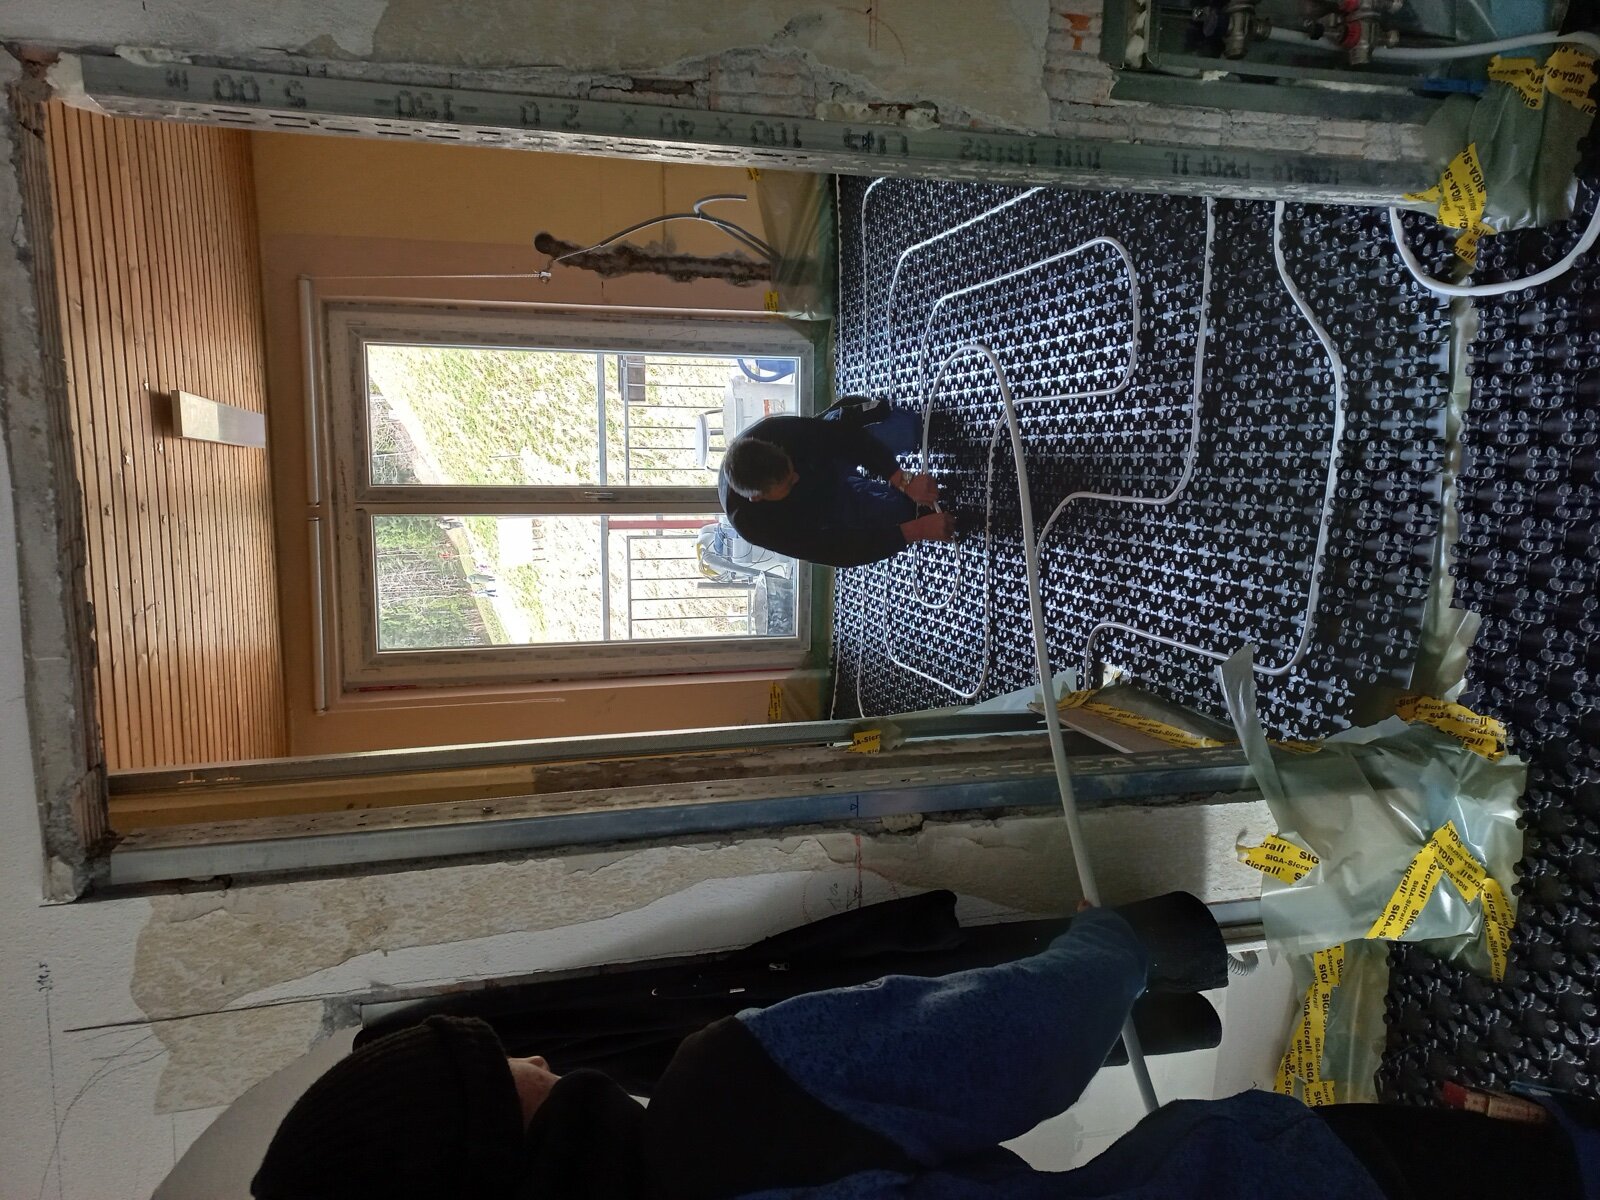
The Tile Association’s guidance is that the heating system should be commissioned following the manufacturer’s instructions both before and after tiling, and that the system must be turned off and cooled down to ambient temperature during the adhesive and grouting curing periods. Bringing the heat up while the adhesive is still curing is one of the reliable ways to produce a floor that debonds a season later.
Two other points from the same guidance are worth checking if you are having the job redone: electric under tile heating systems should be encapsulated before over tiling, using either a self levelling compound or a thin layer of tile adhesive, and the heating must be connected by a Part P competent electrician. Tiles then go down using the solid bed method with a category C2 adhesive.
Cause four: a timber floor that was tiled straight onto
Chipboard and floorboards move with humidity and flex underfoot. Tile adhesive does neither. Tiling directly onto boards without dealing with that is a common cause of tiles cracking along joist lines and lifting in the middle of a bay.
The Tile Association sets out three accepted approaches for tiling onto wooden floors, each using a category C2 adhesive:
- Overlay the existing timber with 15mm dry exterior grade plywood, sealed on the edges and back, fully screwed down at 300mm intervals, with all junctions supported by noggings or joists.
- Overlay with a proprietary uncoupling membrane.
- Overlay with a proprietary tile backer board, installed to the manufacturer’s instructions.
A CG2 grout is recommended with all three, and a water based polymer admixture in the grout improves flexibility on timber. If the floor still bounces when you walk across it, none of these will save it. The deflection has to be fixed at joist level first.
Cause five: voids under the tiles
A tile bedded on five dabs of adhesive is supported at five points and unsupported everywhere else. Drop something heavy, or stand a washing machine on it, and it cracks or breaks the bond. Floor tiles want a solid bed, applied with a slight twisting motion when the tile is laid to collapse the ridges and drive out voids.
This is the fault the tap test finds. Widespread hollowness across a floor that otherwise looks fine means the bedding was never right, and it will keep failing one tile at a time. It is also the case where the honest answer is usually to take the floor up rather than patch it.
Cause six: it was tiled over something unsound
Tiling over existing tiles is perfectly acceptable, but only if the original floor is sound. The Tile Association’s condition is that existing tiles must be sound, clean, grease free and firmly adhered to the subfloor, with priming where required and a category C2 adhesive. Tile over a floor that was already drummy and you have added weight to a failing bond. The same applies to old vinyl, paint and adhesive residue: if new tiles lift and bring the previous layer with them, the problem is two layers down.
How to work out which cause you have
Run through these in order. It takes about ten minutes.
- Look at the pattern. A ridge or a line of failures points to compression and missing movement joints. Scattered individual tiles point to bonding or voids. Cracks following joist lines point to a moving timber floor.
- Check the perimeter. Lift a length of skirting or beading. If the tiles are grouted tight to the wall with no gap, you have found a contributing cause whatever else is going on.
- Tap the whole floor. Map the hollow areas. If more than a small proportion sounds hollow, the bedding is the story.
- Ask when it was tiled, and onto what. Within a few weeks of a new screed, drying shrinkage is a live suspect. Heating, timber and old tiles each change the answer.
- Note the timing. Failures appearing in the first cold spell after the heating goes on, or the first hot spell of summer, are thermal movement almost by definition.
Can you fix it without redoing the whole floor?
Sometimes. If a single row has tented and the rest of the floor is solid, the usual repair is to take up the affected tiles and the two or three either side, cut a proper movement joint into the gap, and re-lay. That gives the floor somewhere to move next time, which is the part that actually fixes it. Simply re-bedding the same tiles in the same place puts them back under the same compression.
If the tap test says a large share of the floor is hollow, or the timber below is flexing, patching is money spent twice. So is re-laying over a screed that has not finished drying. Our guides to fixing loose tiles without removing them and the wider list of common tile faults and their fixes cover the repairs that are genuinely worth doing yourself. If you would rather have someone look at it, Bromley Tilers covers Bromley and south east London.
Where this guidance comes from
The figures above are taken from The Tile Association, the UK trade body for the tiling industry: its Tile It Right consumer guidance for movement joints, underfloor heating and substrate preparation, and its technical FAQs for screed curing and drying times. Where a manufacturer’s instructions are stricter than these, follow the manufacturer.
Frequently asked questions
Why are my floor tiles lifting in only one part of the room?
Usually because that is where the compression concentrated. The longest uninterrupted run of tiling, or the stretch nearest a heat source or a sunlit patio door, takes the most movement. It is also worth checking whether that part of the floor sits over a different substrate, such as a patched section of screed or a suspended timber bay next to a solid one.
Do I really need movement joints in a domestic floor?
In a large one, yes. The Tile Association’s guidance calls for joints around the perimeter and wherever tiling meets walls, columns, kerbs and steps, and for large floors to be divided into bays of no more than 40 square metres. Floors less than 2 metres between walls normally do not need them, unless there is under tile heating.
Can lifting tiles be caused by damp rather than movement?
Yes. Moisture rising through a slab with no working damp proof membrane will break a bond over time, and a screed tiled before it had dried does the same thing while it shrinks. If the failures are widespread and the underside of a lifted tile is damp or the adhesive is soft, treat moisture as the prime suspect and find the source before re-tiling.
How long should a screed dry before tiling?
For a screed containing Portland cement, The Tile Association’s guidance is at least 7 days of curing while stopping the surface drying too fast, then a further 2 weeks to dry out. New concrete should be at least six weeks old and thoroughly dry. Anhydrite and other calcium sulfate screeds have their own drying regime and moisture targets, so check the screed manufacturer’s figures rather than assuming.
Will underfloor heating always make tiles lift?
No. It adds a movement cycle, so the floor needs joints where a cold floor might not, and the commissioning sequence has to be followed: heat up before tiling, then off and cooled to ambient while the adhesive and grout cure, then brought back up gradually. Done that way, tiles over underfloor heating are a normal, long lasting floor.
Related guides
- How to Tile a Bathroom Wall: A UK Step-by-Step Guide
- How Much Does Tiling Cost in the UK? A Realistic Price Guide
- How to Remove Old Wall Tiles Without Damaging the Wall
- Porcelain vs Ceramic Tiles: Which Is Right for Your Bathroom or Kitchen?
- How to Tank and Waterproof a Wet Room Before Tiling: A Bromley Homeowner’s Guide
- Do You Need to Seal Natural Stone Tiles Before Grouting? A Tiler Explains
- How to Tile a Bathroom Floor (Including Around the Toilet)
- How to Tile a Shower: Walls, Niche and Waterproofing
- Construction Trade News: June 2026
- Bathroom Tiling Guide: How to Plan, Prep and Finish a Lasting Job
- Tile Backer Board vs Plasterboard for Bathrooms
- Best Tiles for Small Bathrooms (and How to Make a Space Look Bigger)
- Wall and Floor Tiles for a Wet Room: What Actually Works
- Tiling vs Wall Panels for a Bathroom: Which Is Better?
- Do You Tile the Floor or Walls First in a Bathroom?
- Tiling and Bathroom Trade News: Mid-June 2026
- Kitchen Tiling: Splashbacks, Walls and Floors Explained
- How to Tile a Kitchen Splashback: Step-by-Step Bromley Guide
- How to Tile Around Kitchen Sockets, Switches and Worktops
- Kitchen Splashback Tile Ideas: 12 Looks That Work
- Tiling and Bathroom Trade News: Late June 2026
- How to Lay Metro Tiles in a Herringbone Pattern
- Tiled vs Glass Splashback (and Acrylic): Which Is Best?
- How High Should a Kitchen Splashback Be Tiled? UK Heights Guide
- Tiling and Bathroom Trade News: Early July 2026
- Types of Tiles: The Complete UK Buyer’s Guide
- Porcelain vs Natural Stone Tiles: Which Should You Choose?
- Natural Stone Tiles Explained: Marble, Travertine, Slate and Limestone
- Tiling and Bathroom Trade News: Mid-July 2026
- Mosaic Tiles: Where to Use Them and How They’re Fixed
- Tile Slip Ratings Explained: R Ratings and PTV for UK Floors
- Matt vs Gloss Tiles: Which Finish Is Right for Your Room?
- Cost to Tile a Bathroom in the UK: 2026 Price Breakdown
- Polystyrene Ceiling Tiles: Are They Any Good?
- Cost to Tile a Kitchen in 2026: Floor and Splashback Prices
- Tiling and Bathroom Trade News: Mid-July 2026
- Tiling Cost Per Square Metre 2026: Labour and All-In Prices
- Tiler Day Rate UK: What Tilers Charge Per Day in 2026
- Cost to Regrout a Bathroom in 2026: UK Prices Explained
- Floor Tile Prices UK 2026: What You Will Pay Per Square Metre
- Is It Cheaper to Tile or Use Wall Panels? A UK Cost Comparison
- How to Tile: A Complete Beginner’s Guide (UK)
- How to Cut Tiles: Manual Cutter, Wet Saw and Nippers
- How to Cut Holes in Tiles for Pipes and Taps
- How to Grout Tiles (and Get Clean, Even Lines)
- Cork Flooring: Pros, Cons and Where It Works in UK Homes
- Tiling and Bathroom Trade News: Late July 2026
- How to Mix and Apply Tile Adhesive Correctly
- How to Set Out Tiles for a Perfect Layout
- How to Seal Grout and Tiles in a Bathroom (UK Guide)
- Can You Tile Over Tiles? When It Works and When It Doesn’t
- Tiling Tools List: What You Need for a Professional Finish
- How Much Tile Adhesive Do I Need? Coverage Per Square Metre
- Tiling Trade News: Topps App, Costs Up 6% (Aug 2026)
- Tile Problems: 9 Common Faults and How to Fix Each
- How to Fix Loose Tiles Without Removing Them
- Cracked Grout Repair: Why It Happens and How to Fix It
- Tiling Trade News: TTA Silica Warning, 2% Retentions
- How to Replace a Broken Tile Without Redoing the Wall
- Water Leaking Through Shower Tiles: 6 Causes and Fixes
- Remove Mouldy Silicone Sealant: A 24-Hour Reseal Job
- How to Clean Grout: What Works, and What Etches Stone
- Tiling Trade News: 3,841 Construction Firms Failed
- How to Lay Porcelain Paving: 1:80 Fall, 150mm Below DPC
- Tile Patterns: Why Big Tiles Need a One-Third Offset
- Grout Colour Ideas: How to Get the Shade You Chose
- Can You Paint Tiles? Yes on Walls, No in the Shower
- Decoupling Membrane for Tiles: When You Actually Need One
- Can You Tile Over a Wooden Floor? What Changed in 2024
- Tiling Cost 2026: £25 to £95 per m² Labour, UK Rates
- Tile Ideas: 7 Looks and the One Rule Each Needs
- Metro Tiles: Sizes, Bevels and the 1/3 Offset Rule
- Tile Feature Wall: The Weight Limit That Decides Yours
- Tiling Over Underfloor Heating: 14 Days Before Heat On
- How to Tile a Hallway Floor: Set Out From the Door
- Wood Effect Tiles and Marble Effect: 5 Specs to Check
- Tile Levelling Systems: The 3mm Rule That Decides It
- Tiling Trade News: Repair Work Up 1.7%, Headlam Fails
- Floor Levelling Compound: How Deep and How Long to Dry
- How to Find a Good Tiler: 9 Checks Before You Book
- Tiling Quote: The 10 Lines a Proper One Must Show
- Tile Trim: Sizes, Profiles and the One-Size-Up Rule
- Tile Spacers: 2mm or 3mm, and When to Pull Them Out
- Tiling the Fireplace: 125mm Hearths, Adhesive and Tiles
- Tiling Trade News: Shaws Sinks Reprice on 1 November
- Porcelain vs Stone Paving: Grip, Sealing and Upkeep
- Tiling a Large Floor: Movement Joints Every 10 Metres
- DIY Tiling vs Professional: 6 Jobs to Never Do Yourself
- Terracotta Tiles: Seal Before Grouting, Wait 7 Days
- Tile Drill Bits: Which Bit Won’t Crack Porcelain
- Tiling Corners With Trim: Which Profile, and When to Mitre
- Travertine Tiles: Filled or Unfilled, and How to Seal Them
- Slate Tiles: Calibrated or Riven, and How to Lay Them
- Zellige Tiles: Order 15% Extra and Fix Them Edge to Edge
- Terrazzo Tiles: Real 20mm vs Porcelain, Seal Before Grouting
- Tiling Trade News: 36% Now Add a Bathroom Accent Wall
- Split Face Tiles: Will Your Wall Take 27kg per m²?
- Tile Sealer: Which Tiles Need It and Which Type to Buy
- How to Remove Grout Haze: Which Cleaner for Which Grout
- Efflorescence on Tiles: Why It Comes Back and How to Stop It
- Tile Primer: Which Surfaces Need It and How Much to Dilute
- Epoxy Grout: Where It’s Worth It and How to Apply It
- How to Tile Stairs: Keep Every Riser the Same Height
- Shower Niche: Sizes, Height and Which Wall Can Take One
- How Many Tiles Do I Need? Add 10% to 20% by Layout
- How to Tile a Window Sill: Sill Last, Silicone at the Frame
- Tiling Trade News: Victorian Plumbing Tile Sales Up 76%
- How to Tile Around a Toilet: Lift the Pan or Cut Round It
- Tile to Carpet Transition: Pick the Strip by the Height Gap
- Tile Skirting: Leave a 6mm Gap and Seal, Never Grout
- Tile Backer Board: Cement or Foam, Which Thickness, Fixings
- Quarry Tiles: Seal Them or Not, and How to Clean Them
- Rapid Set Tile Adhesive vs Standard: 30 Mins or 24 Hours