



How to tile stairs comes down to one thing most guides skip: every tile you add to a tread raises it, and if you get the build-up wrong the top or bottom step ends up a different height from the rest. That odd step is what trips people. This page covers the height maths first, then the substrate, the order of work, the nosing and the tiles themselves, from the point of view of a tiler who has fixed plenty of stairs across Bromley and south east London.
Why the first and last steps catch people out
A staircase works because your feet learn the rhythm of the first two steps and expect the rest to match. Approved Document K, the government guidance on stairs and guarding, asks for the rise and going of each step to be consistent throughout a flight. For a private stair in a home it sets a maximum rise of 220mm, a maximum pitch of 42 degrees, and a normal relationship where twice the rise plus the going falls between 550mm and 700mm. You can read the full document on GOV.UK (Approved Document K).
Now add tiles. Say your tile plus adhesive bed comes to 12mm. Every tread goes up by 12mm, so the rises in the middle of the flight stay the same. The two ends do not:
- The bottom step gains 12mm, because the floor at the foot of the stair has not moved but the first tread has.
- The top step loses 12mm, because the last tread has risen but the landing has not.
The fix is to tile, or build up, the floor at the foot of the stair and the landing at the top with the same thickness, so the whole flight moves up together. If the bottom floor is staying as it is, you can sometimes take the difference out of the first tread instead, but on concrete that means grinding or a thinner bed, which is work for someone who has done it before. Measure every rise before you buy tiles, write them down, and work out the finished heights on paper. Existing stairs are rarely as even as they look.
Check what the stairs are made of
Tiles want a rigid base. How you prepare depends on the structure underneath.
Concrete and masonry steps
These are the best base for tiles, inside or out. New concrete needs to have cured fully before tiling, and most retailers advise waiting at least six weeks. Clean off dust, old paint and any loose render, fill hollows, and prime with the primer your adhesive maker specifies. Our page on tile primer covers which surfaces need it.
Timber staircases
A timber stair flexes as people use it, and tiles and grout do not. If you can feel any bounce in a tread, it is not ready for tiles. Stiffen the stair first, then overboard each tread and riser with exterior grade plywood, at least 15mm on treads, screwed down at close centres and sealed on the back and edges. Use a flexible (S1 classified) cement-based adhesive. Even then, a tiled timber stair is a compromise: if the treads are thin, or it is an old stair with years of movement in it, a different finish such as engineered wood or carpet is usually the safer choice.
Old finishes
Remove carpet grippers, staples, old vinyl and any tread covering back to a sound surface. Tiling over a soft or poorly bonded layer moves the weak point up into your new finish.
Choose a nosing before you choose tiles
The front edge of each tread takes most of the wear and is where a foot slips first. You have three sensible options.
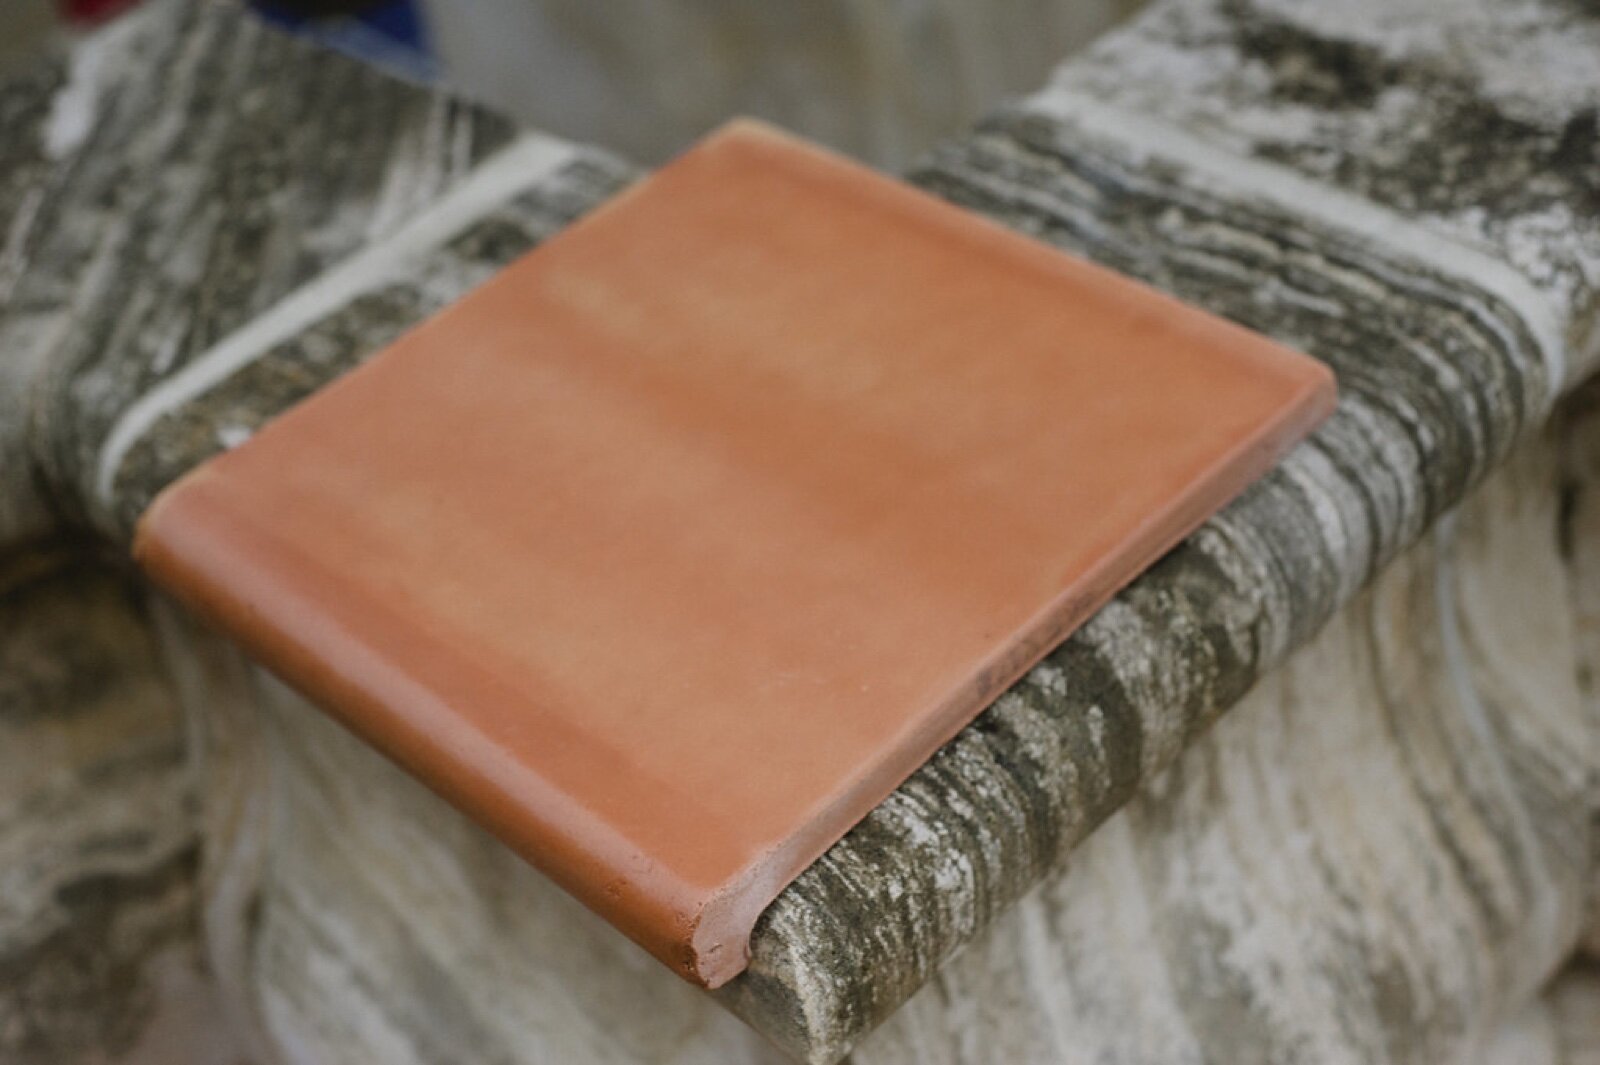
- Bullnose step tiles. Some ranges, especially terracotta and some porcelain, make a step tile with a rounded front edge moulded in. It gives a clean, one-piece look and there is no exposed cut edge.
- Metal stair nosing trims. Aluminium or stainless steel profiles bed into the adhesive under the tread tile and wrap the edge. Many have a ribbed or rubber anti-slip insert. Pick a profile made for the thickness of your tile, the same logic as our tile trim page.
- A plain tile with an overhang. The tread tile overhangs the riser tile slightly and the edge is left square or lightly arrised. It is the cheapest option and the least forgiving, because a sharp porcelain edge chips under heels.
Whatever you pick, a nosing in a contrasting colour makes the edge of each step easier to see, which helps anyone with poor eyesight and everyone in dim light.
Pick a tile that grips
A stair is the worst place in a house to put a slippery tile. In the UK, slip resistance is measured with the pendulum test, giving a Pendulum Test Value (PTV). The Health and Safety Executive and the UK Slip Resistance Group class a PTV of 36 or more as low slip potential, and that is the figure to look for in wet conditions on any external step or any internal stair near an entrance. The HSE slips guidance explains how the test works. Our page on tile slip ratings converts between PTV and the German R ratings you see on many boxes.
For outside steps, use a frost resistant porcelain with a textured or external finish, and make sure each tread is laid with a slight fall towards the front so rain runs off rather than sitting on it. Polished porcelain, gloss ceramic and polished marble do not belong on treads.
The order of work, step by step
- Measure every step individually. Treads and risers on the same stair often vary by a few millimetres. Number each one and record its width, depth and height.
- Dry lay. Set the tiles out on each tread without adhesive. Centre the pattern on the width of the stair so any cut pieces are equal at both ends, and keep grout lines on the treads aligned with those on the risers.
- Tile the risers first. Fix each riser tile so its top edge sits just below the tread line. The tread tile and nosing then sit over it and hide the cut edge.
- Tile the treads from the top down. Starting at the top means you never kneel on fresh work, and you finish at the bottom with a clear route out. If the stair has to stay in use, tile alternate treads one day and the rest the next.
- Get solid bedding. Back-butter each tread tile and comb the adhesive so there are no voids, especially at the front edge. A hollow under a nosing is the most common reason a tread tile cracks within the first year.
- Grout and seal. Leave the adhesive to set for the time on the bag before grouting. Use a flexible sealant, not grout, where the treads and risers meet the walls or the stringer, since those joints move.
- Keep off. Block the stair while it cures. Most cement-based adhesives allow light foot traffic after about 24 hours, but check the data sheet for the product you used.
When to bring in a tiler
Straight concrete steps to a back door are a reasonable weekend job for a confident DIYer. A few situations are worth handing over:
- Timber staircases, where the preparation decides whether the job lasts.
- Winders and curved stairs, where every tread is a different shape and the cutting is slow.
- Front steps and long external flights, where drainage, frost and the height rules all apply at once.
- Any stair where the finished heights do not work out evenly on paper.
If you are in Bromley or nearby and want a second opinion on your stairs, Bromley Tilers can look at the build-up and give you a fixed price.
Frequently asked questions
Can you tile wooden stairs?
Yes, but only once the stair is stiff. Strengthen any bouncy treads, overboard with exterior grade plywood at least 15mm thick, and use a flexible S1 adhesive. If the stair still moves, choose a different finish, because tiles and grout will crack.
Do you tile the riser or the tread first?
Riser first. The tread tile and its nosing then sit over the top edge of the riser tile, which hides the cut and gives a neater line.
What is the best tile for stairs?
A porcelain or terracotta tile with a pendulum test value of 36 or more in wet conditions, ideally with a matching bullnose step tile or a metal nosing. Outside, it must also be frost resistant.
Will tiling my stairs change the step heights?
It changes the first and last steps. The bottom step gets taller and the top step gets shorter by the thickness of tile plus adhesive, unless the floor at the bottom and the landing at the top are raised by the same amount.
Do tiled stairs need a nosing?
It is not compulsory in a home, but it is strongly advisable. The front edge takes the most wear and is where slips start, so a bullnose tile or an anti-slip metal nosing protects the tile and the person on it.
How long before you can walk on newly tiled stairs?
Most cement-based adhesives take light foot traffic after about 24 hours, with grouting done once the adhesive has set. Rapid set products are quicker. Always follow the data sheet for the adhesive you used.
Related guides
- How to Tile a Bathroom Wall: A UK Step-by-Step Guide
- How Much Does Tiling Cost in the UK? A Realistic Price Guide
- How to Remove Old Wall Tiles Without Damaging the Wall
- Porcelain vs Ceramic Tiles: Which Is Right for Your Bathroom or Kitchen?
- How to Tank and Waterproof a Wet Room Before Tiling: A Bromley Homeowner’s Guide
- Do You Need to Seal Natural Stone Tiles Before Grouting? A Tiler Explains
- How to Tile a Bathroom Floor (Including Around the Toilet)
- How to Tile a Shower: Walls, Niche and Waterproofing
- Bathroom Tiling Guide: How to Plan, Prep and Finish a Lasting Job
- Tile Backer Board vs Plasterboard for Bathrooms
- Best Tiles for Small Bathrooms (and How to Make a Space Look Bigger)
- Wall and Floor Tiles for a Wet Room: What Actually Works
- Tiling vs Wall Panels for a Bathroom: Which Is Better?
- Do You Tile the Floor or Walls First in a Bathroom?
- Kitchen Tiling: Splashbacks, Walls and Floors Explained
- How to Tile a Kitchen Splashback: Step-by-Step Bromley Guide
- How to Tile Around Kitchen Sockets, Switches and Worktops
- Kitchen Splashback Tile Ideas: 12 Looks That Work
- How to Lay Metro Tiles in a Herringbone Pattern
- Tiled vs Glass Splashback (and Acrylic): Which Is Best?
- How High Should a Kitchen Splashback Be Tiled? UK Heights Guide
- Types of Tiles: The Complete UK Buyer’s Guide
- Porcelain vs Natural Stone Tiles: Which Should You Choose?
- Natural Stone Tiles Explained: Marble, Travertine, Slate and Limestone
- Mosaic Tiles: Where to Use Them and How They’re Fixed
- Tile Slip Ratings Explained: R Ratings and PTV for UK Floors
- Matt vs Gloss Tiles: Which Finish Is Right for Your Room?
- Cost to Tile a Bathroom in the UK: 2026 Price Breakdown
- Polystyrene Ceiling Tiles: Are They Any Good?
- Cost to Tile a Kitchen in 2026: Floor and Splashback Prices
- Tiling Cost Per Square Metre 2026: Labour and All-In Prices
- Tiler Day Rate UK: What Tilers Charge Per Day in 2026
- Cost to Regrout a Bathroom in 2026: UK Prices Explained
- Floor Tile Prices UK 2026: What You Will Pay Per Square Metre
- Is It Cheaper to Tile or Use Wall Panels? A UK Cost Comparison
- How to Tile: A Complete Beginner’s Guide (UK)
- How to Cut Tiles: Manual Cutter, Wet Saw and Nippers
- How to Cut Holes in Tiles for Pipes and Taps
- How to Grout Tiles (and Get Clean, Even Lines)
- Cork Flooring: Pros, Cons and Where It Works in UK Homes
- How to Mix and Apply Tile Adhesive Correctly
- How to Set Out Tiles for a Perfect Layout
- How to Seal Grout and Tiles in a Bathroom (UK Guide)
- Can You Tile Over Tiles? When It Works and When It Doesn’t
- Tiling Tools List: What You Need for a Professional Finish
- How Much Tile Adhesive Do I Need? Coverage Per Square Metre
- Tile Problems: 9 Common Faults and How to Fix Each
- How to Fix Loose Tiles Without Removing Them
- Cracked Grout Repair: Why It Happens and How to Fix It
- How to Replace a Broken Tile Without Redoing the Wall
- Water Leaking Through Shower Tiles: 6 Causes and Fixes
- Remove Mouldy Silicone Sealant: A 24-Hour Reseal Job
- How to Clean Grout: What Works, and What Etches Stone
- Why Are My Floor Tiles Lifting? The 40m² Bay Rule
- How to Lay Porcelain Paving: 1:80 Fall, 150mm Below DPC
- Tile Patterns: Why Big Tiles Need a One-Third Offset
- Grout Colour Ideas: How to Get the Shade You Chose
- Can You Paint Tiles? Yes on Walls, No in the Shower
- Decoupling Membrane for Tiles: When You Actually Need One
- Can You Tile Over a Wooden Floor? What Changed in 2024
- Tiling Cost 2026: £25 to £95 per m² Labour, UK Rates
- Tile Ideas: 7 Looks and the One Rule Each Needs
- Metro Tiles: Sizes, Bevels and the 1/3 Offset Rule
- Tile Feature Wall: The Weight Limit That Decides Yours
- Tiling Over Underfloor Heating: 14 Days Before Heat On
- How to Tile a Hallway Floor: Set Out From the Door
- Wood Effect Tiles and Marble Effect: 5 Specs to Check
- Tile Levelling Systems: The 3mm Rule That Decides It
- Floor Levelling Compound: How Deep and How Long to Dry
- How to Find a Good Tiler: 9 Checks Before You Book
- Tiling Quote: The 10 Lines a Proper One Must Show
- Tile Trim: Sizes, Profiles and the One-Size-Up Rule
- Tile Spacers: 2mm or 3mm, and When to Pull Them Out
- Tiling the Fireplace: 125mm Hearths, Adhesive and Tiles
- Porcelain vs Stone Paving: Grip, Sealing and Upkeep
- Tiling a Large Floor: Movement Joints Every 10 Metres
- DIY Tiling vs Professional: 6 Jobs to Never Do Yourself
- Terracotta Tiles: Seal Before Grouting, Wait 7 Days
- Tile Drill Bits: Which Bit Won’t Crack Porcelain
- Tiling Corners With Trim: Which Profile, and When to Mitre
- Travertine Tiles: Filled or Unfilled, and How to Seal Them
- Slate Tiles: Calibrated or Riven, and How to Lay Them
- Zellige Tiles: Order 15% Extra and Fix Them Edge to Edge
- Terrazzo Tiles: Real 20mm vs Porcelain, Seal Before Grouting
- Split Face Tiles: Will Your Wall Take 27kg per m²?
- Tile Sealer: Which Tiles Need It and Which Type to Buy
- How to Remove Grout Haze: Which Cleaner for Which Grout
- Efflorescence on Tiles: Why It Comes Back and How to Stop It
- Tile Primer: Which Surfaces Need It and How Much to Dilute
- Epoxy Grout: Where It’s Worth It and How to Apply It
- Shower Niche: Sizes, Height and Which Wall Can Take One
- How Many Tiles Do I Need? Add 10% to 20% by Layout
- How to Tile a Window Sill: Sill Last, Silicone at the Frame