


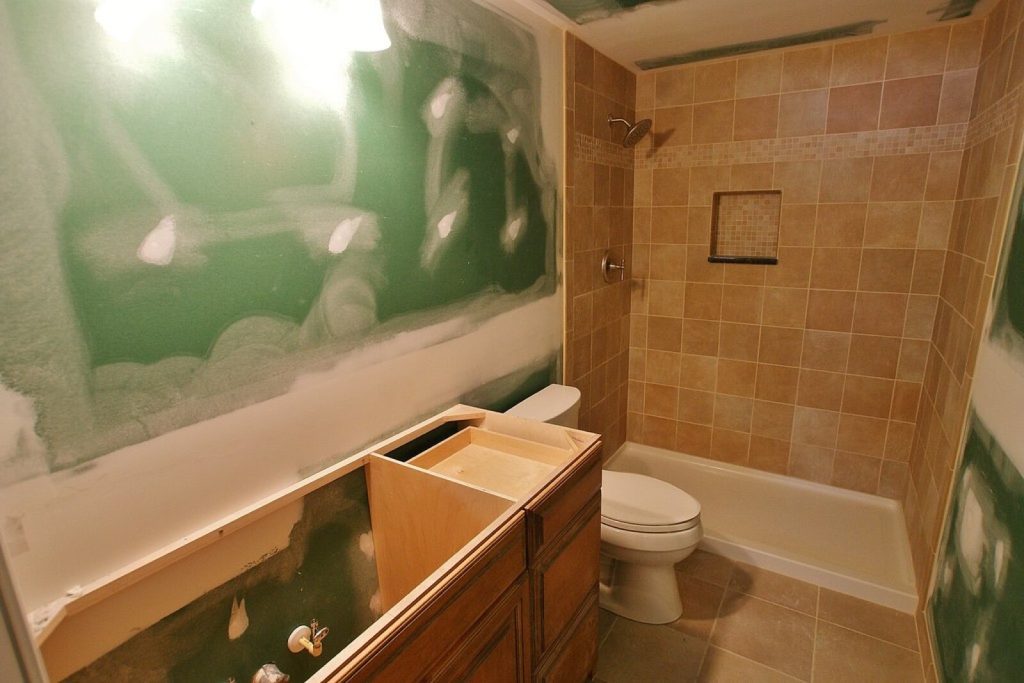
A tile primer is a thin acrylic coat brushed onto a wall or floor before the adhesive goes on, and whether you need one depends almost entirely on what the surface is made of. On gypsum plaster and anhydrite screed it is not optional: skip it and a cement-based adhesive can fail behind tiles that looked perfect on the day. On a dusty sand and cement screed it is cheap insurance. On old glazed tiles a standard tile primer does nothing useful at all, and you need a different product.
This page sorts surfaces into those three groups, gives the dilution and number of coats the manufacturers actually specify, and covers the mistakes we see when we are called in to re-tile a bathroom in Bromley or south east London that has let go.
What a tile primer actually does
Most tile primers sold in the UK are modified acrylic dispersions, usually tinted green, blue or pink so you can see where you have been. They do four jobs, and it helps to know which one you are relying on for your surface:
- Seal off gypsum. Gypsum plaster and calcium sulphate (anhydrite) screeds react with the cement in a standard powdered adhesive when moisture is present. The primer is a barrier between the two.
- Control suction. A thirsty surface such as new render, brick or a sand and cement screed pulls water out of the adhesive before it can cure properly. Primer slows that down, so the adhesive keeps its open time and bonds fully.
- Bind dust. A slightly friable or dusty surface is glued together so the adhesive grips the background, not a layer of loose particles.
- Help levelling compounds flow. On floors, primer stops self-levelling compound losing water into the screed and reduces pinholes and air bubbles.
What a standard acrylic primer does not do is give adhesive something to grip on a smooth, non-absorbent surface. BAL’s own datasheet for its Prime APD lists metal, painted surfaces and existing glazed or porcelain tiles as unsuitable. That is a separate job for a grip primer, covered below.
Surfaces that must be primed before tiling
Gypsum plaster walls
Skimmed plaster is the most common wall we tile onto, and it is gypsum. If you fix with a cement-based powdered adhesive, prime first. BAL specifies two undiluted coats of Prime APD on plaster walls when using one of its cementitious adhesives, with the second coat brushed at 90 degrees to the first so there are no missed patches. If you are using a ready-mixed tub adhesive on plaster, BAL only asks for one coat diluted 1:1 with water, and only if the plaster is dusty or porous.
Two other rules for plaster matter as much as the primer. The plaster must be fully dry, which on new skim usually means weeks rather than days, and there is a weight limit: plaster is a weak surface for heavy tiles. We cover that limit in our page on tile backer board vs plasterboard, and for heavy porcelain or stone the honest answer is often a cement backer board instead.
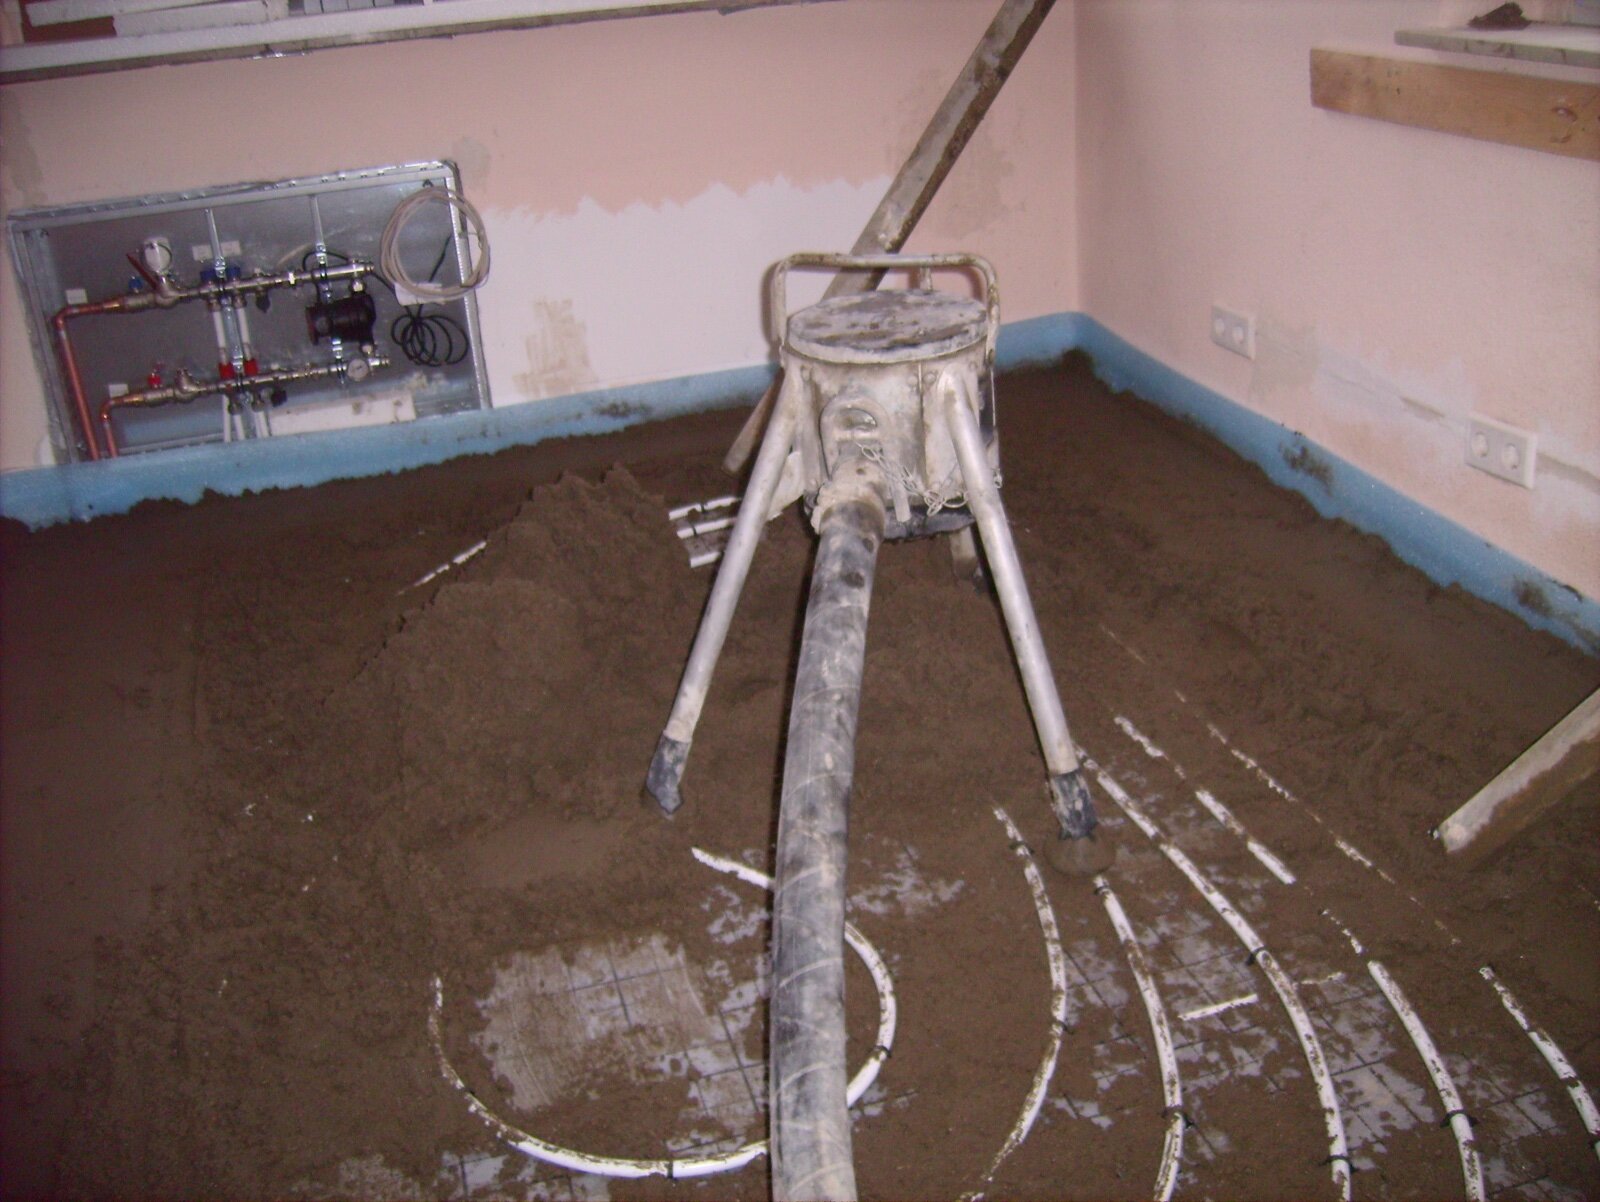
Anhydrite and calcium sulphate screeds
These are the pumped, liquid screeds laid over a lot of underfloor heating, and they are the surface where getting the primer wrong costs the most. Calcium sulphate and the cement in a standard adhesive can form ettringite at the interface when moisture is present, and the bond fails. The preparation, in order:
- Dry the screed. The figure the industry works to is below 0.5% moisture by weight on a carbide (CM) test, or below 75% relative humidity, before moisture-sensitive or impermeable finishes such as tiles go down. Drying is roughly 1mm a day up to 40mm in good conditions, and slower after that.
- Remove the laitance. The thin, weak skin of fine particles on top has to be sanded off, typically with a rotary sander and coarse (around 60 grit) paper, then vacuumed.
- Prime twice. BAL specifies a first coat of Prime APD diluted 1:1 with water, then a second coat undiluted, brushed at 90 degrees to the first.
Some adhesive makers sell calcium sulphate compatible adhesives or uncoupling mats that change these rules, so always follow one manufacturer’s system from screed to grout rather than mixing brands.
Timber floors
For tongue and groove boards, BAL asks for two undiluted coats when using its flexible adhesive with its matting system. Overlaid plywood (15mm minimum in BAL’s table) is treated case by case, with the back face and edges of the ply sealed. In practice most floorboards in older Bromley houses get overboarded or fitted with a backer board first, because the movement in old boards is a bigger risk than the primer.
Surfaces where primer is a good idea, not a must
Cement and sand screeds, concrete, brick and sand and cement render can be tiled with a cement-based adhesive without a chemical barrier, but they are often very absorbent, especially in warm weather or straight after a plasterer has left the house heated. BAL specifies one coat diluted 1:1 with water on cement screeds, concrete, brick and render. Do it if the surface darkens instantly when you flick water on it, if it is dusty when you wipe a hand across it, or if you are going to pour a levelling compound over it.
Tile backer boards are the grey area. Some boards need priming on the face, some must not be primed, and the answer is on the board maker’s datasheet. BAL’s own guidance for backer boards is one coat, diluted or undiluted, “refer to board manufacturer”.
Tile primer dilution at a glance
| Surface | Coats (BAL Prime APD) | Dilution |
|---|---|---|
| Gypsum plaster, cement-based adhesive | 2 | Undiluted, second coat at 90 degrees |
| Gypsum plaster, ready-mixed adhesive | 1, only if dusty or porous | 1:1 with water |
| Anhydrite / calcium sulphate screed | 2 | First 1:1, second undiluted |
| Sand and cement screed, concrete, brick, render | 1 | 1:1 with water |
| Tongue and groove floorboards | 2 | Undiluted |
| Existing glazed or porcelain tiles | Not suitable: use a grip primer | |
Coverage on the BAL datasheet is 5 to 10 m² per litre undiluted and 10 to 20 m² per litre diluted, so a 2.5 litre bottle does 12.5 to 25 m² neat or 25 to 50 m² diluted. Porous surfaces drink more than that, so for a bathroom with two neat coats on the walls, buy more than the maths says.
Tiling over old tiles: you need a grip primer
Old glazed tiles have no suction and nothing for an acrylic primer to soak into. A grip (bond-enhancing) primer is a different product: it contains fine aggregate, so it dries to a rough, sandpaper-like film that gives the adhesive a mechanical key. Mapei’s Eco Prim Grip is a widely stocked example, sold for existing ceramic, terrazzo and natural stone, with tiling possible after it has dried.
A grip primer only helps if the old tiles deserve to stay. Tap every tile with a screwdriver handle and listen for hollow ones, check the old grout is sound, degrease the surface thoroughly, and think about the extra weight and thickness at door thresholds and around the bath. Our page on how to tile over existing tiles covers when we refuse to do it.
How to apply tile primer properly
- Clean first. Brush down dust, scrape off paint drips and plaster nibs, and degrease anything that has been in a kitchen. Primer seals in whatever is on the surface.
- Shake and dilute in a clean bucket. Measure by volume, using clean cold water.
- Brush, do not just roll. A brush works primer into the surface. On floors, do not let it puddle: a pool of primer dries to a skin that the adhesive can bond to, but that skin can then peel off the screed.
- Cross the second coat. Brushing at 90 degrees to the first coat is how the manufacturers avoid pinholes and missed strips.
- Let it dry, but not for days. BAL quotes 15 to 30 minutes at 20°C. Cold, damp rooms take longer, and BAL says not to use it below 5°C. Tile while the primed surface is clean; if it sits for a week collecting dust, brush it down and check it.
Stick to one manufacturer for primer, adhesive and grout where you can. Most guarantees, including BAL’s, depend on using their products together as specified, and that matters if a floor ever fails.
Common tile primer mistakes
- Using PVA instead. Builder’s PVA re-emulsifies when it gets wet, and adhesive manufacturers do not accept it as a primer under their tiles. Use the primer the adhesive maker specifies.
- Priming wet plaster or screed. Primer does not stop moisture coming out. If the background is still drying, wait.
- Leaving laitance on an anhydrite screed. Primer on top of laitance bonds the tiles to a weak crust. Sand it off first.
- One thin coat on gypsum. On plaster with a cement adhesive, and on anhydrite, two coats is the specification, not a suggestion.
- Acrylic primer on old tiles. It sits on the glaze and does nothing. Use a grip primer or take the tiles off.
Frequently asked questions
Do I need to prime plaster before tiling?
Yes, if you are using a cement-based powdered adhesive. Gypsum plaster must be isolated from the cement, and BAL specifies two undiluted coats of its primer. With a ready-mixed tub adhesive, one diluted coat is only needed if the plaster is dusty or porous.
Can I use PVA as a tile primer?
No. PVA softens when it gets damp, which is exactly the condition behind bathroom and kitchen tiles, and adhesive makers do not accept it under their products. Use a proper acrylic tile primer.
How long should tile primer dry before tiling?
BAL quotes 15 to 30 minutes at 20°C for Prime APD. It should be dry to the touch, not tacky. Allow longer in a cold or damp room, and do not apply it below 5°C.
Is a tile primer the same as a sealer?
No. A primer goes on the wall or floor before tiling to prepare the background. A sealer goes on the face of porous tiles such as natural stone after fixing, to stop staining. Different products, different jobs.
Can I tile straight onto a new anhydrite screed?
Not straight away. It must be dried to below 0.5% moisture (CM) or 75% relative humidity, have its laitance sanded off, and be primed twice before a cement-based adhesive goes on, unless you use a calcium sulphate compatible system that says otherwise.
If you want a second opinion on a wall or floor before you tile it, Bromley Tilers can look at the background and tell you what it needs. The full BAL instructions are on the BAL Prime APD product page.
Related guides
- How to Tile a Bathroom Wall: A UK Step-by-Step Guide
- How Much Does Tiling Cost in the UK? A Realistic Price Guide
- How to Remove Old Wall Tiles Without Damaging the Wall
- Porcelain vs Ceramic Tiles: Which Is Right for Your Bathroom or Kitchen?
- How to Tank and Waterproof a Wet Room Before Tiling: A Bromley Homeowner’s Guide
- Do You Need to Seal Natural Stone Tiles Before Grouting? A Tiler Explains
- How to Tile a Bathroom Floor (Including Around the Toilet)
- How to Tile a Shower: Walls, Niche and Waterproofing
- Bathroom Tiling Guide: How to Plan, Prep and Finish a Lasting Job
- Tile Backer Board vs Plasterboard for Bathrooms
- Best Tiles for Small Bathrooms (and How to Make a Space Look Bigger)
- Wall and Floor Tiles for a Wet Room: What Actually Works
- Tiling vs Wall Panels for a Bathroom: Which Is Better?
- Do You Tile the Floor or Walls First in a Bathroom?
- Kitchen Tiling: Splashbacks, Walls and Floors Explained
- How to Tile a Kitchen Splashback: Step-by-Step Bromley Guide
- How to Tile Around Kitchen Sockets, Switches and Worktops
- Kitchen Splashback Tile Ideas: 12 Looks That Work
- How to Lay Metro Tiles in a Herringbone Pattern
- Tiled vs Glass Splashback (and Acrylic): Which Is Best?
- How High Should a Kitchen Splashback Be Tiled? UK Heights Guide
- Types of Tiles: The Complete UK Buyer’s Guide
- Porcelain vs Natural Stone Tiles: Which Should You Choose?
- Natural Stone Tiles Explained: Marble, Travertine, Slate and Limestone
- Mosaic Tiles: Where to Use Them and How They’re Fixed
- Tile Slip Ratings Explained: R Ratings and PTV for UK Floors
- Matt vs Gloss Tiles: Which Finish Is Right for Your Room?
- Cost to Tile a Bathroom in the UK: 2026 Price Breakdown
- Polystyrene Ceiling Tiles: Are They Any Good?
- Cost to Tile a Kitchen in 2026: Floor and Splashback Prices
- Tiling Cost Per Square Metre 2026: Labour and All-In Prices
- Tiler Day Rate UK: What Tilers Charge Per Day in 2026
- Cost to Regrout a Bathroom in 2026: UK Prices Explained
- Floor Tile Prices UK 2026: What You Will Pay Per Square Metre
- Is It Cheaper to Tile or Use Wall Panels? A UK Cost Comparison
- How to Tile: A Complete Beginner’s Guide (UK)
- How to Cut Tiles: Manual Cutter, Wet Saw and Nippers
- How to Cut Holes in Tiles for Pipes and Taps
- How to Grout Tiles (and Get Clean, Even Lines)
- Cork Flooring: Pros, Cons and Where It Works in UK Homes
- How to Mix and Apply Tile Adhesive Correctly
- How to Set Out Tiles for a Perfect Layout
- How to Seal Grout and Tiles in a Bathroom (UK Guide)
- Can You Tile Over Tiles? When It Works and When It Doesn’t
- Tiling Tools List: What You Need for a Professional Finish
- How Much Tile Adhesive Do I Need? Coverage Per Square Metre
- Tile Problems: 9 Common Faults and How to Fix Each
- How to Fix Loose Tiles Without Removing Them
- Cracked Grout Repair: Why It Happens and How to Fix It
- How to Replace a Broken Tile Without Redoing the Wall
- Water Leaking Through Shower Tiles: 6 Causes and Fixes
- Remove Mouldy Silicone Sealant: A 24-Hour Reseal Job
- How to Clean Grout: What Works, and What Etches Stone
- Why Are My Floor Tiles Lifting? The 40m² Bay Rule
- How to Lay Porcelain Paving: 1:80 Fall, 150mm Below DPC
- Tile Patterns: Why Big Tiles Need a One-Third Offset
- Grout Colour Ideas: How to Get the Shade You Chose
- Can You Paint Tiles? Yes on Walls, No in the Shower
- Decoupling Membrane for Tiles: When You Actually Need One
- Can You Tile Over a Wooden Floor? What Changed in 2024
- Tiling Cost 2026: £25 to £95 per m² Labour, UK Rates
- Tile Ideas: 7 Looks and the One Rule Each Needs
- Metro Tiles: Sizes, Bevels and the 1/3 Offset Rule
- Tile Feature Wall: The Weight Limit That Decides Yours
- Tiling Over Underfloor Heating: 14 Days Before Heat On
- How to Tile a Hallway Floor: Set Out From the Door
- Wood Effect Tiles and Marble Effect: 5 Specs to Check
- Tile Levelling Systems: The 3mm Rule That Decides It
- Floor Levelling Compound: How Deep and How Long to Dry
- How to Find a Good Tiler: 9 Checks Before You Book
- Tiling Quote: The 10 Lines a Proper One Must Show
- Tile Trim: Sizes, Profiles and the One-Size-Up Rule
- Tile Spacers: 2mm or 3mm, and When to Pull Them Out
- Tiling the Fireplace: 125mm Hearths, Adhesive and Tiles
- Porcelain vs Stone Paving: Grip, Sealing and Upkeep
- Tiling a Large Floor: Movement Joints Every 10 Metres
- DIY Tiling vs Professional: 6 Jobs to Never Do Yourself
- Terracotta Tiles: Seal Before Grouting, Wait 7 Days
- Tile Drill Bits: Which Bit Won’t Crack Porcelain
- Tiling Corners With Trim: Which Profile, and When to Mitre
- Travertine Tiles: Filled or Unfilled, and How to Seal Them
- Slate Tiles: Calibrated or Riven, and How to Lay Them
- Zellige Tiles: Order 15% Extra and Fix Them Edge to Edge
- Terrazzo Tiles: Real 20mm vs Porcelain, Seal Before Grouting
- Split Face Tiles: Will Your Wall Take 27kg per m²?
- Tile Sealer: Which Tiles Need It and Which Type to Buy
- How to Remove Grout Haze: Which Cleaner for Which Grout
- Efflorescence on Tiles: Why It Comes Back and How to Stop It
- Epoxy Grout: Where It’s Worth It and How to Apply It
- How to Tile Stairs: Keep Every Riser the Same Height
- Shower Niche: Sizes, Height and Which Wall Can Take One
- How Many Tiles Do I Need? Add 10% to 20% by Layout
- How to Tile a Window Sill: Sill Last, Silicone at the Frame