


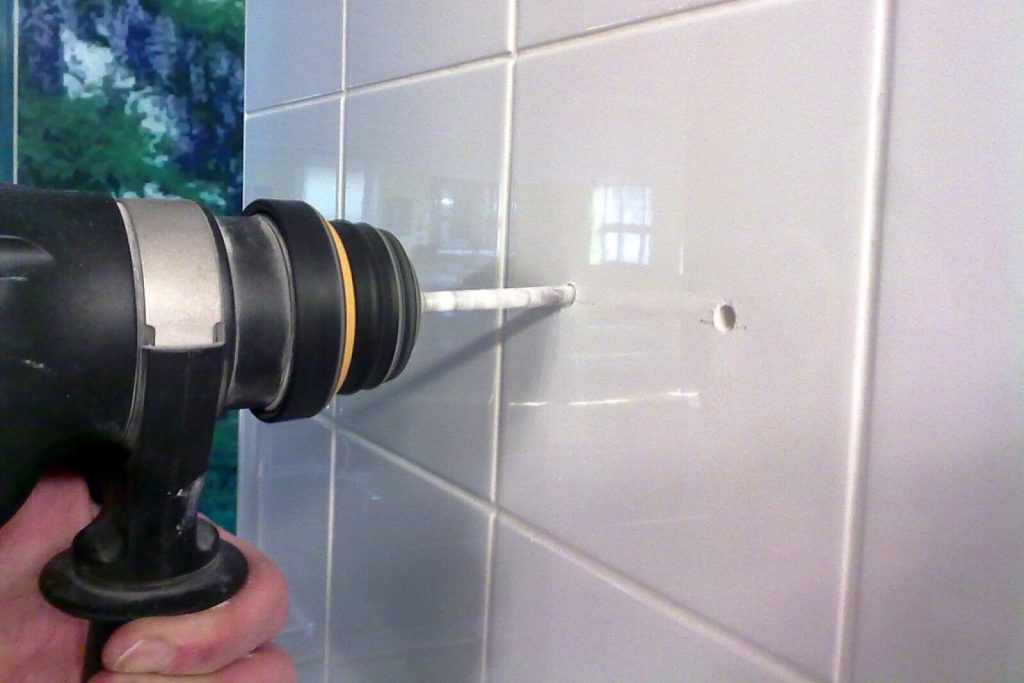
Picking the right tile drill bit is the difference between a clean 6mm hole and a cracked tile you have to chop out and replace. Most split tiles are not down to clumsy hands: they are down to a masonry bit, hammer action left switched on, or a blunt bit that is grinding rather than cutting. Get those three right and drilling a tiled wall is a two minute job. This is how we do it on bathroom and kitchen work across Bromley and south east London, including the awkward cases: hard porcelain, natural stone, and old tiles bedded on cement render.
Which tile drill bit suits your tile
There are three bit types worth owning, and the choice follows the tile, not the price.
- Spear point (tungsten carbide) bits are the cheap arrowhead bits sold as glass and tile bits. They cut glazed ceramic and glass well. On porcelain they blunt in seconds and then skate or overheat, so treat them as a ceramic-only tool.
- Diamond tipped bits have industrial diamond bonded to the tip or rim. They are the only sensible choice for porcelain, and they also handle marble, slate, mosaic and vitrified paving. Marcrist’s PG850 range, a common trade bit, is rated for drills and cordless drills up to 1500 to 3000 rpm, lists sizes from 6mm to 112mm, and is quoted at 500 to 700 holes per bit at roughly 27 seconds a hole. Those numbers are a useful sanity check: if your hole is taking several minutes, something is wrong with the bit, the speed or the pressure.
- Diamond core bits, sometimes sold as crowns or hole saws, cut a ring rather than a solid hole. They are for anything above about 20mm: pipe tails, shower valve bodies, waste outlets.
Why porcelain is the problem child: it is fired denser than ceramic and absorbs no more than 0.5 per cent water by weight under BS EN 14411, the standard that classifies tiles. That density is what makes it hard-wearing underfoot and hard on drill bits. Natural stone varies more: slate and travertine cut easily, some granites are as stubborn as porcelain. Our note on porcelain versus ceramic covers the difference in use as well as under the drill.
Set the drill up before the bit touches the tile
Three settings decide whether the tile survives.
Hammer action off. This matters more than the bit. Percussion works by smashing a hard tip into masonry thousands of times a minute, and a glazed tile is a brittle sheet sitting on adhesive over a void. Hammer action will star-crack it before the bit is through the glaze. On a combi drill, turn the collar to the plain drill symbol, not the hammer symbol. If you only own an SDS drill, switch it to rotary-only or borrow a normal drill.
Low to moderate speed. Diamond cuts by abrasion and abrasion makes heat. Heat is what kills the bit and stresses the tile. Stay near the bottom of the manufacturer’s stated range, keep the trigger steady rather than pulsing it wildly, and let the bit do the work.
Light pressure. Leaning on the drill does not speed anything up. It glazes the diamond and loads the tile at the exact moment the tip breaks through the back face, which is when most cracks happen.
Drilling the hole, step by step
- Mark the hole and check what is behind it. Measure twice. Keep the hole in the body of the tile, not on a grout joint: a plug set half in grout and half in tile will never pull up tight, and the bit tends to wander into the softer joint.
- Stop the bit skating. On glazed ceramic, a cross of masking tape over the mark gives the spear point something to bite. With a diamond bit, the better trick is to start the bit tilted at roughly 45 degrees so the rim cuts a small crescent through the glaze, then bring the drill upright once that notch is established.
- Keep it wet. Water is the single biggest factor in bit life. A sponge held under the hole, a plant mister, or a blob of plumber’s putty shaped into a dam around the mark will all work. On a wall, where running water is awkward, rolling the bit on a wet sponge between bursts is enough for small holes.
- Lift the bit clear every few seconds. This lets water and air reach the tip and clears the slurry that otherwise polishes the diamonds smooth.
- Ease off at breakthrough. When the resistance drops, reduce pressure to almost nothing. A bit that suddenly plunges is how tiles chip from the back.
- Switch bits for the substrate. Once through the tile, swap to a masonry bit for the wall behind, and keep hammer action off until the bit is well clear of the tile.
Holes closer to a tile edge than about their own diameter are the riskiest. A drilling guide plate clamps or suctions to the tile and holds the bit square, which lets you work near an edge and overlap holes without the bit walking.
Big holes for pipes, wastes and shower valves
Once a hole is bigger than about 20mm, a solid bit is the wrong tool. A diamond core cuts only the ring of material, so there is far less heat and far less load on the tile. Cores come in the diameters plumbing actually uses, and a typical core runs on an arbor with a spring-loaded pilot drill that centres it until the rim has scored its own track.
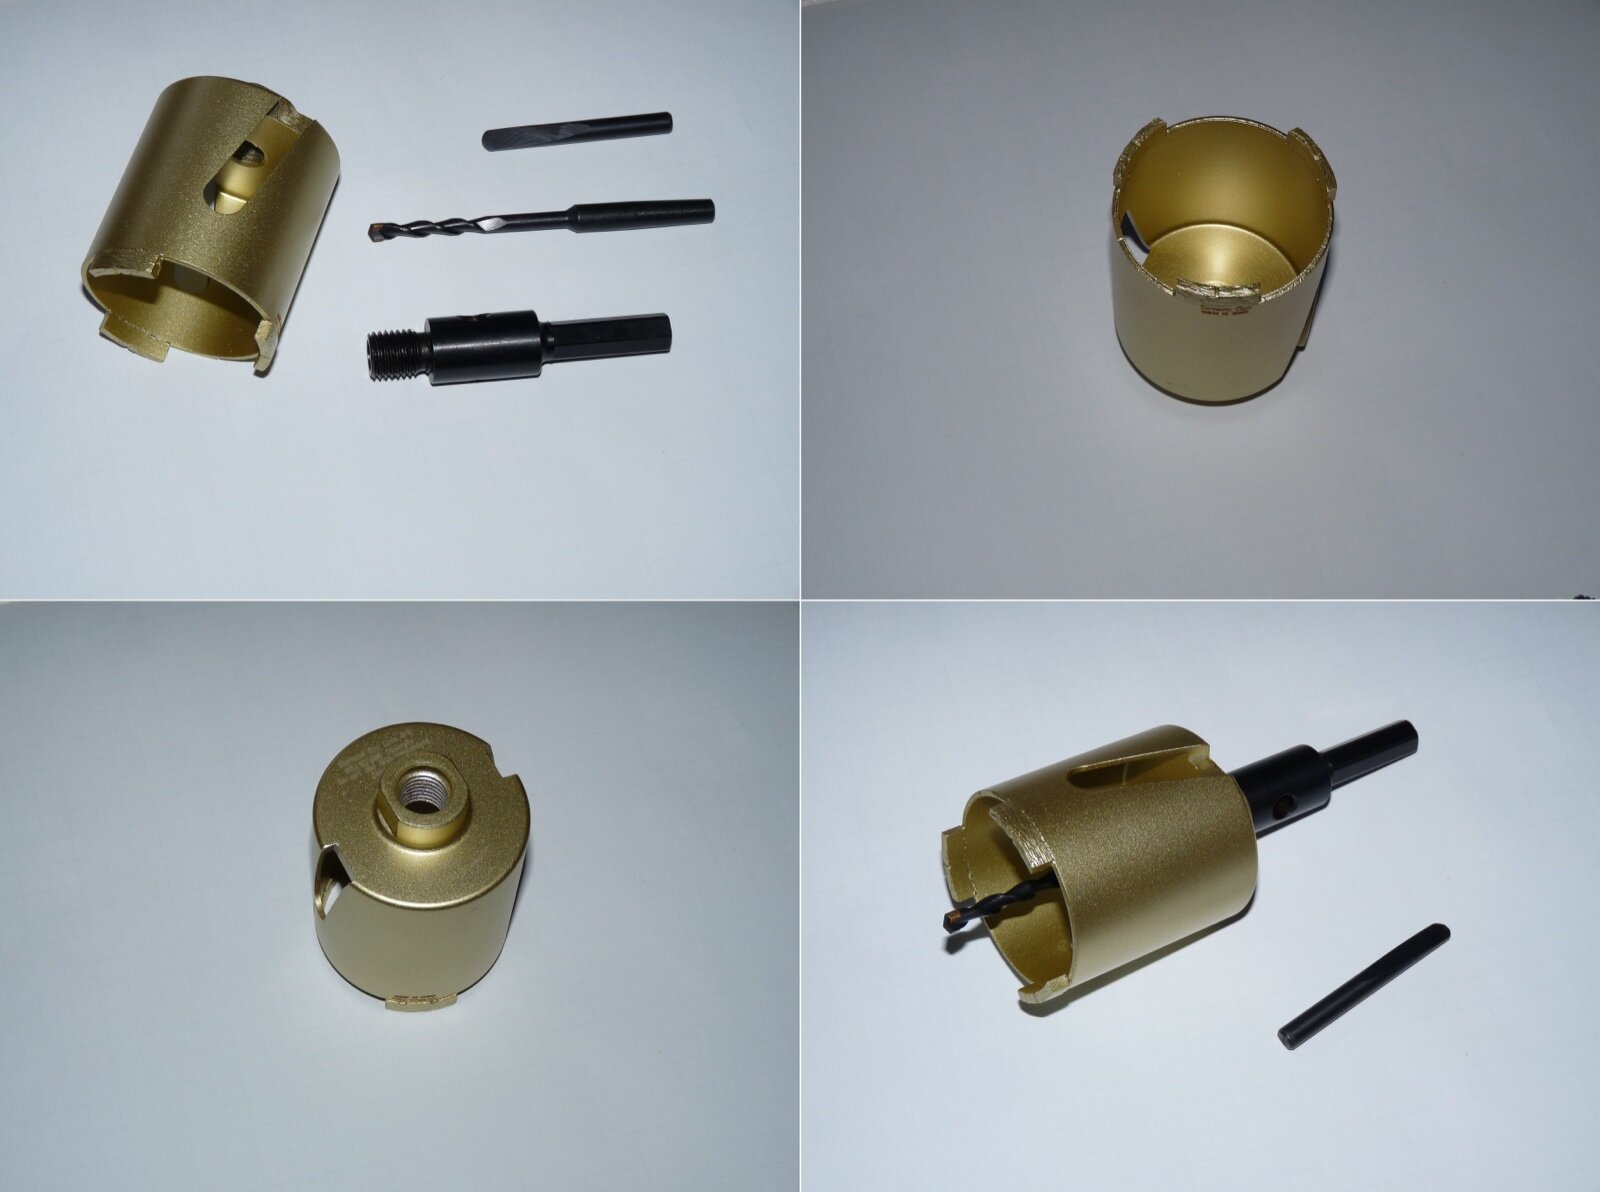
Two practical points. The pilot needs somewhere to go, so check there is a void or soft substrate behind, and cores throw real slurry, so water is not optional. Where a large hole would land tight to an edge, it is often quicker to lift that one tile, core it on a bench with the tile supported on a flat board, and re-fix it.
What sits behind the tile
The tile is the easy part. What you drill into next decides whether the fixing holds and whether the job is safe.
Cables. BS 7671, the UK wiring regulations, sets out prescribed zones where concealed cables are expected to run: within 150mm of the top of a wall, within 150mm of the internal or external angle where two walls meet, and in the vertical and horizontal bands running from any socket, switch or other accessory. Cables buried less than 50mm from the surface normally rely on 30mA RCD protection, and the IET publishes a brief overview of the requirements for cables concealed in a wall or partition. Treat those zones as no-drill areas, and use a detector even so, because older installations in period houses do not always follow them.
Pipes. Assume a vertical pipe runs up to every tap, cistern and radiator valve. A detector on its metal setting will usually find copper.
The fixing. Behind bathroom tiles you will typically find plasterboard, a tile backer board, or solid masonry. Each needs a different plug: a hollow wall anchor for board, a standard wall plug for brick or block. Which one you have is worth knowing before you start, and our comparison of tile backer board and plasterboard explains how each behaves. Older Bromley terraces often have a bed of sand and cement render behind the tiles, which takes a plug well but chews through cheap masonry bits. Whatever the fixing, size the pilot hole in the tile so the plug passes through cleanly. Forcing a plug through a slightly tight hole is a classic way to crack a tile after the drilling went perfectly.
Dust and eye protection
Tile dust contains respirable crystalline silica, which the Health and Safety Executive treats as a serious construction health risk alongside wood and cement dust. For a couple of holes at home the exposure is small, and the controls are easy: drill wet, since water suppression is the most effective way to stop dust becoming airborne, or use on-tool extraction, covered in HSE information sheet CIS69. Wear eye protection too: tile swarf is glass-hard and sharp enough to cut fingers when you wipe it away.
Why tiles crack, and how to avoid each cause
- Hammer action left on. The most common single cause, and completely avoidable.
- A blunt or wrong bit. A spear point on porcelain glazes over and starts generating heat instead of cutting. Change the bit rather than pushing harder.
- Heat. Dry drilling puts a hot ring into a cold tile, and that stress can craze the glaze around a hole that otherwise looks perfect.
- A void behind the tile. If it was fixed on dabs rather than a full bed, nothing supports it where you are pushing. Tap first: a hollow ring means less pressure and more patience.
- Drilling too near an edge. Move the hole if you can, use a guide plate if you cannot.
If a tile does crack, do not try to fill it. Rake out the grout and lift the tile while you still have spares. For help with that, or with a full bathroom or kitchen, see Bromley Tilers.
Frequently asked questions
Can I use a masonry bit on tiles?
On soft glazed ceramic a sharp masonry bit sometimes gets through, but it is the wrong geometry: it is designed to chip material away under percussion, not to cut a glaze. On porcelain it will not start at all. Use a spear point for ceramic and a diamond bit for porcelain.
Do I need a special drill?
No. An ordinary corded or cordless drill is fine, as long as you can turn hammer action off and control the speed. Trade diamond bits are typically rated to run at up to a few thousand rpm, so a standard drill is well within range.
Should I drill into the tile or the grout line?
Into the tile. Grout is softer, so the bit drifts, and a plug set in a joint has far less to grip. The exception is a temporary or very light fixing where you want to leave the tiles unmarked.
How do I stop the drill bit slipping on a shiny tile?
Masking tape over the mark works for spear point bits. For diamond bits, start the cut with the drill tilted so the edge of the bit scores a notch, then straighten up. A drilling guide plate removes the problem entirely.
Does drilling into a tile mean water can get behind it?
Any penetration through tile and grout in a shower or splash area is a potential route for water. Seal the hole: put a bead of silicone into it before the plug and fixing go in, and seal around the fitting once it is on the wall.
Related guides
- How to Tile a Bathroom Wall: A UK Step-by-Step Guide
- How Much Does Tiling Cost in the UK? A Realistic Price Guide
- How to Remove Old Wall Tiles Without Damaging the Wall
- Porcelain vs Ceramic Tiles: Which Is Right for Your Bathroom or Kitchen?
- How to Tank and Waterproof a Wet Room Before Tiling: A Bromley Homeowner’s Guide
- Do You Need to Seal Natural Stone Tiles Before Grouting? A Tiler Explains
- How to Tile a Bathroom Floor (Including Around the Toilet)
- How to Tile a Shower: Walls, Niche and Waterproofing
- Bathroom Tiling Guide: How to Plan, Prep and Finish a Lasting Job
- Tile Backer Board vs Plasterboard for Bathrooms
- Best Tiles for Small Bathrooms (and How to Make a Space Look Bigger)
- Wall and Floor Tiles for a Wet Room: What Actually Works
- Tiling vs Wall Panels for a Bathroom: Which Is Better?
- Do You Tile the Floor or Walls First in a Bathroom?
- Kitchen Tiling: Splashbacks, Walls and Floors Explained
- How to Tile a Kitchen Splashback: Step-by-Step Bromley Guide
- How to Tile Around Kitchen Sockets, Switches and Worktops
- Kitchen Splashback Tile Ideas: 12 Looks That Work
- How to Lay Metro Tiles in a Herringbone Pattern
- Tiled vs Glass Splashback (and Acrylic): Which Is Best?
- How High Should a Kitchen Splashback Be Tiled? UK Heights Guide
- Types of Tiles: The Complete UK Buyer’s Guide
- Porcelain vs Natural Stone Tiles: Which Should You Choose?
- Natural Stone Tiles Explained: Marble, Travertine, Slate and Limestone
- Mosaic Tiles: Where to Use Them and How They’re Fixed
- Tile Slip Ratings Explained: R Ratings and PTV for UK Floors
- Matt vs Gloss Tiles: Which Finish Is Right for Your Room?
- Cost to Tile a Bathroom in the UK: 2026 Price Breakdown
- Polystyrene Ceiling Tiles: Are They Any Good?
- Cost to Tile a Kitchen in 2026: Floor and Splashback Prices
- Tiling Cost Per Square Metre 2026: Labour and All-In Prices
- Tiler Day Rate UK: What Tilers Charge Per Day in 2026
- Cost to Regrout a Bathroom in 2026: UK Prices Explained
- Floor Tile Prices UK 2026: What You Will Pay Per Square Metre
- Is It Cheaper to Tile or Use Wall Panels? A UK Cost Comparison
- How to Tile: A Complete Beginner’s Guide (UK)
- How to Cut Tiles: Manual Cutter, Wet Saw and Nippers
- How to Cut Holes in Tiles for Pipes and Taps
- How to Grout Tiles (and Get Clean, Even Lines)
- Cork Flooring: Pros, Cons and Where It Works in UK Homes
- How to Mix and Apply Tile Adhesive Correctly
- How to Set Out Tiles for a Perfect Layout
- How to Seal Grout and Tiles in a Bathroom (UK Guide)
- Can You Tile Over Tiles? When It Works and When It Doesn’t
- Tiling Tools List: What You Need for a Professional Finish
- How Much Tile Adhesive Do I Need? Coverage Per Square Metre
- Tile Problems: 9 Common Faults and How to Fix Each
- How to Fix Loose Tiles Without Removing Them
- Cracked Grout Repair: Why It Happens and How to Fix It
- How to Replace a Broken Tile Without Redoing the Wall
- Water Leaking Through Shower Tiles: 6 Causes and Fixes
- Remove Mouldy Silicone Sealant: A 24-Hour Reseal Job
- How to Clean Grout: What Works, and What Etches Stone
- Why Are My Floor Tiles Lifting? The 40m² Bay Rule
- How to Lay Porcelain Paving: 1:80 Fall, 150mm Below DPC
- Tile Patterns: Why Big Tiles Need a One-Third Offset
- Grout Colour Ideas: How to Get the Shade You Chose
- Can You Paint Tiles? Yes on Walls, No in the Shower
- Decoupling Membrane for Tiles: When You Actually Need One
- Can You Tile Over a Wooden Floor? What Changed in 2024
- Tiling Cost 2026: £25 to £95 per m² Labour, UK Rates
- Tile Ideas: 7 Looks and the One Rule Each Needs
- Metro Tiles: Sizes, Bevels and the 1/3 Offset Rule
- Tile Feature Wall: The Weight Limit That Decides Yours
- Tiling Over Underfloor Heating: 14 Days Before Heat On
- How to Tile a Hallway Floor: Set Out From the Door
- Wood Effect Tiles and Marble Effect: 5 Specs to Check
- Tile Levelling Systems: The 3mm Rule That Decides It
- Floor Levelling Compound: How Deep and How Long to Dry
- How to Find a Good Tiler: 9 Checks Before You Book
- Tiling Quote: The 10 Lines a Proper One Must Show
- Tile Trim: Sizes, Profiles and the One-Size-Up Rule
- Tile Spacers: 2mm or 3mm, and When to Pull Them Out
- Tiling the Fireplace: 125mm Hearths, Adhesive and Tiles
- Porcelain vs Stone Paving: Grip, Sealing and Upkeep
- Tiling a Large Floor: Movement Joints Every 10 Metres
- DIY Tiling vs Professional: 6 Jobs to Never Do Yourself
- Terracotta Tiles: Seal Before Grouting, Wait 7 Days
- Tiling Corners With Trim: Which Profile, and When to Mitre
- Travertine Tiles: Filled or Unfilled, and How to Seal Them
- Slate Tiles: Calibrated or Riven, and How to Lay Them
- Zellige Tiles: Order 15% Extra and Fix Them Edge to Edge
- Terrazzo Tiles: Real 20mm vs Porcelain, Seal Before Grouting
- Split Face Tiles: Will Your Wall Take 27kg per m²?
- Tile Sealer: Which Tiles Need It and Which Type to Buy
- How to Remove Grout Haze: Which Cleaner for Which Grout
- Efflorescence on Tiles: Why It Comes Back and How to Stop It
- Tile Primer: Which Surfaces Need It and How Much to Dilute
- Epoxy Grout: Where It’s Worth It and How to Apply It
- How to Tile Stairs: Keep Every Riser the Same Height
- Shower Niche: Sizes, Height and Which Wall Can Take One
- How Many Tiles Do I Need? Add 10% to 20% by Layout
- How to Tile a Window Sill: Sill Last, Silicone at the Frame