


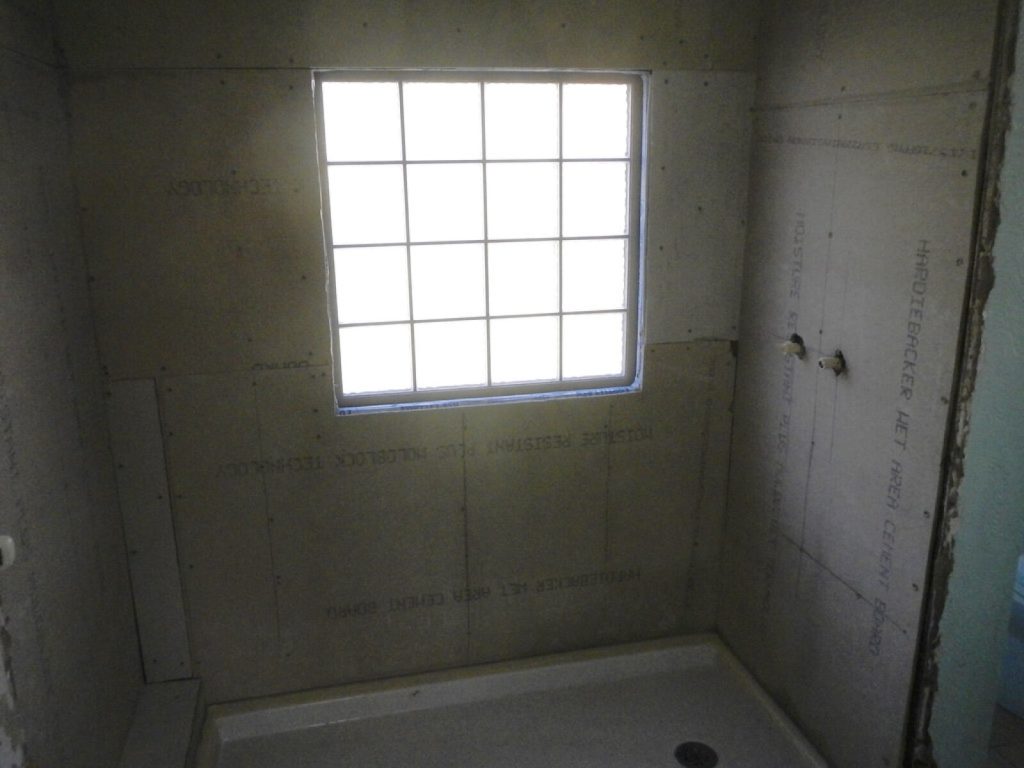
A tile backer board is a rigid, water-resistant sheet you fix to studs, a timber floor or an uneven wall so the tiles have something flat, strong and stable to grip. Plasterboard will take tiles too, but it has a lower weight limit and it softens if water gets behind the grout. Backer board removes both problems, which is why it is the standard base for shower walls and tiled floors over timber.
This page covers the two families of board you will find at UK merchants, which thickness goes where, how each one is fixed, and the details that decide whether the tiles stay on for twenty years or crack in two.
Cement board or foam board: the two types
Almost every board sold in the UK falls into one of two groups.
Cement and fibre cement boards
These are heavy, dense sheets made from cement reinforced with fibres or mesh. HardieBacker from James Hardie is the one most tilers know. It is sold in 1200 x 800mm sheets, with the 6mm board aimed at overlaying timber floors, masonry walls and old plasterboard, and the 12mm board aimed at stud walls. No More Ply sells fibre cement in 6mm to 22mm thicknesses, including tongue-and-groove floor boards that can span joists. Cement boards are water-resistant rather than fully waterproof: water will not rot them, but it can pass through, so a shower still needs tanking on top.
XPS foam boards
These are extruded polystyrene cores with a cement-polymer coating and a mesh on each face. Marmox Multiboard is the best-known example; Marmox lists thicknesses of 4, 6, 10, 12.5, 20, 30, 40, 50 and 60mm and sheet sizes of 600 x 1200mm, 600 x 2400mm and 1200 x 2400mm. Wedi and No More Ply make similar boards. Foam boards are light enough to carry up a loft ladder with one hand, cut with a knife, add insulation (useful under electric underfloor heating) and are sold as waterproof, with the joints sealed by a waterproof tape.
Which to choose
- Shower walls and wet rooms: foam board with taped joints, or cement board plus a tanking membrane.
- Timber floors: 6mm cement board or 10mm foam board, bedded in adhesive and screwed, over a sound subfloor.
- Floors with underfloor heating: foam board, because it stops the heat going down into the joists.
- Heavy stone or large porcelain on walls: board fixed to masonry with a solid adhesive bed, or the thicker cement board on close studs.
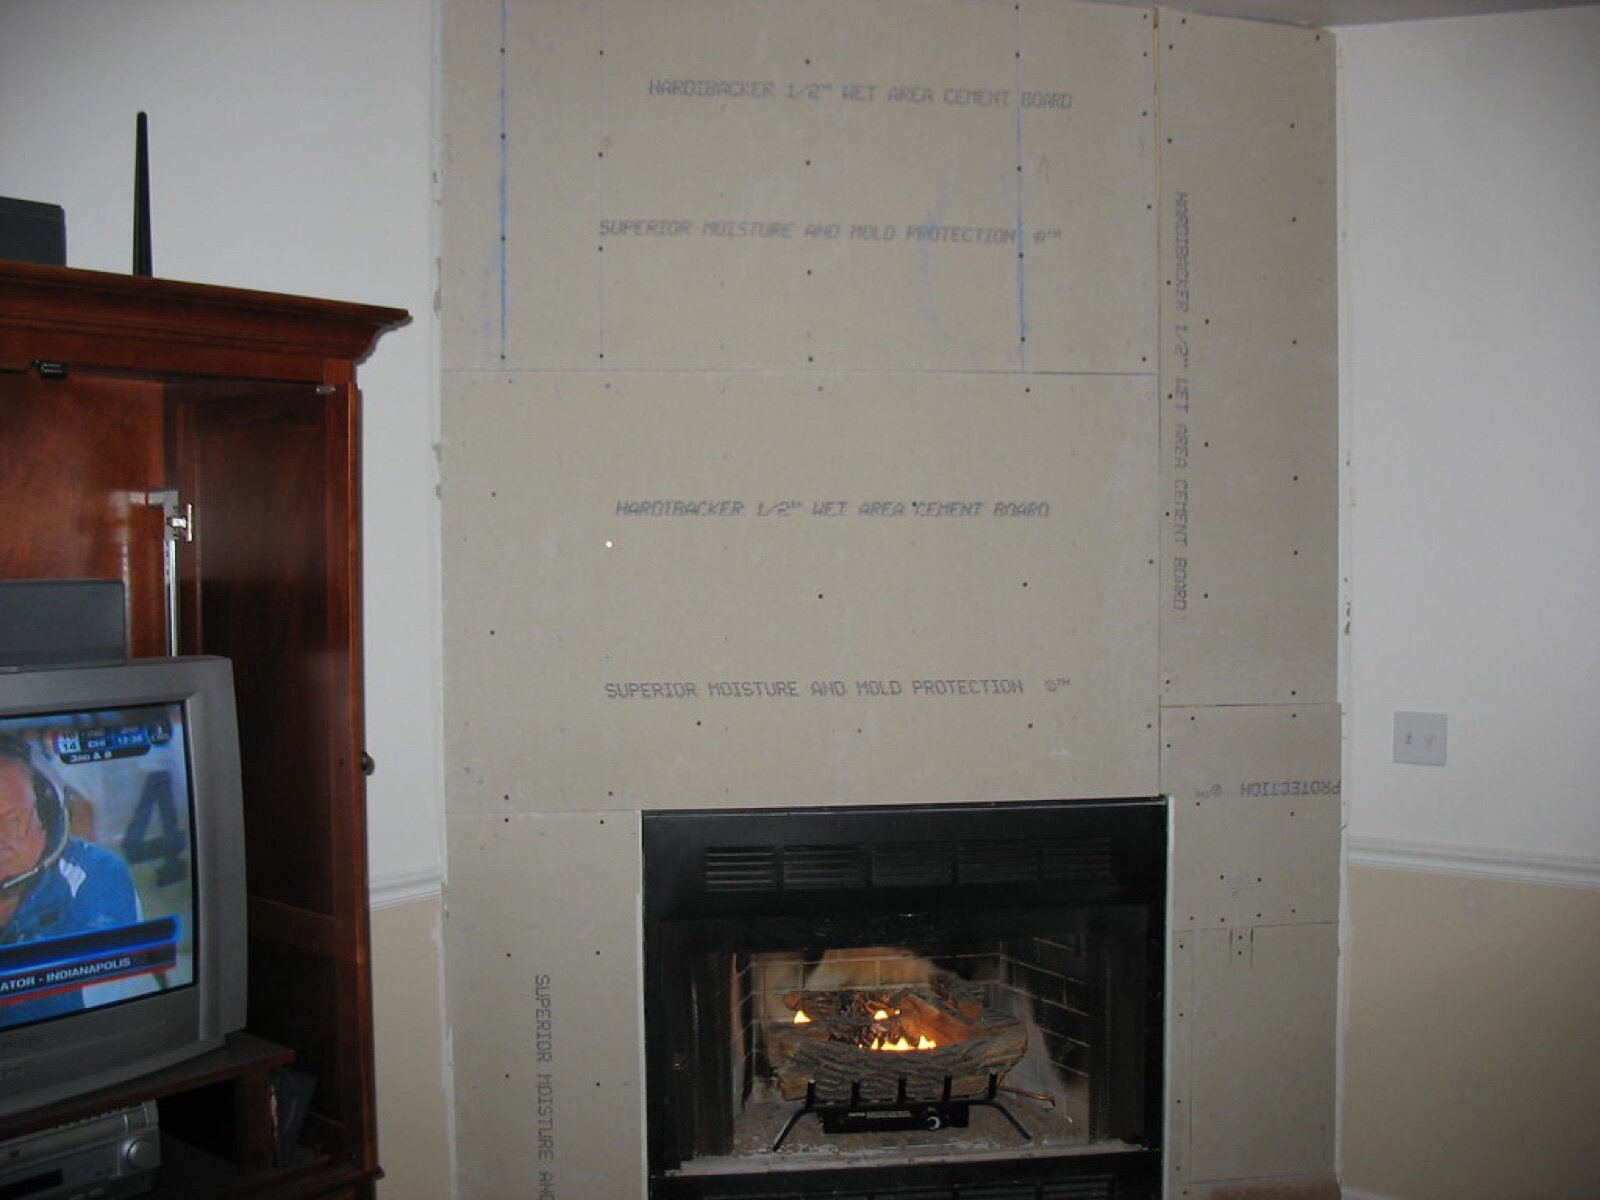
- Fireplace surrounds: cement board. Foam board is plastic and has no place near a fire.
Why not just tile onto plasterboard?
Two reasons: weight and water. Instarmac, which makes UltraTile adhesives, gives a maximum of 32kg per square metre for unskimmed gypsum plasterboard and 40kg per square metre for tile backer board. Both figures include the adhesive and grout, which typically add 2 to 4kg per square metre, so the tile itself has to come in lighter. Thick porcelain and natural stone can get close to the plasterboard limit once adhesive is added, so check the weight per square metre on the box.
The water risk matters more in a shower. Grout is not waterproof. Once water finds a cracked joint, the paper face of plasterboard soaks it up, the board softens and the tiles start to sound hollow. We cover that comparison in more detail in our piece on tile backer board vs plasterboard.
Which thickness for walls and floors
Thickness is about stiffness and the job the board is doing, not about how strong you want it to feel.
- Overboarding a sound wall (old plaster, old plasterboard, masonry): 6mm is usually enough, because the wall behind does the structural work. The board gives a clean, consistent surface and better water resistance.
- Fixing direct to timber or metal studs: use the thicker board. James Hardie specifies its 12mm board for stud walls. On foam boards, most tilers use 10mm or 12.5mm on studs at 400mm centres or closer; thin foam flexes between studs.
- Overlaying a timber floor: 6mm cement board or 10mm foam is the usual choice. These are overlays, not structural floors. HardieBacker is not designed to go straight over joists without a structural deck such as 22mm boarding underneath.
- Levelling out a wall or boxing in pipes: the thicker foam boards (20mm and up) are rigid enough to be self-supporting over short spans.
Check the floor height before you choose. Board, adhesive and tile can add 20mm or more, which changes how the door closes and how the new floor meets the next room.
How to fix tile backer board
Every brand publishes its own fixing guide, and that guide is what a warranty is judged against, so read it for the board you actually buy. The general method looks like this.
On stud walls
- Check the studs are straight and add noggins where board edges would otherwise float.
- Offer the board up and screw it to the studs. Foam boards need their large washers under each screw head: Marmox describes washers as essential, and its fitting guide asks for screws at least 20mm longer than the board is thick, set in three rows of three on a short board and three rows of five on a long one.
- Stagger the vertical joints so four corners never meet at one point.
- Tape every joint with the maker’s tape: alkali-resistant mesh tape for cement board, waterproof tape for foam board in wet areas.
On masonry or old plaster
Bed the board onto a solid layer of cement-based tile adhesive rather than dabs, then add a few mechanical fixings while it sets. A full bed leaves no hollow spots for a tile to crack over. Marmox says a board fixed to masonry this way can take loads above 100kg per square metre, far more than any wall tile needs.
On timber floors
Screw down any loose floorboards first and prime the timber if the adhesive maker asks for it. Spread adhesive with a notched trowel, bed the board into it, then screw through at the spacing the board maker gives. Stagger the joints like brickwork, keep joints off the joint lines of the boards below where you can, leave a small gap at the walls, and tape the joints before tiling.
Preparing the board for tiles
Once the board is up, the hard part is done. Prime the surface if the adhesive maker requires it; Instarmac notes that priming may not be needed with a ready-mixed adhesive, but powdered cement-based adhesives often call for it. Choose the adhesive for the tile, not for the board: a flexible adhesive (S1 rated) is the usual pick for porcelain, large formats and any floor over timber. Fill screw-head dimples with adhesive as you go so the bed stays flat.
In a shower, the board is not the waterproofing on its own unless it is a foam board with every joint, screw head and pipe hole sealed as the maker describes. With cement board, add a liquid or sheet tanking system over the board in the wet zone. Our guide to tanking before tiling shows where the membrane has to run.
Common mistakes we see on Bromley jobs
- Foam board fixed without washers. The screw head pulls through the coating and the board moves under the tiles.
- Thin board straight onto studs. A 6mm sheet on 600mm stud centres flexes when you press it, and grout lines crack along the stud lines.
- Untaped joints. Joints are where boards move. Tape and adhesive lock them together.
- Silicone left out of the corners. Internal corners and the tray edge need a flexible sealant, not grout, whatever the board.
- Cement board treated as waterproof. It will not rot, but water can still pass through to the studs.
If you would rather hand the boarding and tiling to someone who does it every week, Bromley Tilers covers Bromley and south east London, and we price the preparation separately so you can see where the money goes.
Frequently asked questions
Do I need tile backer board in a bathroom?
Not on every wall. Sound plaster or plasterboard can be tiled outside wet zones within its weight limit. Inside a shower enclosure or wet room, backer board (or plasterboard with a full tanking system) is the safer choice because grout is not waterproof.
Is tile backer board waterproof?
Foam boards such as Marmox Multiboard are sold as waterproof, and the joints are sealed with waterproof tape. Cement boards are water-resistant: they will not rot or soften, but they need a tanking membrane in a shower.
What thickness of backer board should I use on a floor?
For overlaying a sound timber floor, 6mm cement board or 10mm foam board is the usual choice, bedded in adhesive and screwed. Neither is meant to span joists on its own; that needs a structural deck or a purpose-made tongue-and-groove board.
Can you put backer board over old tiles?
Often yes, if the old tiles are firmly bonded. Bed the board in adhesive and fix through to the wall behind with screws long enough to pass the tile and grip the substrate. Hollow-sounding tiles should come off first.
How heavy can tiles be on backer board?
Instarmac’s figure for tile backer board is 40kg per square metre, including about 2 to 4kg for adhesive and grout. Boards fixed to masonry on a full adhesive bed can carry more; the board maker’s data sheet gives the figure for your build-up.
Do you screw or glue tile backer board?
Usually both. On masonry and floors the board goes onto a bed of adhesive and is then screwed. On studs it is screwed, with washers for foam boards, at the spacing the maker gives.
Related guides
- How to Tile a Bathroom Wall: A UK Step-by-Step Guide
- How Much Does Tiling Cost in the UK? A Realistic Price Guide
- How to Remove Old Wall Tiles Without Damaging the Wall
- Porcelain vs Ceramic Tiles: Which Is Right for Your Bathroom or Kitchen?
- How to Tank and Waterproof a Wet Room Before Tiling: A Bromley Homeowner’s Guide
- Do You Need to Seal Natural Stone Tiles Before Grouting? A Tiler Explains
- How to Tile a Bathroom Floor (Including Around the Toilet)
- How to Tile a Shower: Walls, Niche and Waterproofing
- Construction Trade News: June 2026
- Bathroom Tiling Guide: How to Plan, Prep and Finish a Lasting Job
- Tile Backer Board vs Plasterboard for Bathrooms
- Best Tiles for Small Bathrooms (and How to Make a Space Look Bigger)
- Wall and Floor Tiles for a Wet Room: What Actually Works
- Tiling vs Wall Panels for a Bathroom: Which Is Better?
- Do You Tile the Floor or Walls First in a Bathroom?
- Tiling and Bathroom Trade News: Mid-June 2026
- Kitchen Tiling: Splashbacks, Walls and Floors Explained
- How to Tile a Kitchen Splashback: Step-by-Step Bromley Guide
- How to Tile Around Kitchen Sockets, Switches and Worktops
- Kitchen Splashback Tile Ideas: 12 Looks That Work
- Tiling and Bathroom Trade News: Late June 2026
- How to Lay Metro Tiles in a Herringbone Pattern
- Tiled vs Glass Splashback (and Acrylic): Which Is Best?
- How High Should a Kitchen Splashback Be Tiled? UK Heights Guide
- Tiling and Bathroom Trade News: Early July 2026
- Types of Tiles: The Complete UK Buyer’s Guide
- Porcelain vs Natural Stone Tiles: Which Should You Choose?
- Natural Stone Tiles Explained: Marble, Travertine, Slate and Limestone
- Tiling and Bathroom Trade News: Mid-July 2026
- Mosaic Tiles: Where to Use Them and How They’re Fixed
- Tile Slip Ratings Explained: R Ratings and PTV for UK Floors
- Matt vs Gloss Tiles: Which Finish Is Right for Your Room?
- Cost to Tile a Bathroom in the UK: 2026 Price Breakdown
- Polystyrene Ceiling Tiles: Are They Any Good?
- Cost to Tile a Kitchen in 2026: Floor and Splashback Prices
- Tiling and Bathroom Trade News: Mid-July 2026
- Tiling Cost Per Square Metre 2026: Labour and All-In Prices
- Tiler Day Rate UK: What Tilers Charge Per Day in 2026
- Cost to Regrout a Bathroom in 2026: UK Prices Explained
- Floor Tile Prices UK 2026: What You Will Pay Per Square Metre
- Is It Cheaper to Tile or Use Wall Panels? A UK Cost Comparison
- How to Tile: A Complete Beginner’s Guide (UK)
- How to Cut Tiles: Manual Cutter, Wet Saw and Nippers
- How to Cut Holes in Tiles for Pipes and Taps
- How to Grout Tiles (and Get Clean, Even Lines)
- Cork Flooring: Pros, Cons and Where It Works in UK Homes
- Tiling and Bathroom Trade News: Late July 2026
- How to Mix and Apply Tile Adhesive Correctly
- How to Set Out Tiles for a Perfect Layout
- How to Seal Grout and Tiles in a Bathroom (UK Guide)
- Can You Tile Over Tiles? When It Works and When It Doesn’t
- Tiling Tools List: What You Need for a Professional Finish
- How Much Tile Adhesive Do I Need? Coverage Per Square Metre
- Tiling Trade News: Topps App, Costs Up 6% (Aug 2026)
- Tile Problems: 9 Common Faults and How to Fix Each
- How to Fix Loose Tiles Without Removing Them
- Cracked Grout Repair: Why It Happens and How to Fix It
- Tiling Trade News: TTA Silica Warning, 2% Retentions
- How to Replace a Broken Tile Without Redoing the Wall
- Water Leaking Through Shower Tiles: 6 Causes and Fixes
- Remove Mouldy Silicone Sealant: A 24-Hour Reseal Job
- How to Clean Grout: What Works, and What Etches Stone
- Why Are My Floor Tiles Lifting? The 40m² Bay Rule
- Tiling Trade News: 3,841 Construction Firms Failed
- How to Lay Porcelain Paving: 1:80 Fall, 150mm Below DPC
- Tile Patterns: Why Big Tiles Need a One-Third Offset
- Grout Colour Ideas: How to Get the Shade You Chose
- Can You Paint Tiles? Yes on Walls, No in the Shower
- Decoupling Membrane for Tiles: When You Actually Need One
- Can You Tile Over a Wooden Floor? What Changed in 2024
- Tiling Cost 2026: £25 to £95 per m² Labour, UK Rates
- Tile Ideas: 7 Looks and the One Rule Each Needs
- Metro Tiles: Sizes, Bevels and the 1/3 Offset Rule
- Tile Feature Wall: The Weight Limit That Decides Yours
- Tiling Over Underfloor Heating: 14 Days Before Heat On
- How to Tile a Hallway Floor: Set Out From the Door
- Wood Effect Tiles and Marble Effect: 5 Specs to Check
- Tile Levelling Systems: The 3mm Rule That Decides It
- Tiling Trade News: Repair Work Up 1.7%, Headlam Fails
- Floor Levelling Compound: How Deep and How Long to Dry
- How to Find a Good Tiler: 9 Checks Before You Book
- Tiling Quote: The 10 Lines a Proper One Must Show
- Tile Trim: Sizes, Profiles and the One-Size-Up Rule
- Tile Spacers: 2mm or 3mm, and When to Pull Them Out
- Tiling the Fireplace: 125mm Hearths, Adhesive and Tiles
- Tiling Trade News: Shaws Sinks Reprice on 1 November
- Porcelain vs Stone Paving: Grip, Sealing and Upkeep
- Tiling a Large Floor: Movement Joints Every 10 Metres
- DIY Tiling vs Professional: 6 Jobs to Never Do Yourself
- Terracotta Tiles: Seal Before Grouting, Wait 7 Days
- Tile Drill Bits: Which Bit Won’t Crack Porcelain
- Tiling Corners With Trim: Which Profile, and When to Mitre
- Travertine Tiles: Filled or Unfilled, and How to Seal Them
- Slate Tiles: Calibrated or Riven, and How to Lay Them
- Zellige Tiles: Order 15% Extra and Fix Them Edge to Edge
- Terrazzo Tiles: Real 20mm vs Porcelain, Seal Before Grouting
- Tiling Trade News: 36% Now Add a Bathroom Accent Wall
- Split Face Tiles: Will Your Wall Take 27kg per m²?
- Tile Sealer: Which Tiles Need It and Which Type to Buy
- How to Remove Grout Haze: Which Cleaner for Which Grout
- Efflorescence on Tiles: Why It Comes Back and How to Stop It
- Tile Primer: Which Surfaces Need It and How Much to Dilute
- Epoxy Grout: Where It’s Worth It and How to Apply It
- How to Tile Stairs: Keep Every Riser the Same Height
- Shower Niche: Sizes, Height and Which Wall Can Take One
- How Many Tiles Do I Need? Add 10% to 20% by Layout
- How to Tile a Window Sill: Sill Last, Silicone at the Frame
- Tiling Trade News: Victorian Plumbing Tile Sales Up 76%
- How to Tile Around a Toilet: Lift the Pan or Cut Round It
- Tile to Carpet Transition: Pick the Strip by the Height Gap
- Tile Skirting: Leave a 6mm Gap and Seal, Never Grout