


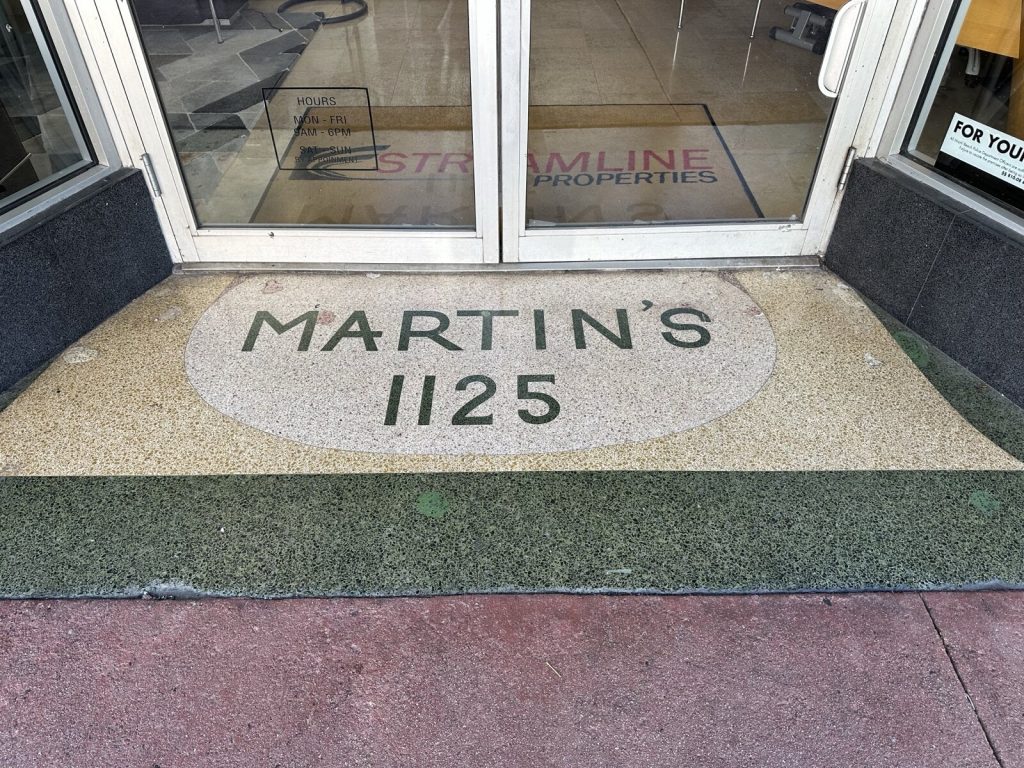
Terrazzo tiles come in two very different products that look alike in a showroom photo: real terrazzo, a cast slab of marble, quartz or glass chips set in cement or resin, and terrazzo-effect porcelain, a printed tile that copies the look. They are fixed, sealed, cleaned and priced differently, and choosing the wrong one for the wrong wall or floor is the most common terrazzo mistake we see. This page covers how to tell them apart, which one suits which room, and how real terrazzo has to be laid so it does not stain, crack or drag a wall down.
Real terrazzo or terrazzo-effect porcelain?
Terrazzo started in Venice as a way of using offcuts of marble: chips were set into a binder, then ground flat and polished so the aggregate showed through. Today you can buy it three ways.
- Poured in situ. Laid wet across the whole floor, then machine-ground and polished. Seamless, beautiful, and a specialist trade. Homebuilding puts professionally installed poured terrazzo at £250 to £300 or more per square metre.
- Precast terrazzo tiles. The real material, cut into tiles or slabs and fixed like stone. The same source puts real terrazzo tiles at £100 per square metre and up, before fitting.
- Terrazzo-effect porcelain. A porcelain tile with the chip pattern printed into the glaze. It is waterproof, needs no sealing and costs a fraction of the real thing.
Precast terrazzo also splits into two binders. Cement-based terrazzo suits floors and outdoor use and is porous, so it has to be sealed. Resin-based terrazzo is denser and less porous, which is why it is preferred for worktops and splashbacks.
The quick way to tell real from printed in a showroom: turn the tile over and look at the edge. Real terrazzo shows the chips running right through the body. Porcelain shows a uniform clay body with the pattern only on the face. The second check is the pattern itself. A printed tile has a limited number of faces, so lay six or eight out on the floor and look for the same cluster of chips repeating.
Which one for which room
- Bathroom walls and showers: porcelain, almost always. It is light, does not need sealing and copes with constant water. If you want real terrazzo in a shower, use a resin product and follow the maker’s sealing advice to the letter.
- Kitchen floors and hallways: either works. Real terrazzo is harder-wearing in the sense that a chip shows the same material underneath, but it needs resealing. Porcelain is the low-maintenance choice for a busy family hallway.
- Feature floors in living spaces: this is where real terrazzo earns its price. The depth of the polished aggregate is something print does not quite reproduce close up.
Thickness and weight: check the wall before you buy
Real terrazzo is heavy, and the weight decides where it can go. UK supplier Terrazzo Tiles recommends a minimum of 20 mm thick for floor tiles up to 600 x 600 mm, and 30 mm for larger formats up to 1200 mm. A fixing guide from Dutch supplier De Tegel puts a single 600 x 600 x 20 mm tile at about 20 kg. That works out at roughly 55 kg per square metre before any adhesive.
The same supplier lists the maximum tile weights the common wall backgrounds will carry:
- Gypsum plaster: 20 kg per square metre
- Gypsum plasterboard: 32 kg per square metre
- XPS insulated tile backer boards: 120 kg per square metre
- Cement boards: 200 kg per square metre
Adhesive adds about 3 kg per square metre. So a 20 mm terrazzo floor tile cannot go on a plastered or plasterboard wall at all. Thinner 10 mm terrazzo wall tiles come to roughly 28 kg per square metre on the same maths, around 31 kg with adhesive, which is right at the plasterboard limit with nothing to spare. For any real terrazzo on a wall, we fix to cement board or a heavy-duty backer board. Our page on tile backer board vs plasterboard explains the swap.
Porcelain has none of this problem. Most terrazzo-effect wall tiles are under 10 mm thick and sit comfortably on plasterboard.
Floors need the same thought. On a suspended timber floor, a heavy stone-like tile needs a stiff, overboarded deck, because any bounce will crack the grout first and the tiles next. On concrete, check it is flat and dry, and use levelling compound before tiling rather than trying to pack the adhesive bed out.
How to lay real terrazzo tiles
Terrazzo is fixed more like natural stone than like ceramic. The sequence matters because the face is porous until it is sealed.
1. Adhesive and bed
Use a flexible cement-based adhesive. For pale terrazzo, use a white adhesive: grey adhesive can show through or shadow lighter tiles. Spread with a 10 to 12 mm notched trowel and back-butter each tile so there is a solid bed with no voids. Wipe dust off the back of each tile with a damp sponge first so the adhesive bonds. Our page on applying tile adhesive covers solid-bed technique.
2. Joints and levelling
Real terrazzo is made to tight tolerances and usually laid with 2 to 3 mm joints. With joints that narrow, any lip between tiles shows, so a tile levelling system is worth using on large formats.
3. Cutting
Cut with a water-cooled saw. A manual tile cutter will not score a 20 mm cast slab cleanly. Slightly damaged tiles from the delivery can usually be kept for cuts, so set them aside rather than sending them back.
4. Seal before you grout
This is the step that ruins most DIY terrazzo floors when it is skipped. Once the adhesive has cured and the face is clean and completely dry, apply a coat of impregnating sealer. It acts as a grout release, so the grout cannot soak into the porous face and leave a haze or stain. Allow it 12 to 24 hours to dry. Terrazzo Tiles recommends Lithofin Stainstop MN, two coats, one before and one after grouting.
5. Grout
Use a fine, unsanded grout in white or grey. Strong colours can stain the face. Work small areas, clean off as you go and do not let grout dry on the surface.
6. Seal again
When the floor is clean and fully dry, apply the second coat of sealer over tiles and joints. De Tegel’s guide advises waiting at least two weeks before giving the floor a thorough clean.
For the general method behind steps 4 and 6, see our page on sealing natural stone before grouting; terrazzo behaves the same way.
Underfloor heating, slip and outdoor use
Both real terrazzo and porcelain conduct heat well and work over underfloor heating. With cement terrazzo, the supplier advice is a flexible adhesive with an uncoupling mat such as Schlüter DITRA between the heated screed and the tiles, to absorb movement as the floor warms and cools. Our tiling over underfloor heating page covers commissioning the system before you tile.
On slip, sealed cement terrazzo from Terrazzo Tiles is quoted at a wet pendulum test value (PTV) of 42. A PTV of 36 or more is the level generally treated as low slip potential, so a sealed, honed finish is fine for most kitchens. A highly polished finish is a different matter in a wet area; ask for the PTV of the exact finish you are buying. Terrazzo-effect porcelain varies by range, so check the rating for that tile, especially for a shower floor or entrance.
Cement terrazzo can go outside if it is properly sealed and maintained, but frost and the British wet season are hard on any sealed porous surface. For a patio, a 20 mm terrazzo-effect porcelain paver is far less work; see laying outdoor porcelain paving.
Cleaning and resealing
Clean real terrazzo with warm water or a pH-neutral cleaner. Keep acids off it entirely: vinegar, lemon, limescale removers and many bathroom sprays etch the cement binder and dull the polish, and a sealer will not stop that. In a bathroom, this is the biggest practical argument for porcelain.
Plan to reseal real cement terrazzo every 12 to 18 months in a busy room. A simple test: drip water on the floor in a high-traffic spot. If it beads, the seal is working; if it darkens the tile within a few minutes, it is time to reseal. Resin terrazzo and porcelain need neither.
Ordering: batches, shade and waste
Real terrazzo is a cast product with natural aggregate, so shade varies between production batches. Order the whole job in one go, check the batch numbers on every box match, and order 10% extra for cuts and breakages. Open several boxes and mix tiles from each as you lay, so any variation spreads across the floor instead of forming a visible band.
Check the delivery before work starts. A 20 mm tile with a chipped corner may be fine for a cut, but a cracked one is not, and suppliers will deal with damage far more readily before anything is fixed.
Frequently asked questions
Are terrazzo tiles expensive?
Real terrazzo tiles start at around £100 per square metre for the tile alone, and poured terrazzo runs to £250 to £300 or more per square metre installed. Terrazzo-effect porcelain costs much less, and fitting is cheaper too because it needs no sealing and is lighter to handle.
Do terrazzo tiles need sealing?
Cement-based terrazzo does: once before grouting and once after, then every 12 to 18 months in busy areas. Resin terrazzo is far less porous. Terrazzo-effect porcelain needs no sealing at all.
Can you put terrazzo tiles on plasterboard?
Not 20 mm real terrazzo: at around 55 kg per square metre it is well over plasterboard’s 32 kg limit. Thin 10 mm terrazzo is right at the limit, so we would still use cement board. Porcelain terrazzo-effect tiles are fine on plasterboard.
Are terrazzo tiles slippery?
Sealed, honed cement terrazzo has been tested at a wet PTV of 42, which is low slip potential. Polished finishes are more slippery when wet, so check the PTV for the exact finish before using it in a bathroom.
Can terrazzo tiles go over underfloor heating?
Yes. Use a flexible adhesive, and with real terrazzo an uncoupling mat between the heated screed and the tile. Commission and run the heating before tiling so the screed has finished moving.
What should I not clean terrazzo with?
Anything acidic: vinegar, lemon, limescale removers and descaling bathroom sprays. Use warm water or a pH-neutral cleaner.
If you are planning a terrazzo floor or bathroom in Bromley or south east London, Bromley Tilers can advise on the substrate and fix it properly the first time.
Related guides
- How to Tile a Bathroom Wall: A UK Step-by-Step Guide
- How Much Does Tiling Cost in the UK? A Realistic Price Guide
- How to Remove Old Wall Tiles Without Damaging the Wall
- Porcelain vs Ceramic Tiles: Which Is Right for Your Bathroom or Kitchen?
- How to Tank and Waterproof a Wet Room Before Tiling: A Bromley Homeowner’s Guide
- Do You Need to Seal Natural Stone Tiles Before Grouting? A Tiler Explains
- How to Tile a Bathroom Floor (Including Around the Toilet)
- How to Tile a Shower: Walls, Niche and Waterproofing
- Construction Trade News: June 2026
- Bathroom Tiling Guide: How to Plan, Prep and Finish a Lasting Job
- Tile Backer Board vs Plasterboard for Bathrooms
- Best Tiles for Small Bathrooms (and How to Make a Space Look Bigger)
- Wall and Floor Tiles for a Wet Room: What Actually Works
- Tiling vs Wall Panels for a Bathroom: Which Is Better?
- Do You Tile the Floor or Walls First in a Bathroom?
- Tiling and Bathroom Trade News: Mid-June 2026
- Kitchen Tiling: Splashbacks, Walls and Floors Explained
- How to Tile a Kitchen Splashback: Step-by-Step Bromley Guide
- How to Tile Around Kitchen Sockets, Switches and Worktops
- Kitchen Splashback Tile Ideas: 12 Looks That Work
- Tiling and Bathroom Trade News: Late June 2026
- How to Lay Metro Tiles in a Herringbone Pattern
- Tiled vs Glass Splashback (and Acrylic): Which Is Best?
- How High Should a Kitchen Splashback Be Tiled? UK Heights Guide
- Tiling and Bathroom Trade News: Early July 2026
- Types of Tiles: The Complete UK Buyer’s Guide
- Porcelain vs Natural Stone Tiles: Which Should You Choose?
- Natural Stone Tiles Explained: Marble, Travertine, Slate and Limestone
- Tiling and Bathroom Trade News: Mid-July 2026
- Mosaic Tiles: Where to Use Them and How They’re Fixed
- Tile Slip Ratings Explained: R Ratings and PTV for UK Floors
- Matt vs Gloss Tiles: Which Finish Is Right for Your Room?
- Cost to Tile a Bathroom in the UK: 2026 Price Breakdown
- Polystyrene Ceiling Tiles: Are They Any Good?
- Cost to Tile a Kitchen in 2026: Floor and Splashback Prices
- Tiling and Bathroom Trade News: Mid-July 2026
- Tiling Cost Per Square Metre 2026: Labour and All-In Prices
- Tiler Day Rate UK: What Tilers Charge Per Day in 2026
- Cost to Regrout a Bathroom in 2026: UK Prices Explained
- Floor Tile Prices UK 2026: What You Will Pay Per Square Metre
- Is It Cheaper to Tile or Use Wall Panels? A UK Cost Comparison
- How to Tile: A Complete Beginner’s Guide (UK)
- How to Cut Tiles: Manual Cutter, Wet Saw and Nippers
- How to Cut Holes in Tiles for Pipes and Taps
- How to Grout Tiles (and Get Clean, Even Lines)
- Cork Flooring: Pros, Cons and Where It Works in UK Homes
- Tiling and Bathroom Trade News: Late July 2026
- How to Mix and Apply Tile Adhesive Correctly
- How to Set Out Tiles for a Perfect Layout
- How to Seal Grout and Tiles in a Bathroom (UK Guide)
- Can You Tile Over Tiles? When It Works and When It Doesn’t
- Tiling Tools List: What You Need for a Professional Finish
- How Much Tile Adhesive Do I Need? Coverage Per Square Metre
- Tiling Trade News: Topps App, Costs Up 6% (Aug 2026)
- Tile Problems: 9 Common Faults and How to Fix Each
- How to Fix Loose Tiles Without Removing Them
- Cracked Grout Repair: Why It Happens and How to Fix It
- Tiling Trade News: TTA Silica Warning, 2% Retentions
- How to Replace a Broken Tile Without Redoing the Wall
- Water Leaking Through Shower Tiles: 6 Causes and Fixes
- Remove Mouldy Silicone Sealant: A 24-Hour Reseal Job
- How to Clean Grout: What Works, and What Etches Stone
- Why Are My Floor Tiles Lifting? The 40m² Bay Rule
- Tiling Trade News: 3,841 Construction Firms Failed
- How to Lay Porcelain Paving: 1:80 Fall, 150mm Below DPC
- Tile Patterns: Why Big Tiles Need a One-Third Offset
- Grout Colour Ideas: How to Get the Shade You Chose
- Can You Paint Tiles? Yes on Walls, No in the Shower
- Decoupling Membrane for Tiles: When You Actually Need One
- Can You Tile Over a Wooden Floor? What Changed in 2024
- Tiling Cost 2026: £25 to £95 per m² Labour, UK Rates
- Tile Ideas: 7 Looks and the One Rule Each Needs
- Metro Tiles: Sizes, Bevels and the 1/3 Offset Rule
- Tile Feature Wall: The Weight Limit That Decides Yours
- Tiling Over Underfloor Heating: 14 Days Before Heat On
- How to Tile a Hallway Floor: Set Out From the Door
- Wood Effect Tiles and Marble Effect: 5 Specs to Check
- Tile Levelling Systems: The 3mm Rule That Decides It
- Tiling Trade News: Repair Work Up 1.7%, Headlam Fails
- Floor Levelling Compound: How Deep and How Long to Dry
- How to Find a Good Tiler: 9 Checks Before You Book
- Tiling Quote: The 10 Lines a Proper One Must Show
- Tile Trim: Sizes, Profiles and the One-Size-Up Rule
- Tile Spacers: 2mm or 3mm, and When to Pull Them Out
- Tiling the Fireplace: 125mm Hearths, Adhesive and Tiles
- Tiling Trade News: Shaws Sinks Reprice on 1 November
- Porcelain vs Stone Paving: Grip, Sealing and Upkeep
- Tiling a Large Floor: Movement Joints Every 10 Metres
- DIY Tiling vs Professional: 6 Jobs to Never Do Yourself
- Terracotta Tiles: Seal Before Grouting, Wait 7 Days
- Tile Drill Bits: Which Bit Won’t Crack Porcelain
- Tiling Corners With Trim: Which Profile, and When to Mitre
- Travertine Tiles: Filled or Unfilled, and How to Seal Them
- Slate Tiles: Calibrated or Riven, and How to Lay Them
- Zellige Tiles: Order 15% Extra and Fix Them Edge to Edge