


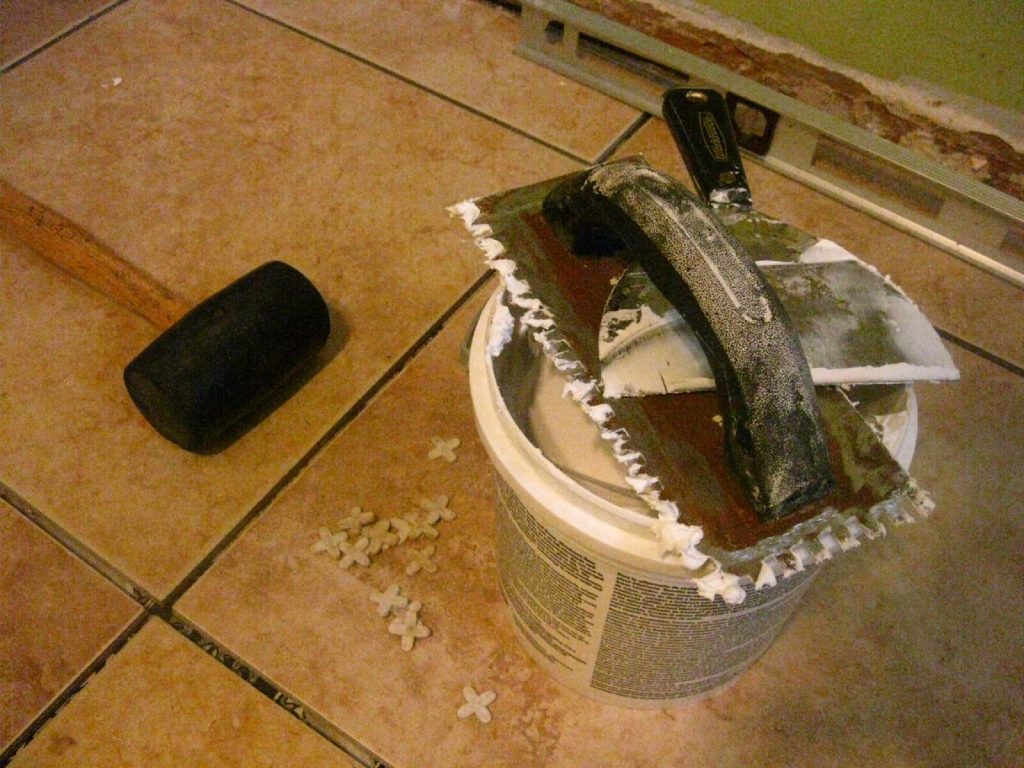
Floor levelling compound is the cheapest insurance you can buy before tiling a floor, and the step most people skip. Pour a bag of it over a dipped concrete slab and you turn a floor that would have fought you all day into one where the tiles drop flat and the grout lines run straight. Skip it, and you spend the job building up adhesive under one corner of every tile, which is exactly how hollow spots, lippage and cracked tiles start.
Here is what the product actually is, how flat a floor has to be before tiling, which type to buy for your depth and subfloor, and the real drying times taken from manufacturer data.
What floor levelling compound does, and what it does not
A levelling compound is a fine, pourable cement-based screed that flows out under its own weight to fill dips, ripples and trowel marks in a subfloor. It is mixed with water (or with a latex liquid in older two-part systems), poured, and helped along with a smoothing trowel. Most modern products set hard enough to walk on within one to three hours.
Two things it will not do. It will not level a floor that slopes: a compound seeks its own level across the area it can flow over, so on a sloping floor you either get a wedge several centimetres thick at one end or you dam the low side and build up in stages. Correcting a genuine slope is a screeding job.
It also will not fix a damp floor, and it is not a substitute for letting a new screed dry: see how long screed takes to dry before tiling. Every mainstream compound is specified for a subfloor at less than 75% relative humidity, tightening to 65% where timber is involved, and requires the slab to have a working damp proof membrane underneath. Pouring over a damp slab traps the moisture and moves the problem up into your adhesive.
How flat does a floor need to be before tiling?
There is a published answer. British Standard practice for internal floor tiling asks that when a 2 metre straightedge is laid on the base, the gap underneath between points of contact does not exceed 3mm. That is the number to test against, and it is the same tolerance as the SR1 class in BS 8204, the standard for screeds and in-situ floorings. SR2 allows 5mm and SR3 allows 10mm, and the Concrete Society’s summary of the straightedge method sets out how the test is done.
In practice: borrow or buy a 2m aluminium straightedge, lay it across the floor in several directions, and slide a tape or a coin under it. If you can get more than 3mm of daylight anywhere, the floor needs levelling before tiles go down. The bigger the tile, the less forgiving this gets. A 600mm x 600mm porcelain simply cannot bridge a dip without either rocking or sitting proud of its neighbour.
One caveat on the alternative people reach for. Tile levelling clips hold the faces of adjacent tiles in plane while the adhesive sets, and they earn their keep on large format tiles, but they do not make a floor flat. Using clips to disguise a 6mm dip means packing that dip with adhesive, and adhesive built far beyond its rated bed thickness shrinks and debonds.
Which compound for which depth
The single most common mistake is buying the wrong depth class. A standard smoothing compound rated at 2 to 10mm poured 25mm deep will crack. A deep-fill compound poured as a 2mm skim will not flow properly. Manufacturers publish the range on the bag and in the data sheet, and it varies far more than people expect.
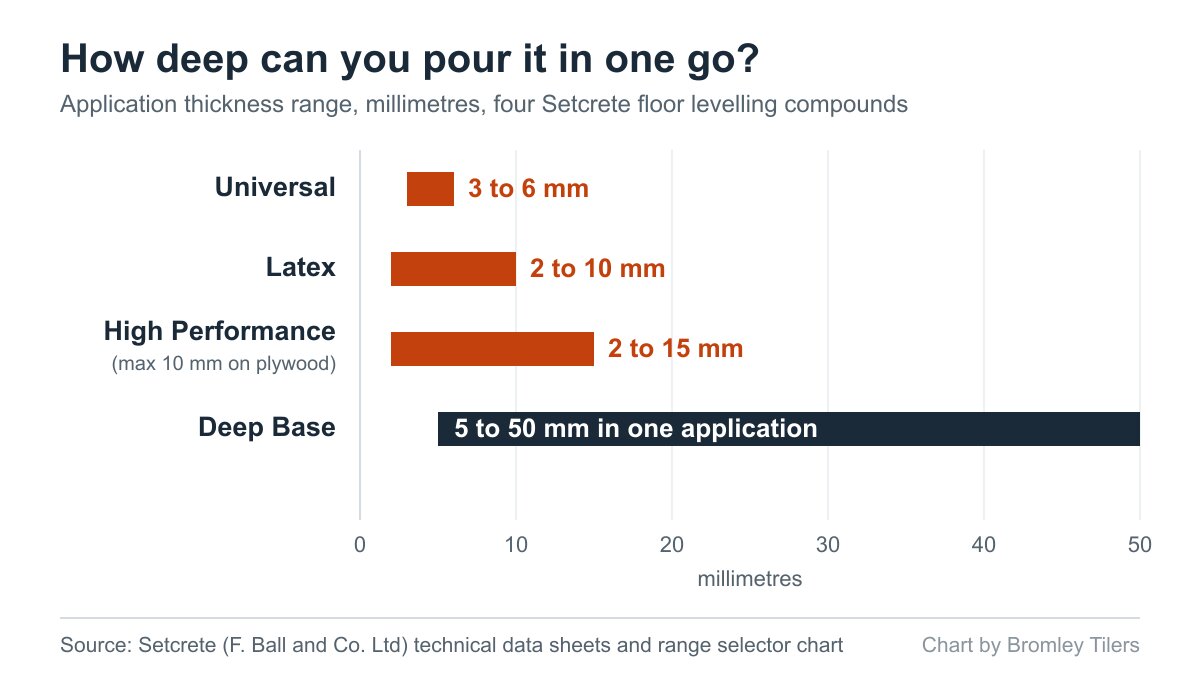
Taking one widely stocked UK range as an example, the published application thicknesses are: Universal 3 to 6mm, Latex 2 to 10mm, High Performance 2 to 15mm (dropping to a 10mm maximum over plywood), and Deep Base 5 to 50mm in a single application. Filled mixes, where clean sand or aggregate is added to the mix per the data sheet, extend some products further again.
So before you buy anything, measure the worst dip. That measurement, not the brand, decides the product.
Priming is the step that actually fails
Almost every failed pour traces back to priming. The primer stops an absorbent slab sucking water out of the compound before it cures, which is what leaves a powdery, friable surface, and it kills the pinholing caused by air escaping through wet compound. The dilution differs by substrate:
- Absorbent subfloors (concrete, sand and cement screed, anhydrite): acrylic primer diluted, typically one part primer to four parts water.
- Non-absorbent subfloors (existing ceramic or quarry tiles, terrazzo, epoxy and polyurethane resin, granolithic): the same primer used neat, to give the compound something to grip.
Let the primer dry fully before you pour. Then keep off it. Walking on a primed floor in dusty boots contaminates exactly the surface you just prepared.
Pouring it: the working time is shorter than you think
Working time at 20°C is around 15 to 20 minutes for a standard compound and 20 to 30 minutes for a deep-fill product. That is the whole window, and it includes mixing. Plan the job around it.
- Clear the room, vacuum it, and remove any laitance, paint, adhesive residue or surface treatment. Compound bonds to the slab, not to what sits on top of it.
- Seal doorways, pipe penetrations and any gaps at the skirting with foam or timber battens. Poured compound finds every hole.
- Prime, and let it dry.
- Mix strictly to the stated water volume, usually around 3.2 to 3.4 litres per 20kg bag, using a power whisk on a drill for at least two minutes. Do not add extra water to make it flow better. Extra water means shrinkage cracks and a weak surface.
- Start in the corner furthest from the door and pour in bands, working back. Move the material with a smoothing trowel rather than pushing it hard, then leave it alone.
- Never mix more than you can lay in about 20 minutes.
Keep the floor above 5°C throughout application and drying, and above 10°C for some latex products. A cold Bromley garage in January is not the place to rush this.
How long before you can tile on it?
Shorter than most people assume, if you have bought the right product. Published figures for one common UK range: a 2 to 10mm latex compound is walk-on hard in about 2 hours and ready for ceramic tiles from 8 hours, while a 5 to 50mm deep-fill compound walks in 90 minutes and takes ceramic tiles from 6 hours regardless of the depth poured.
Vinyl, LVT, rubber and lino are the slow ones: 24 hours at 2 to 5mm and 48 hours above that, because a resilient covering seals the surface and traps any residual moisture. Ceramic and porcelain are far more tolerant, which is why tiling is usually the quickest trade to follow a pour.
Always check the data sheet for the exact product you bought. The Setcrete Deep Base technical data sheet is a good example of the level of detail you should be reading before mixing.
Timber floors, underfloor heating and other awkward cases
Chipboard and floorboards. Do not pour straight onto them, and read up on tiling over a wooden floor before you commit. Boards move, and compound does not. Overboard with plywood fixed at close centres first, then use a compound rated for use over plywood and respect its reduced maximum depth, often 10mm rather than the 15mm allowed on concrete. Timber installations also want the subfloor below 65% relative humidity rather than 75%.
Underfloor heating. Switch it off for at least 48 hours before, during and after the pour. Bringing heat up under curing compound is a reliable way to crack it. Note too that not every deep-fill product is approved for encapsulating water-fed pipework even though it is fine over electric mats and heated screeds, so check that specific line in the data sheet.
Existing tiles. You can pour over sound, well-bonded ceramic or quarry tiles. Bang every tile with a knuckle first, lift anything that sounds hollow, degrease the surface, and prime with neat primer.
Anhydrite and calcium sulphate screeds. These need the surface laitance mechanically removed and an appropriate primer, and they are not compatible with every cement-based product. Worth a call to the manufacturer’s technical line before you buy.
What goes wrong
- Powdery, dusty surface: unprimed absorbent slab, or too much water in the mix.
- Pinholes across the surface: air escaping through an unprimed or poorly primed base.
- Shrinkage cracks: poured beyond the rated depth, over-watered, or dried too fast in direct sun or with heating on.
- Compound curling at the edges: usually a thin pour drying unevenly, or no expansion allowance at perimeters on a large floor.
- Still not flat: a genuine slope was treated as a dip. Dam and build in stages, or screed it.
A 20kg bag covers roughly 2.3 square metres at 5mm or 1.15 square metres at 10mm, so buy by area and depth and add a bag. Running out mid-pour is the one mistake you cannot recover from, because the cold joint will telegraph through.
Frequently asked questions
Can I use floor levelling compound under floor tiles?
Yes, and it is one of its main uses. Ceramic and porcelain tiles can usually go down from 6 to 8 hours after pouring, depending on the product. Make sure the compound you buy is rated for the depth you need and for the subfloor you are pouring over.
How thick can floor levelling compound be?
It depends entirely on the product. Standard smoothing compounds run from around 2mm to 10mm or 15mm. Deep-fill compounds go from 5mm to 50mm in one application, and some can be filled with sand to go deeper. Exceeding the stated maximum is the most common cause of cracking.
Do I have to prime before using levelling compound?
In almost every case, yes. Manufacturers specify diluted acrylic primer on absorbent surfaces such as concrete and screed, and neat primer on non-absorbent surfaces such as existing tiles. Skipping it risks a weak, dusty surface and pinholing.
Can you pour levelling compound over floorboards?
Not directly. Overboard with plywood first, fixed at close centres so it cannot flex, then use a product approved for timber and stay within its reduced maximum thickness, commonly 10mm.
How flat does a floor need to be for large format tiles?
Aim for no more than a 3mm gap under a 2m straightedge, which matches British Standard practice for internal floor tiling and the SR1 surface regularity class. The larger the tile, the more visible any deviation becomes.
If you are planning a tiled floor in Bromley or south east London and the subfloor is not flat, it is worth getting the preparation looked at before the tiles arrive. Bromley Tilers can assess the substrate, specify the right compound and depth, and tile onto it once it has cured.
Related guides
- Tile Levelling Systems: The 3mm Rule That Decides It
- Can You Tile Over a Wooden Floor? What Changed in 2024
- Why Are My Floor Tiles Lifting? The 40m² Bay Rule
- Tiling Over Underfloor Heating: 14 Days Before Heat On
- Can You Tile Over Tiles? When It Works and When It Doesn’t
- How to Tile a Bathroom Floor (Including Around the Toilet)
- How to Tile a Hallway Floor: Set Out From the Door